Manage users and their permissions
As an account admin, you create users and manage their permissions according to the specific needs and roles of your team members.
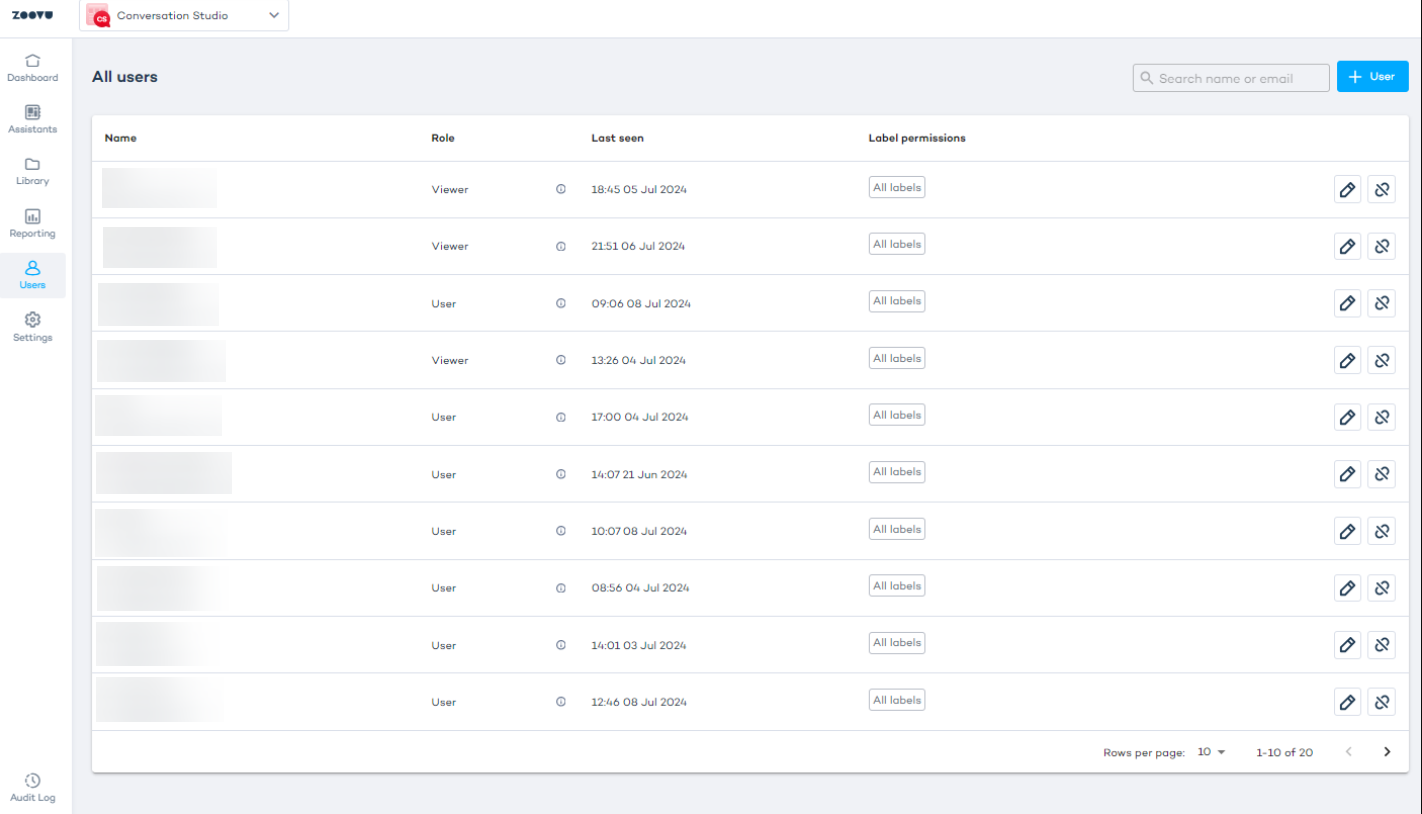
To access the user panel, log in to Conversation Studio and navigate to the "Users" tab. From here, you can view basic user details, add new users, define their permissions, edit user details, and unlink users from the account.
Create, edit, and remove users
Add a new user
To add a new user:
- Click the "+ User" button at the top right corner.
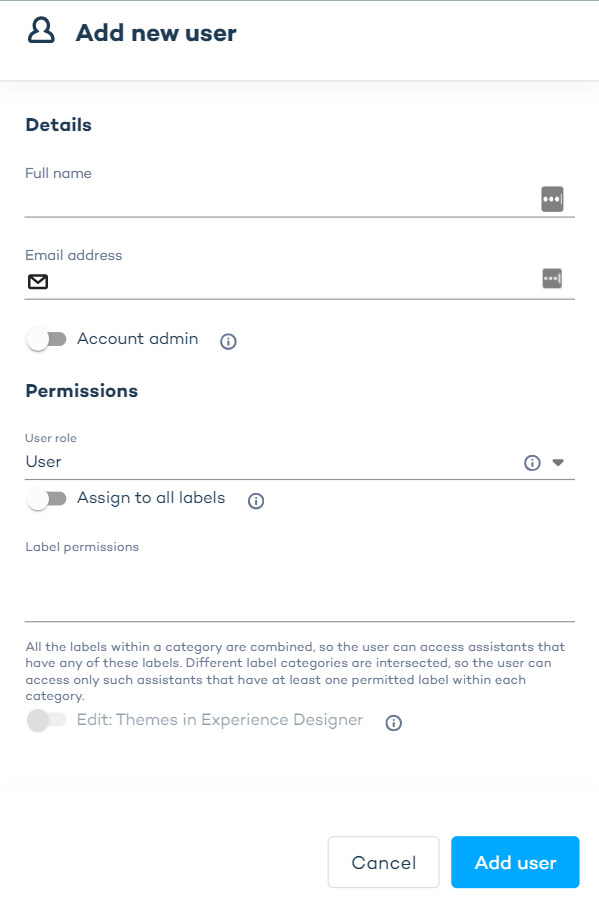
- Define the user's name and email address.
- Specify the permissions: select whether they should have admin rights and define their role.
User roles
- Account admin: Account admins can add new users, define their permissions, assign labels, create label lists, provide edit access to Experience Designer Themes, and unlink users from accounts. Any team member can be made an Account admin by toggling the "Account admin" option.
- User: Can perform most actions except approvals. Viewer: Can preview and view experiences (Digital Assistants and/or Visual Configurators) but cannot create, edit, or approve.
- Writer: Can edit and create experiences but cannot publish changes without approval. Multiple Writers are allowed for each account.
- Approver: Can approve new or edited experiences and request updates; receives the request via email and reviews the draft (This role is optional. If no approver is assigned, all users have full publish permissions.)
- Assign a label to determine which experiences the user can manage. For example, assign the "US" labeled assistants to your US team members.
- Decide whether the user can edit themes in Experience Designer.
- Click the "Add user" button.
Edit access for Experience Designer themes
Only account admins can grant edit access to Experience Designer themes. This access can only be granted to users assigned to all labels.Without this permission, users can only view themes in read-only mode.
Edit a user's permissions
To edit an existing user:
- Navigate to the Users tab.
- Click the "Edit user" icon next to their name.
Note:You can change a user's permissions but not their name or email address.
Changes to roles and permissions can take up to one hour to take effect. To apply them immediately, log out and log back in.
Remove a user
To remove a user, click the "Unlink" icon on the Users dashboard.

Once removed, the user can only be added back to that account by the Zoovu Support Team. Reach out via the Zoovu Support Portal.
Example workflow
- The first user assigns roles (approver and writer) within the account.
- If an approver is assigned, all other users become writers.
- The writer creates a Digital Assistant and clicks "Publish."
- A pop-up appears informing the writer to request approval.
- The writer sends the approval request.
- The Digital Assistant is frozen, and the status changes to "pending approval."
- The approver receives an email and can:
- Approve the request: this unfreezes the assistant, allowing the writer to publish it.
- Reject the request: the approver sends feedback, and the assistant remains frozen.
- Edit the assistant: the approver can make changes and publish the assistant.
- If the request is approved, the writer logs in and publishes the draft. any further changes will require a new approval request.
- If the request is rejected, the writer reworks the assistant and resubmits it for approval.