SAP Commerce (Hybris) setup for Zoovu integration
Zoovu Data Pipelines allow you to aggregate data from SAP Commerce (Hybris) to power Zoovu experiences such as Search, Zoe, and Visual Configurators.
This guide will help you set up SAP Commerce (Hybris) for Zoovu integration step by step.
Prerequisites
To use Zoovu Data Pipelines, you need a running SAP Commerce (Hybris) instance. Additional systems like SAP S/4HANA* can be connected, but this guide focuses on setting up SAP Commerce (Hybris).
For best performance, we recommend using the OData API of SAP Commerce. By providing well defined Integration Objects coupled with Virtual Attributes, it guarantees that only the data required for Zoovu experiences is pulled from the system.
Required extensions
To create an Integration Object in SAP Commerce, make sure the required extensions are installed.
- Check your
localextensions.xmlfile located at:
<your_installation_path>/hybris/config/localextensions.xml
- See if the following extensions are installed:
<extension name="integrationservices"/>
<extension name="integrationbackoffice"/>
<extension name="odata2webservices"/>
<extension name="outboundservices"/>
- If any of these extensions are missing, add them to
localextensions.xmland restart your SAP Commerce server:
cd <your_installation_path>/hybris/bin/platform

ant clean all
Step 1: Create an Integration Object
An Integration Object defines which data is extracted from SAP Commerce and made available in Zoovu Data Pipelines.
Steps to create an integration object:
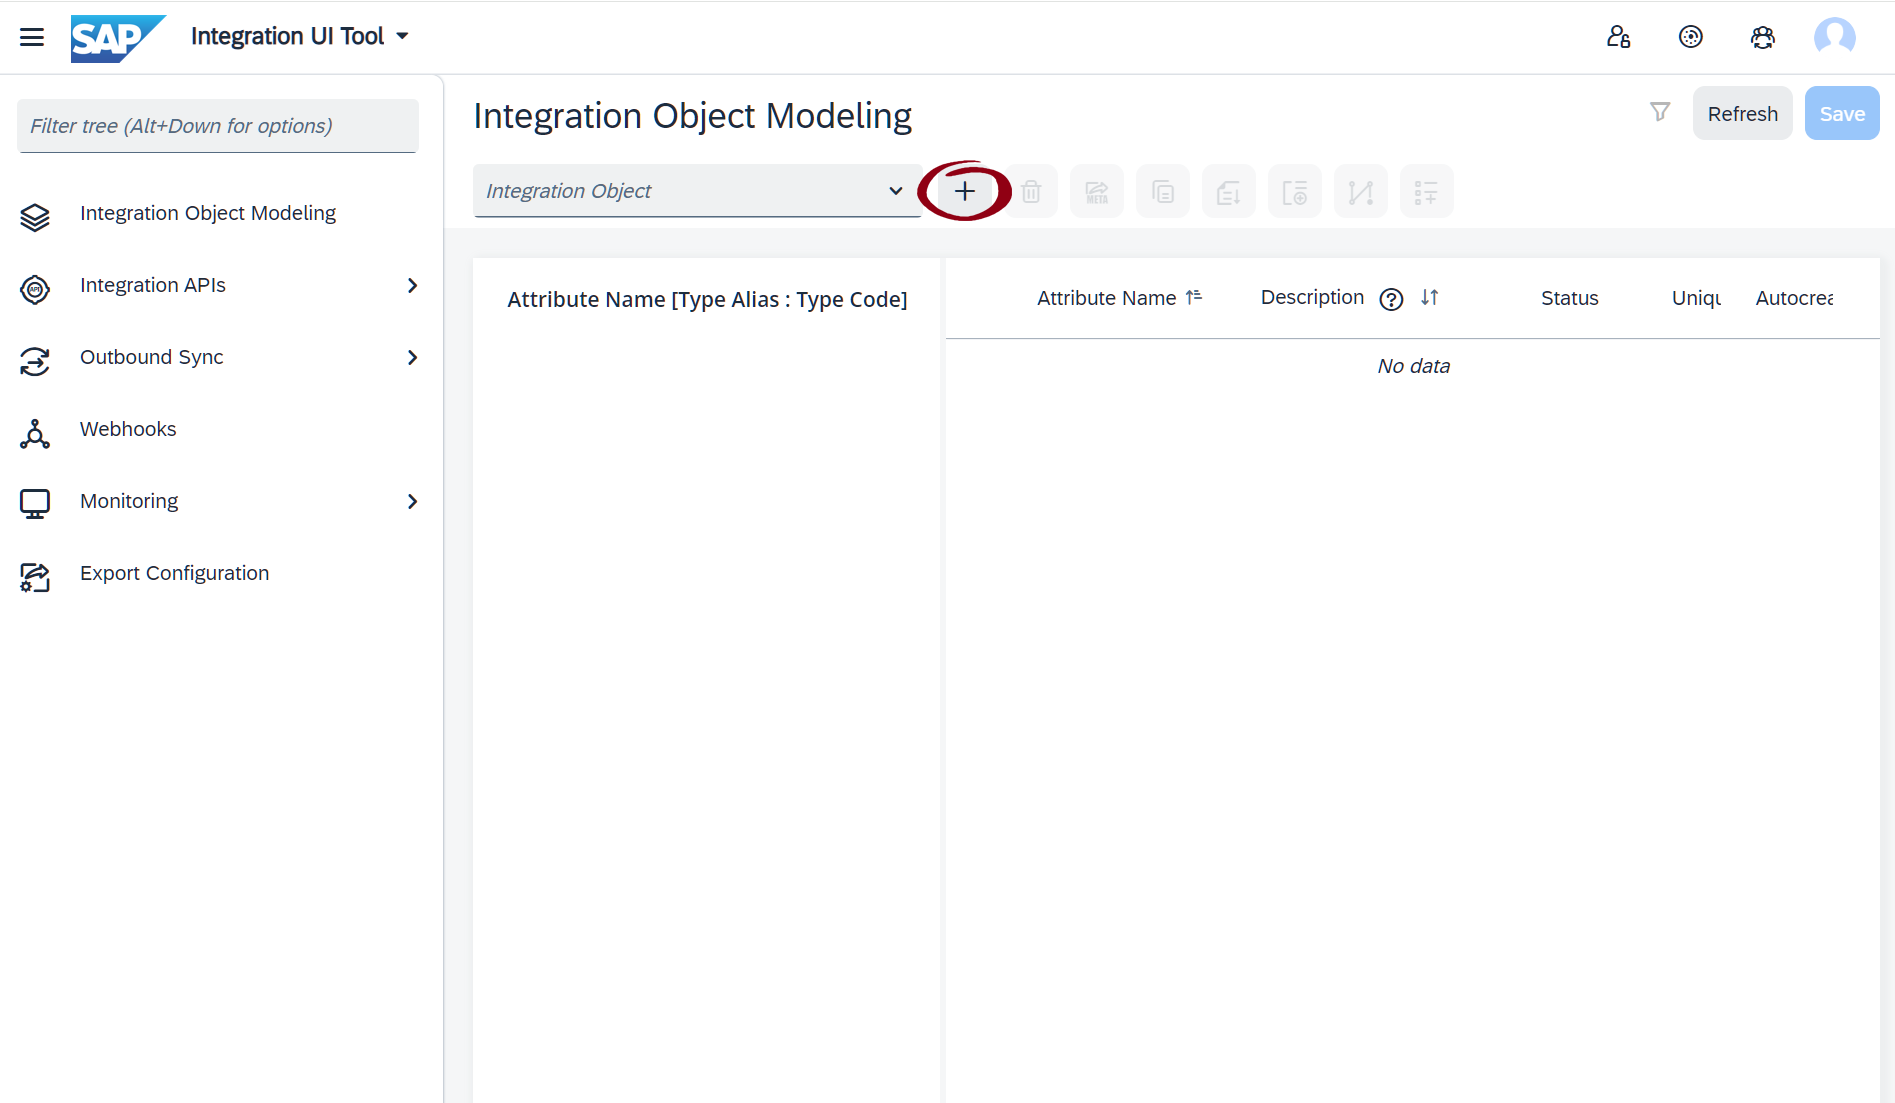
- Open SAP Commerce Backoffice.
- Navigate to Integration UI Tool > Integration Object Modeling.
- Click the "+" button to create a new Integration Object.
The following fields need to be filled out:
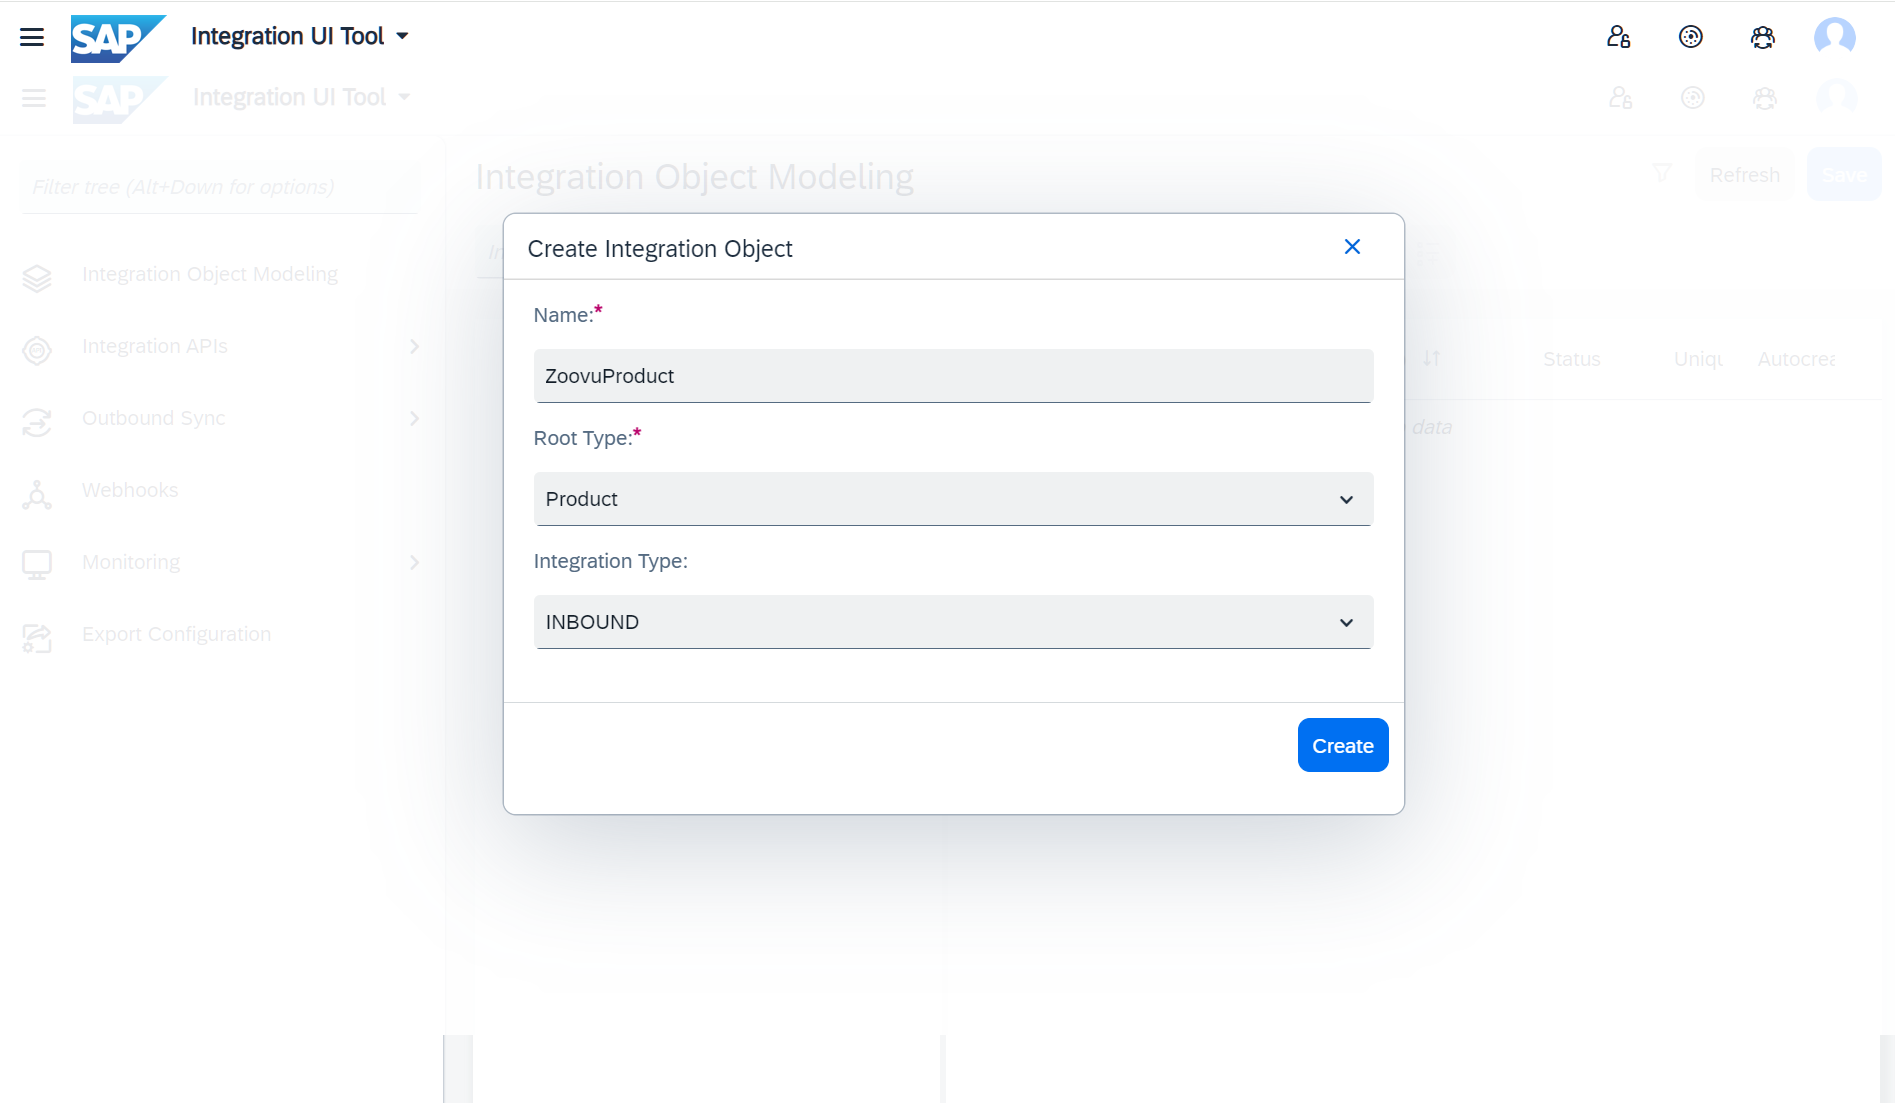
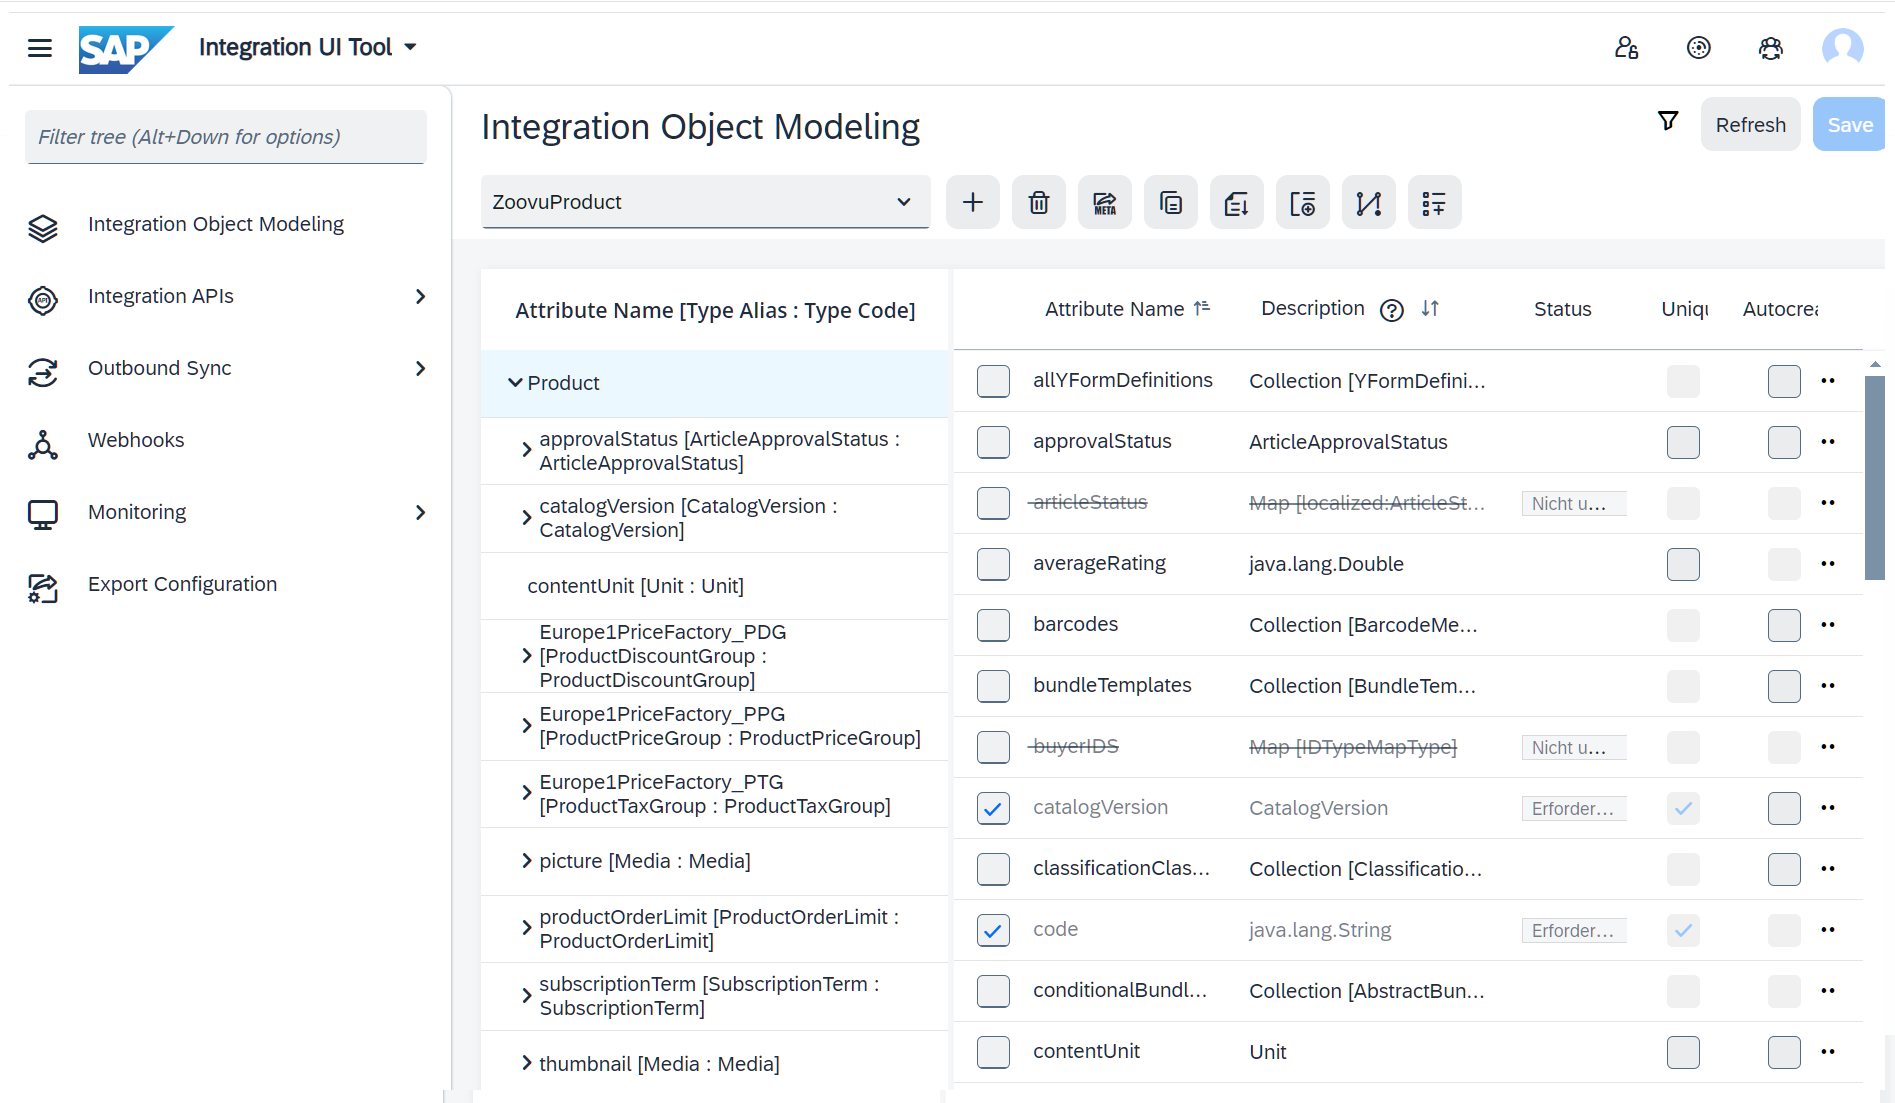
In Integration Object Modelling, enable the following attributes (some, like code, might already be enabled):
1. Product → catalogVersion → rootCategories
- categories
- name
- code
2. Product → classificationClasses
- code
- name
- allClassificationAttributeAssignments
- classificationAttribute
- defaultAttributeValues
- name
- code
- name
- defaultAttributeValues
- attributeType
- unit
- name
- symbol
- unitType
- modifiedtime
- multiValued
- mandatory
- range
- classificationAttribute
- allSubcategories
3. Product → supercategories
Step 2: Define virtual attributes
Virtual attributes are based on custom scripts and allow you to provide arbitrary content (based on the available attributes of an integration object).
Steps to create virtual attributes:
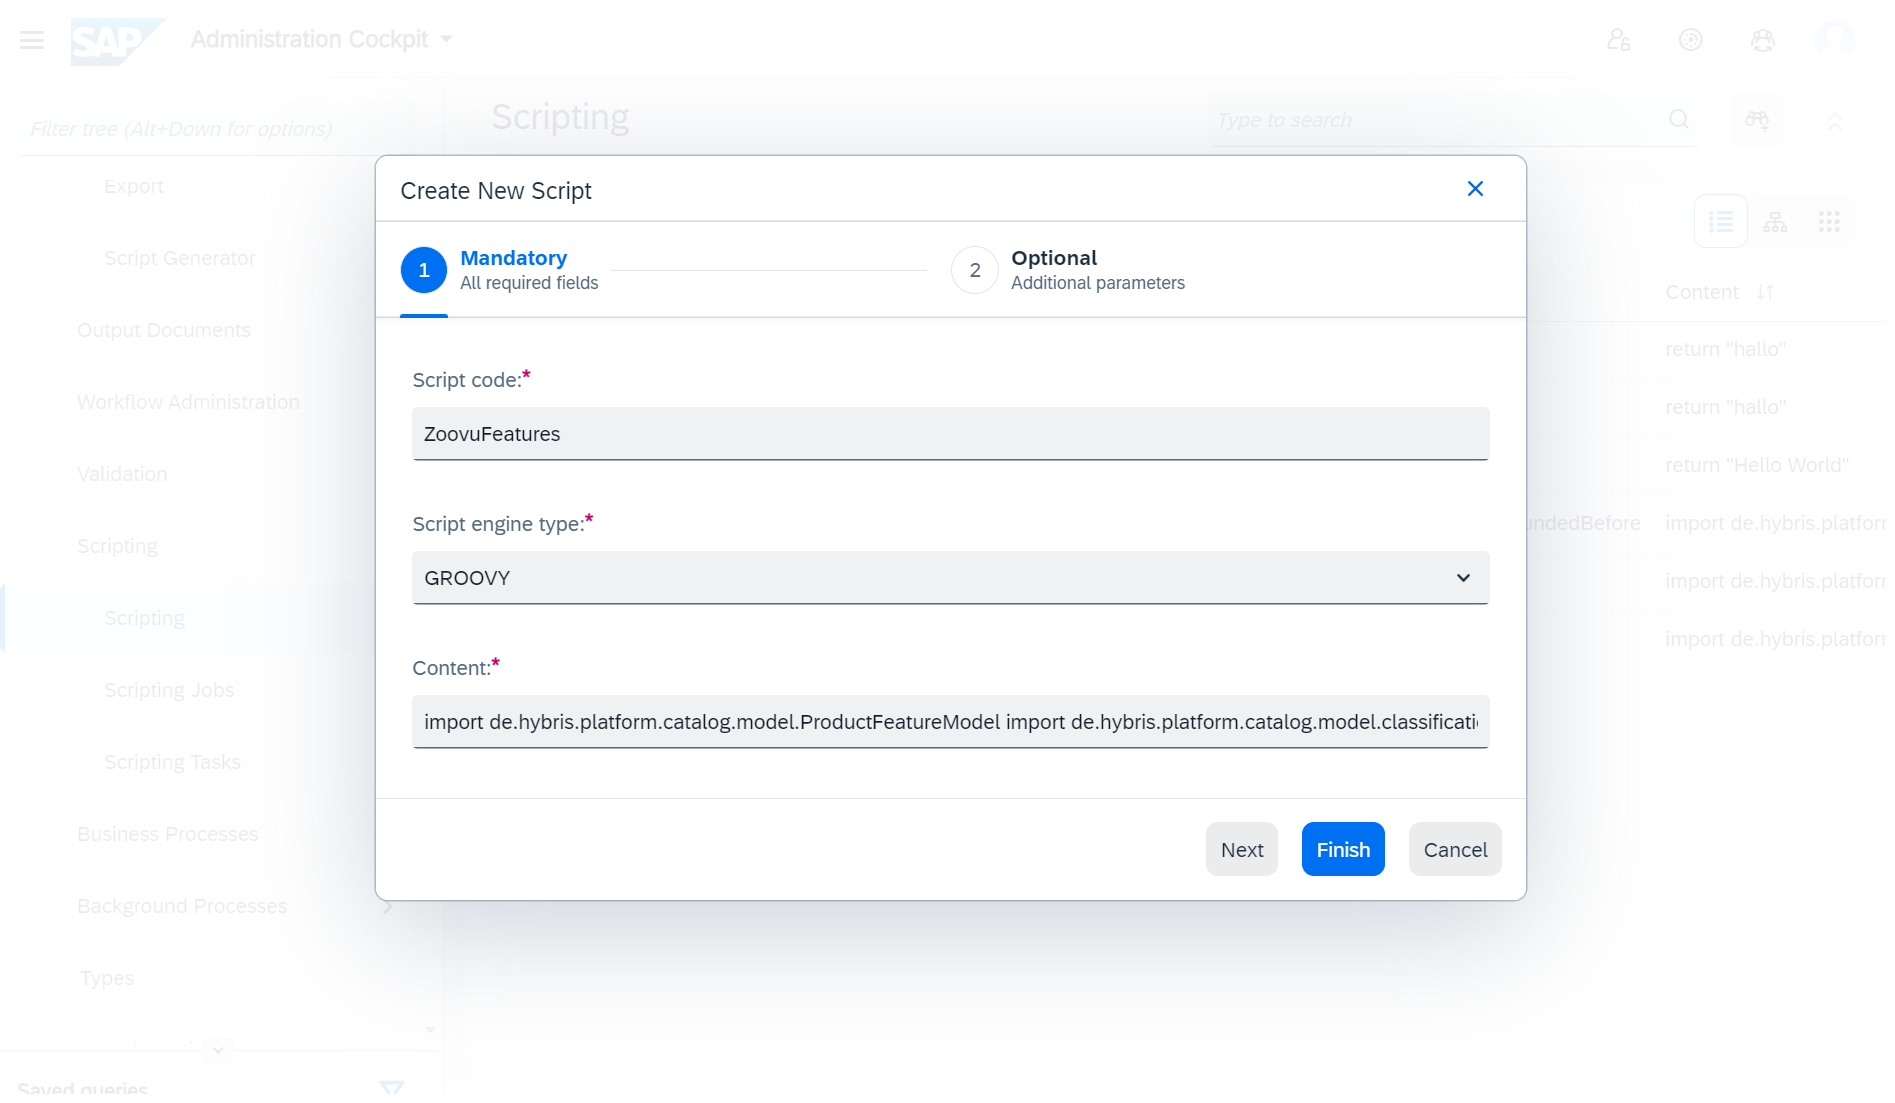
- Navigate to Administration Cockpit > Scripting > Scripting.
- Click the "+" button to create a new script.
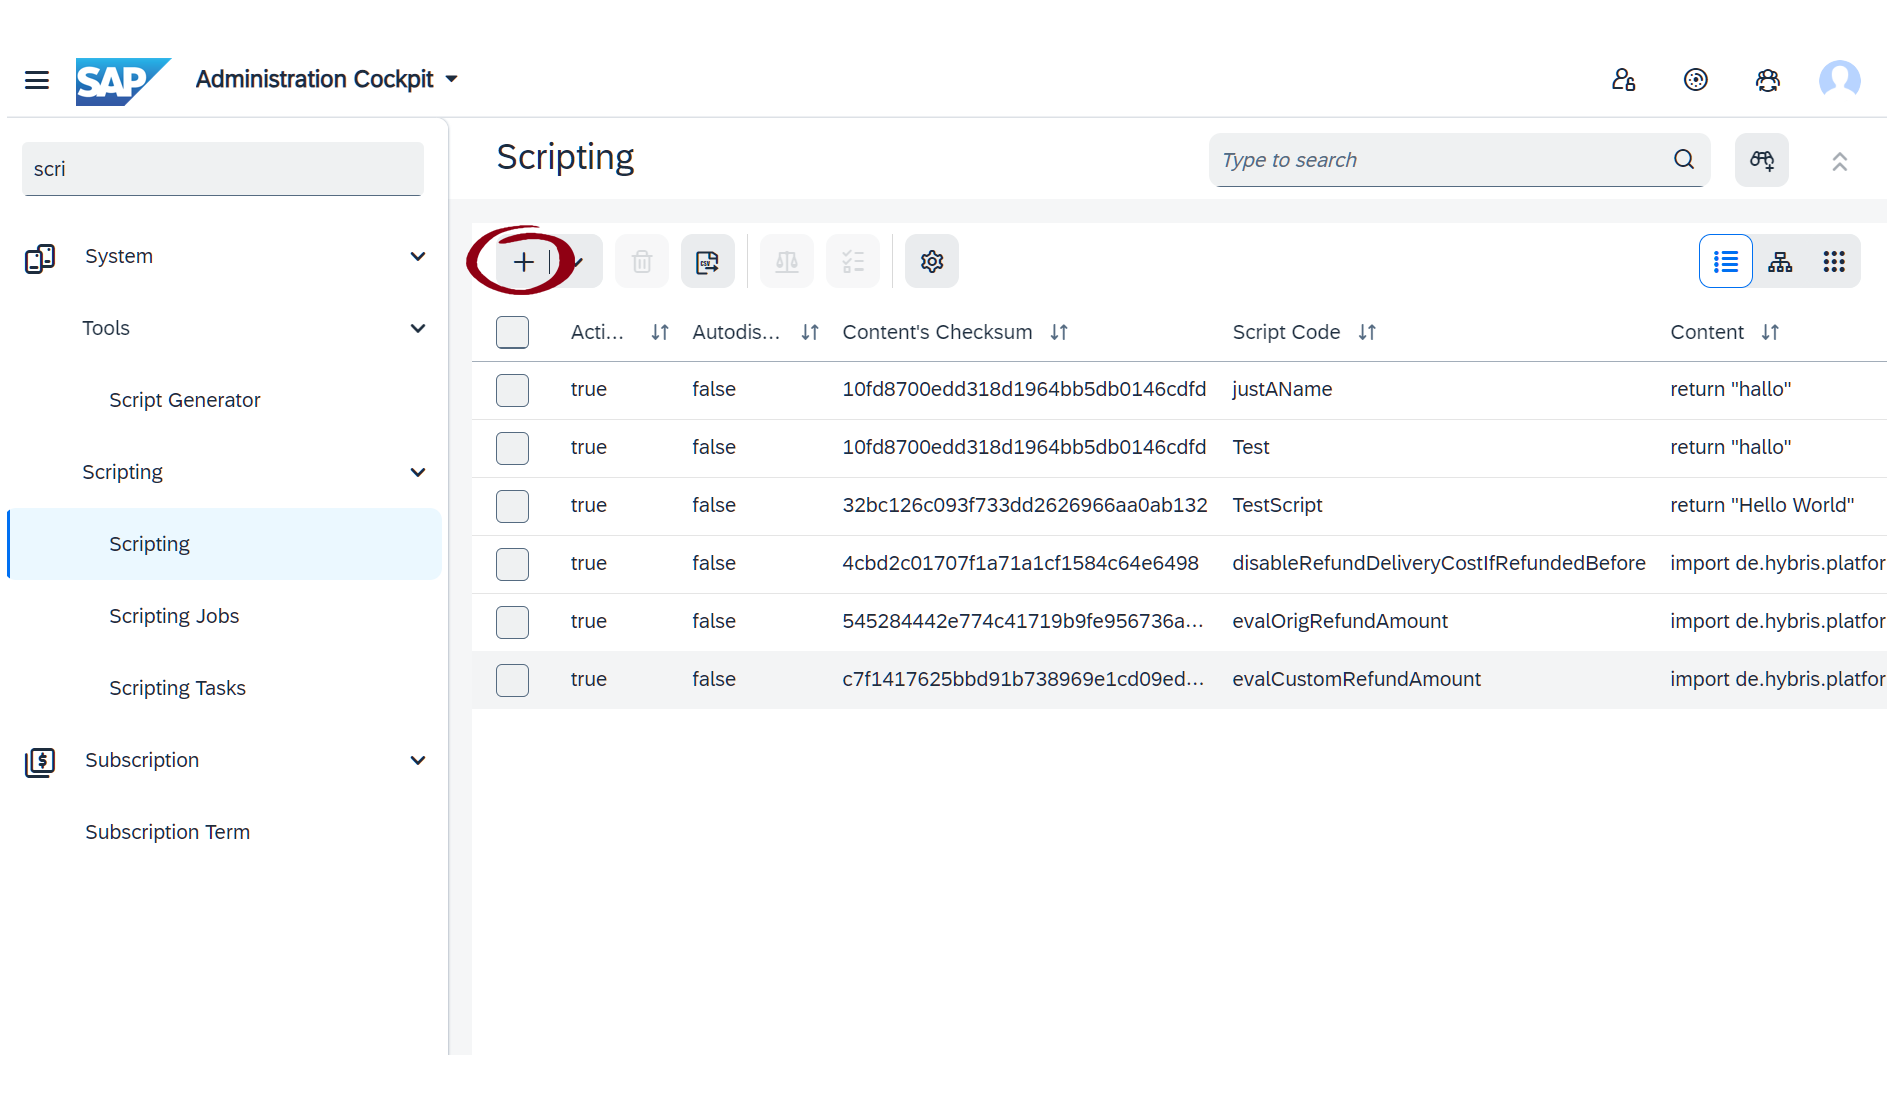
Recommended virtual attribute scripts for Zoovu integration:
- ZoovuFeatures
import de.hybris.platform.catalog.model.ProductFeatureModel
import de.hybris.platform.catalog.model.classification.ClassificationAttributeValueModel

try {
    return "[" << itemModel.features?.collect {
        "{" << "\"value\": \"" <<
                featureValue(it) << "\", " << "\"unit\": \"" << escape(featureUnitName(it))
                << "\", " << "\"code\": \"" << escape(featureCode(it)) << "\", " <<
                "\"lang\": \"" << featureLanguage(it) << "\"}";
    }?.join(',') << "]";
} catch (e) {
    return e.toString();
};

def featureValue(feature) {
    if (((ProductFeatureModel) feature).value instanceof
            ClassificationAttributeValueModel) {
        def productFeature = (ProductFeatureModel) feature;
        def classificationAttribute = (ClassificationAttributeValueModel)
        productFeature.value;
        if (productFeature.language == null) {
            return escape(classificationAttribute.name);
        } else {
            def fallbackLanguages =
                    productFeature.language.fallbackLanguages;
            def defaultLocale =
                    java.util.Locale.forLanguageTag(feature.language.isocode);
            def defaultValue =
                    classificationAttribute.getName(defaultLocale);
            if (defaultValue == null && !fallbackLanguages.isEmpty()) {
                def fallbackLocale =
                        java.util.Locale.forLanguageTag(fallbackLanguages[0].isocode);
                return
                escape(classificationAttribute.getName(fallbackLocale));
            }; return escape(defaultValue);
        }
    } else {
        return escape(((ProductFeatureModel) feature)?.value);
    }
};

def featureLanguage(feature) {
    if (feature.language != null) {
        return java.util.Locale.forLanguageTag(feature.language.isocode);
    } else return null;
};

def featureCode(feature) {
    return
    feature.classificationAttributeAssignment?.classificationAttribute?.code;
};

def featureUnitName(feature) { return feature.unit?.name; };

def escape(value) {
    try {
        return groovy.json.StringEscapeUtils.escapeJava(value?.toString());
    } catch (e) {
        return e.toString();
    }
};
- ZoovuProductPrices
import de.hybris.platform.europe1.model.PriceRowModel;
import groovy.json.JsonGenerator

class Price {
    String price;
    Date startTime;
    Date endTime;
    String currency;
    String unit;
    Date modifiedtime;
}

;

try {
    return new JsonGenerator.Options().excludeNulls().dateFormat("yyyy-MMdd'T'HH:mm:ssXX").build().toJson(itemModel.europe1Prices?.collect {
        def price
                = (PriceRowModel) it;
        new Price(price: price.price, startTime: price.startTime, endTime:
                price.endTime, currency: price.currency?.isocode, unit: price.unit?.code,
                modifiedtime: price.modifiedtime);
    })
} catch (e) {
    return e.toString();
};
- ZoovuPdpUrl
try {
    def urlResolver = spring.getBean("defaultProductModelUrlResolver")
    String pdpUrl = urlResolver.resolveInternal(itemModel);
    return pdpUrl;
} catch (e) {
    return e.toString();
}
In the script creation modal define the script code (ZoovuFeatures | ZoovuProductPrices | ZoovuPdpUrl) and paste the corresponding script.
After creating the scripts, go back to Integration UI Tool > Integration Object Modelling and add a Virtual Attribute for each script.
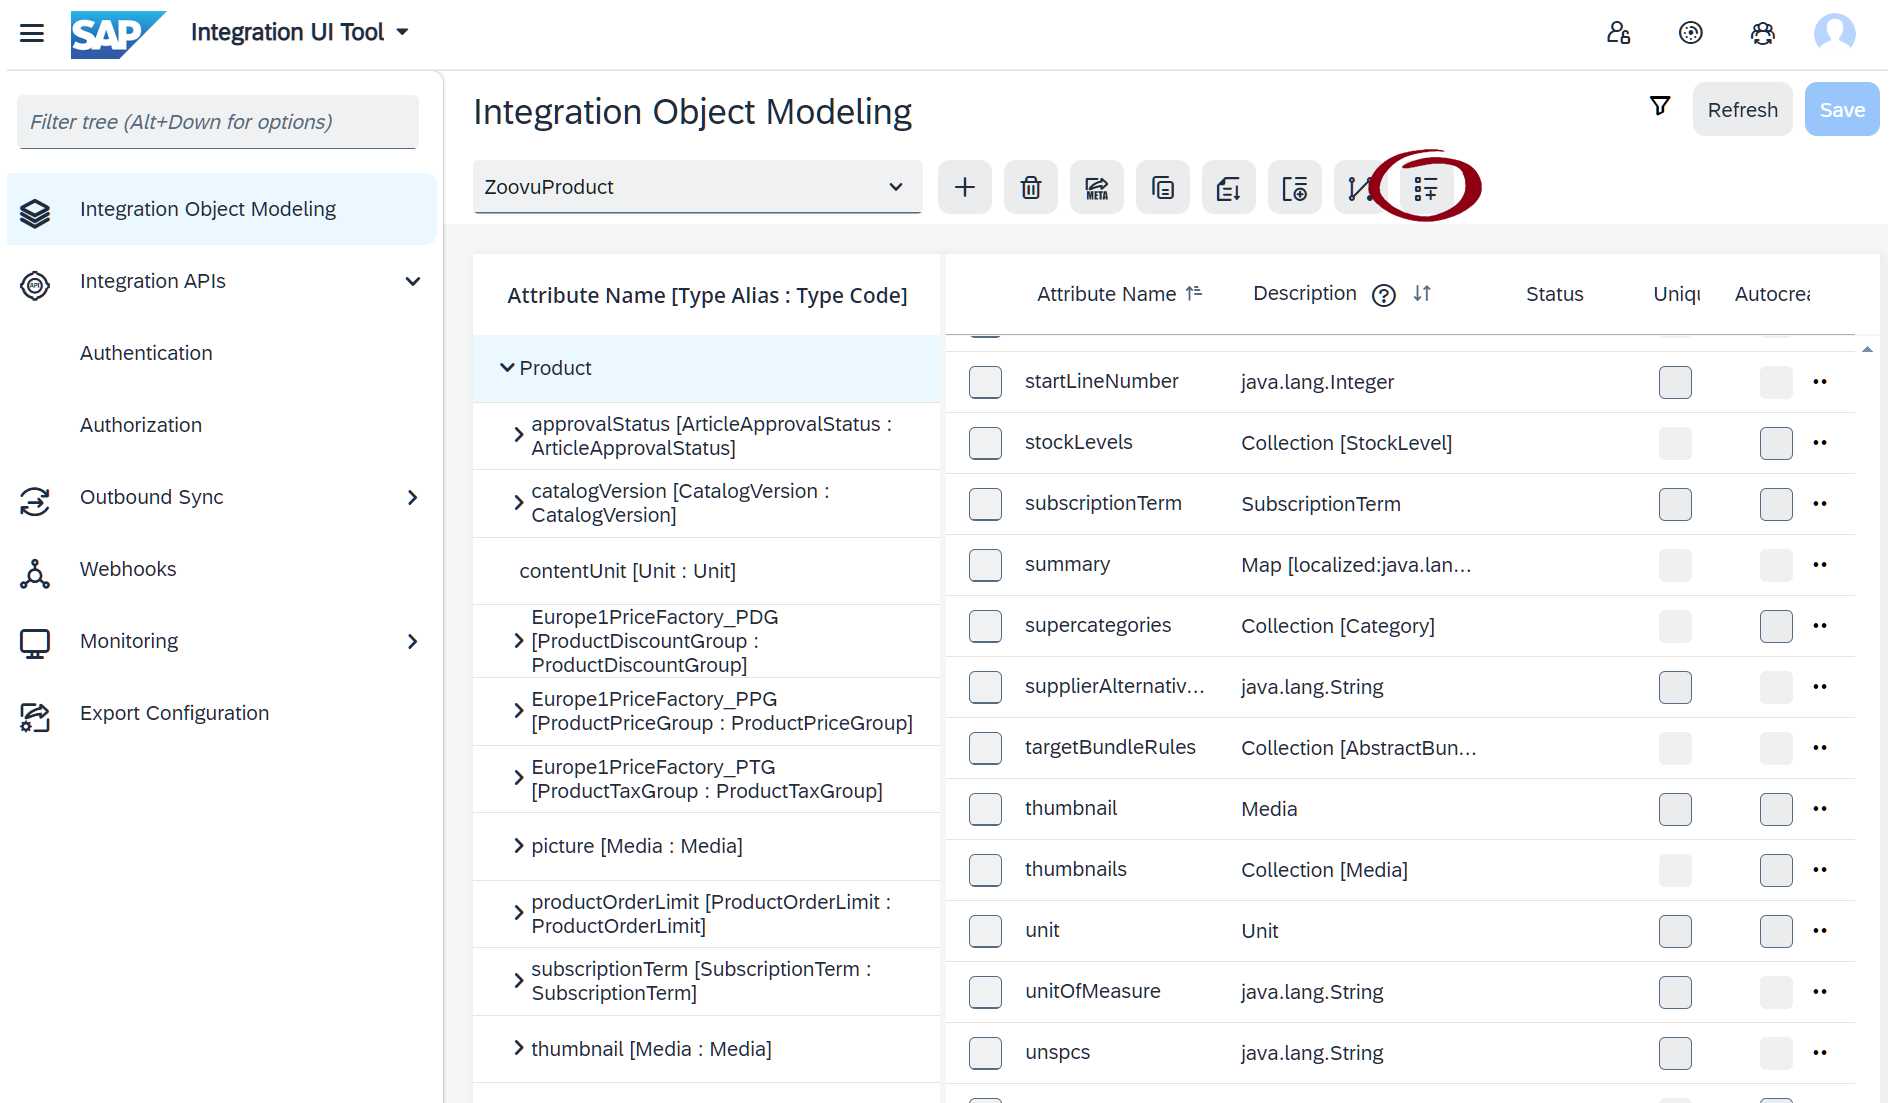
In the Virtual Attribute Modal fill out the mandatory fields:
1. Select a Virtual Attribute Descriptor
- Description: Select an existing virtual attribute descriptor from the dropdown.
- Purpose: Defines the virtual attribute that will be linked to the integration object.
2. Virtual Attribute Descriptor Code
- Description: A unique identifier for the virtual attribute.
- Purpose: Used internally to reference the virtual attribute.
- Requirement: Must be unique within the integration object.
3. Script Location
- Description: The location of the script that will handle the virtual attribute's logic.
- Purpose: Allows custom logic to be executed when fetching data.
- Example:
model://ZoovuFeatures - Requirement: Must be a valid script path.
4. Virtual Attribute Descriptor Type (Optional)
- Description: Defines the data type of the virtual attribute.
- Purpose: Ensures data consistency and type safety.
- Examples:
java.lang.Stringjava.lang.Integerjava.util.Datede.hybris.platform.core.model.product.ProductModel
5. Virtual Attribute Alias (Optional)
- Description: Alternative name for the virtual attribute.
- Purpose: Can be used in external integrations instead of the default descriptor code.
Step 3: Set up authentication
The next step is to define the authentication method for the OData API to allow Zoovu to access SAP Commerce.
You can use Basic Authentication or OAuth2.0. For either case, start by creating a new User and assign the needed permissions to that user.
Create new user
- Go to Administration Cockpit → Users → Employees.
- Click the "+" button to create a new user.
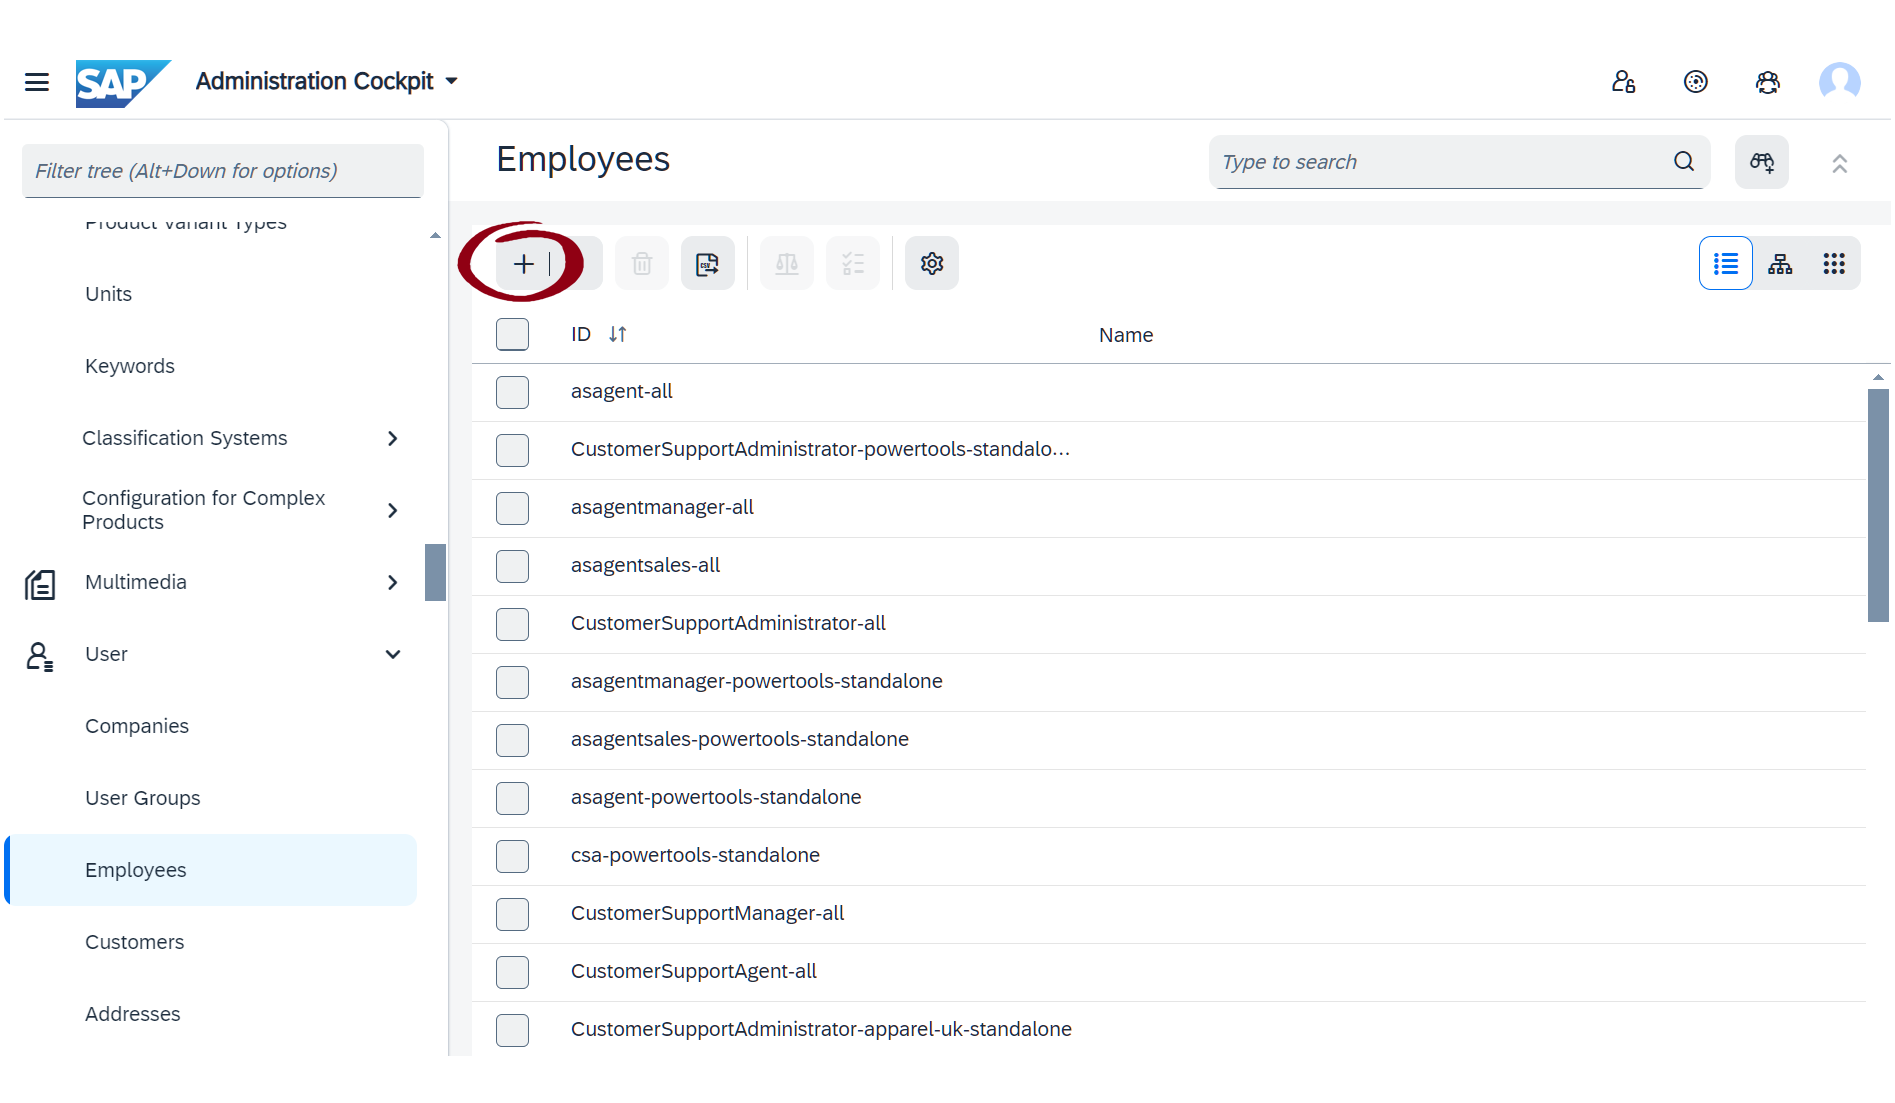
- Assign the following roles:
integrationservicegroupintegrationviewgroupintegrationusergroupproductmanagergroup
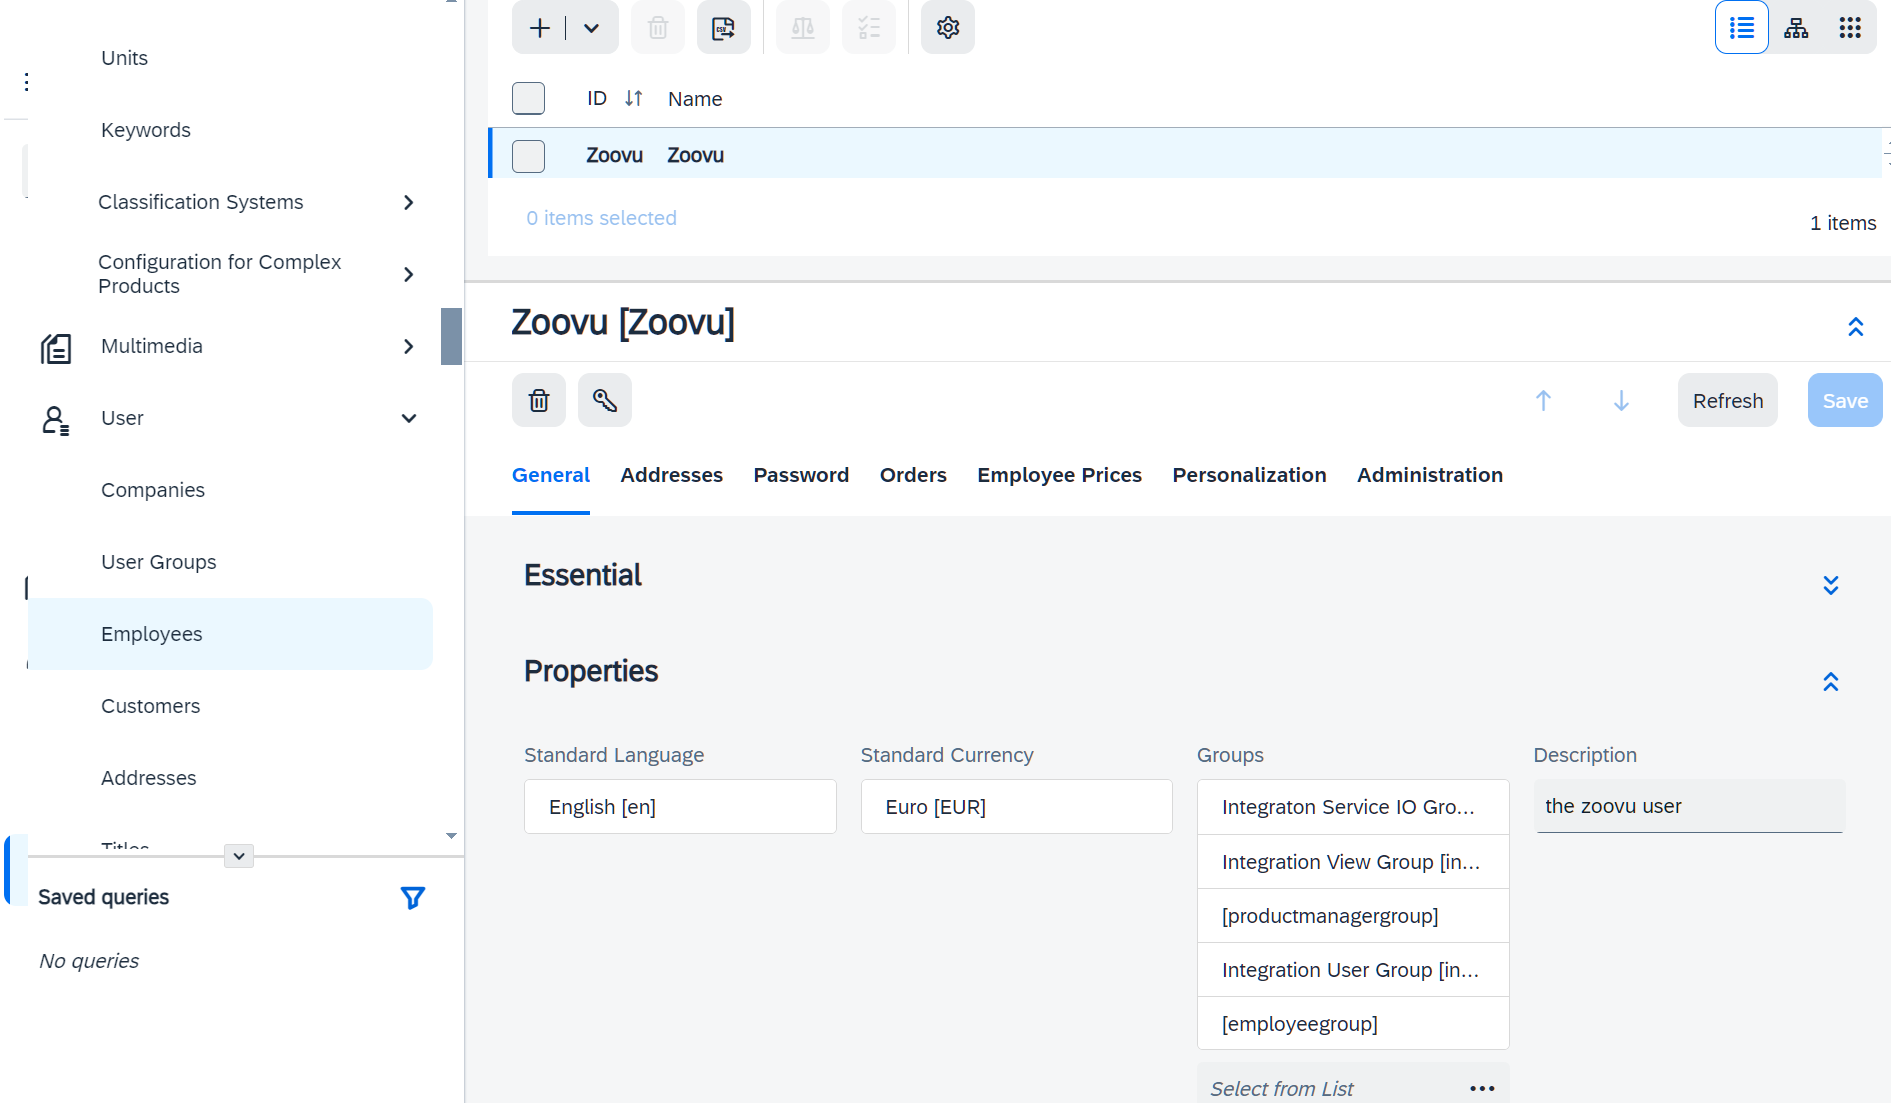
Important: The productmanagergroup has a lot of permissions. Make sure that the user has only the permissions needed for the Zoovu Integration.
- Go to the Password tab, set a password and save the user.
Set up OAuth or Basic Authentication
We recommend to setup OAuth2.0 for the OData API. This is a more secure way to authenticate against the API.
Benefits of OAuth over Basic Authentication
| Feature | OAuth | Basic Authentication |
|---|---|---|
| Security | ✅ More secure (tokens instead of credentials) | ❌ Sends username & password in every request |
| Token Expiry | ✅ Tokens have an expiration time (reduces risk) | ❌ Credentials are valid indefinitely (higher risk) |
| Granular Access Control | ✅ Fine-grained permissions via scopes | ❌ All-or-nothing access (full user permissions) |
| Scalability | ✅ Supports multiple clients with different access levels | ❌ Requires a user for each integration |
| Revocability | ✅ Can revoke specific OAuth tokens without disabling a user | ❌ Requires password change to revoke access |
| Audit & Monitoring | ✅ Track API usage per OAuth client | ❌ Harder to track individual API calls |
Option 1: Set up OAuth2.0
- Go to
Integration UI Tool → Integration APIs → Authentication. - Click the plus button to create a new Inbound Channel Configuration.
- Select your Integration Object (
ZoovuProduct) and chooseOAuth2.0as the authentication method and clickNext. - In the next step, choose a
OAuth Client Idand assign the userZoovuto the client. - Set a password and click
Save.
Option 2: Set up basic authentication
- Go to Integration UI Tool → Integration APIs > Authentication.
- Click the "+" button to create a new Inbound Channel Configuration.
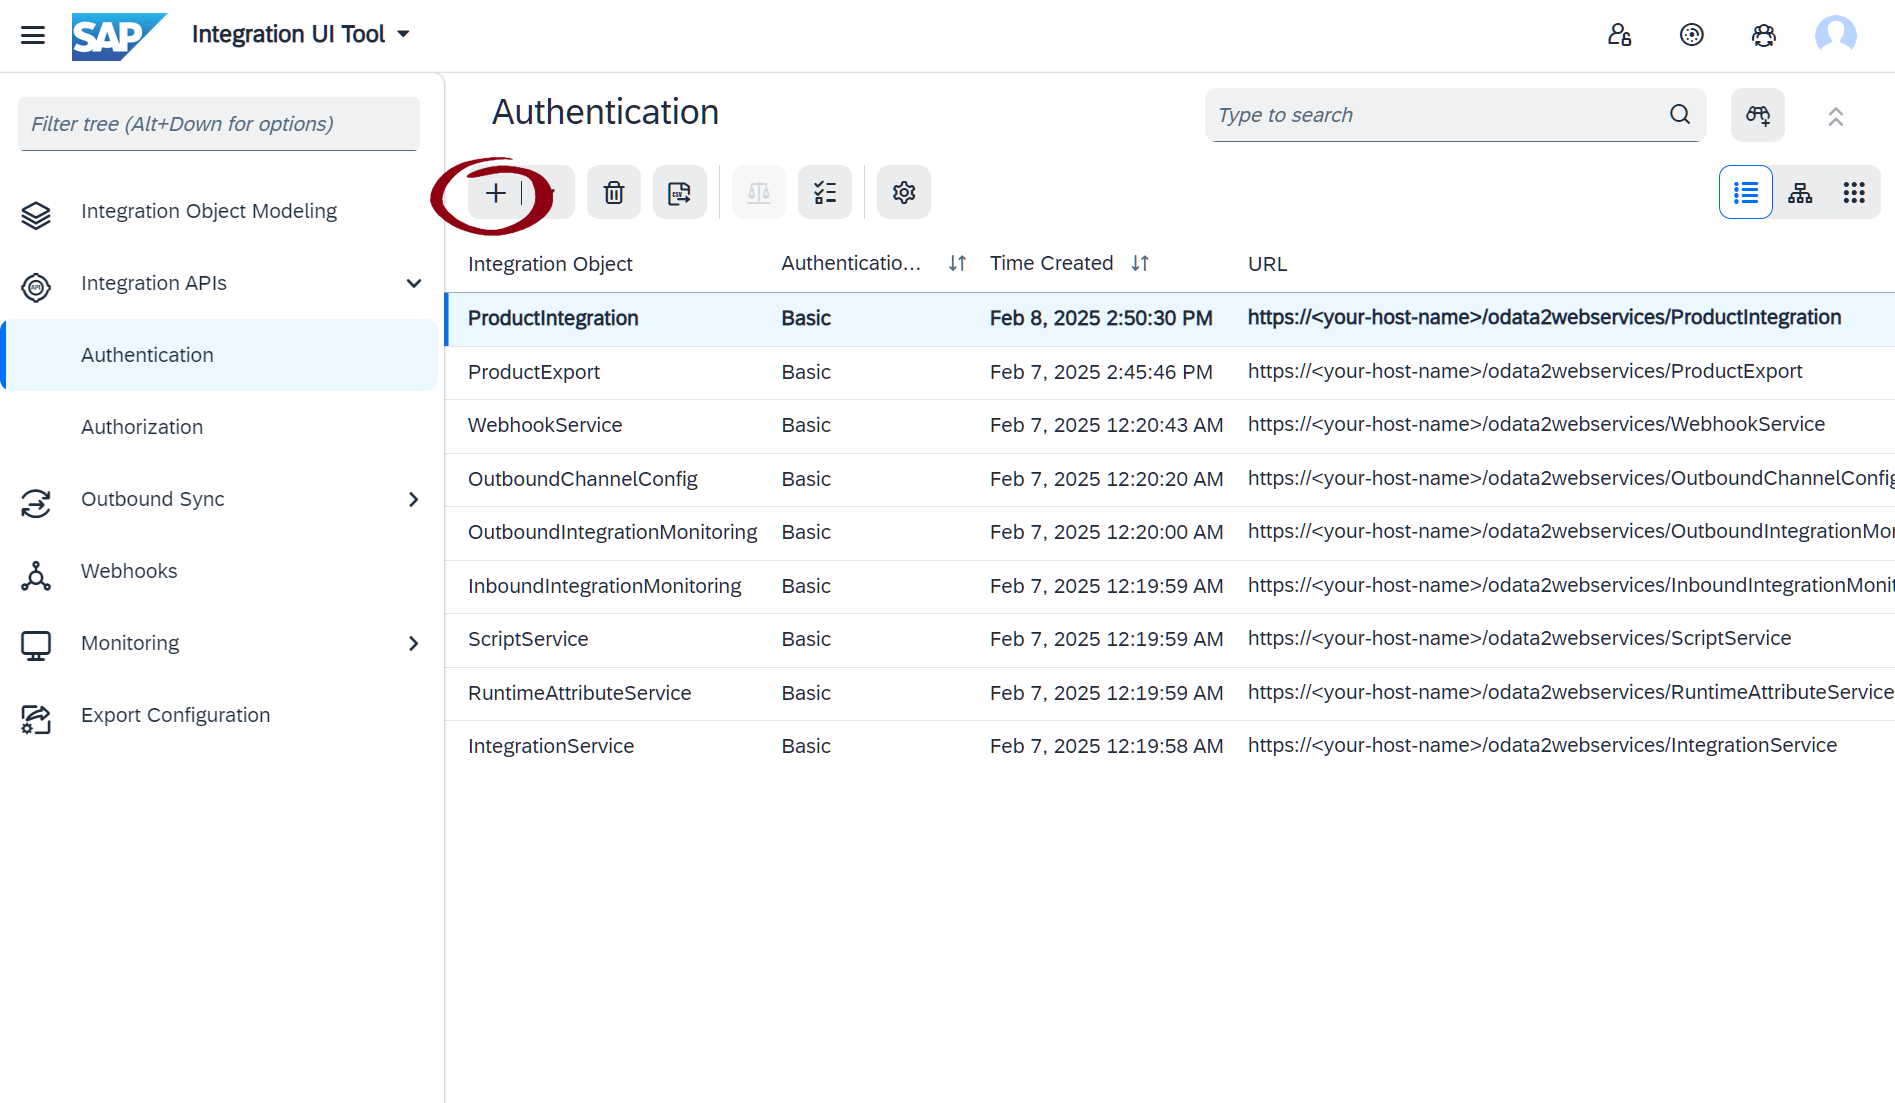
- Select your Integration Object (ZoovuProduct).
- Choose Basic Authentication as the method.
- Click Save.
To test authentication, use the following API request:
GET https://<your_sap_commerce_url>/odata2webservices/ZoovuProduct/Products
Authorization: Basic <your_base_64_encoded_credentials>
Accept: application/json
In the opening Modal select your Integration Object (ZoovuProduct) and choose "Basic Authentication" as the authentication method.
You can get the base64 encoded credentials by using the following command in your terminal:
echo -n "Zoovu:<your_password>" | base64
Step 4: Obtain an authentication token
Your SAP Commerce (Hybris) is now ready for Zoovu Integration.
Before you can send requests you need to obtain an authentication token. You can do this by sending a POST request to the following endpoint:
POST https://<your_sap_commerce_url>/authorizationserver/oauth/token
Content-Type: application/x-www-form-urlencoded

grant_type=client_credentials&client_id=Zoovu&client_secret=1234
You will receive a response with the access token. You can use this token to authenticate against the OData API.
GET https://<your_sap_commerce_url>/odata2webservices/ZoovuProduct/Products
Authorization: Bearer <your_token>
Accept: application/json