Personas
Use personas to segment shoppers by behavior and tailor assistants, content and offers. Start with traits (behavior rules), group them into personas, target experiences, then measure impact.
Prerequisites
- A domain added to Zoovu Home > Domains. Learn more.
- Tracking enabled in Zoovu Home > Tracking Manager. Learn more.
- Source events available: PDP views, search, add-to-cart, checkout, purchases (or your equivalents).
Quick start
- Create 3–4 traits
- Lost browsing: >10 PDP views AND no add-to-cart (24h)
- Discount intent: ≥3 price/discount filter changes (session)
- Brand intent: same brand filtered in ≥2 sessions (7d)
- Fast path: landing → checkout steps ≤5 (7d)
- Create 2–3 personas
- Lost customer = Lost browsing
- Discount seeker = Discount intent
- Brand loyalist = Brand intent
- Target assistants
- For Lost customer, surface clarifying Q/A (use-case, budget) early.
- For Discount seeker, expose price slider and promo tiles first.
- For Brand loyalist, show brand-first recommendations.
- Validate and roll out
- Test with preview user/session.
- Roll out to 25% traffic, compare KPIs, then go wider.
Step 1: Create traits
Traits describe behaviors that define a persona. Open the traits setup guide.
Examples:
- Lost customer: viewed >10 PDPs, no add-to-cart
- Discount seeker: applied ≥3 price/discount filters
- Brand loyalist: filtered for the same brand across sessions
- Quick buyer: from landing to checkout in ≤5 steps
To create a trait:
- Go to Traits (left menu).
- Select the domain.
- Pick a type (boolean, number, etc.).
- Define rules (e.g., “>5 PDP visits AND no cart events”).
- Publish.
A trait returns a score when its condition is met: TRUE/FALSE or a number (intensity).
Step 2: Create a persona
- Go to Zoovu Home > Personas.
- Click Create Persona.
- Name the persona, e.g., “Lost customer”.
- Add an optional description.
- Select the domain.
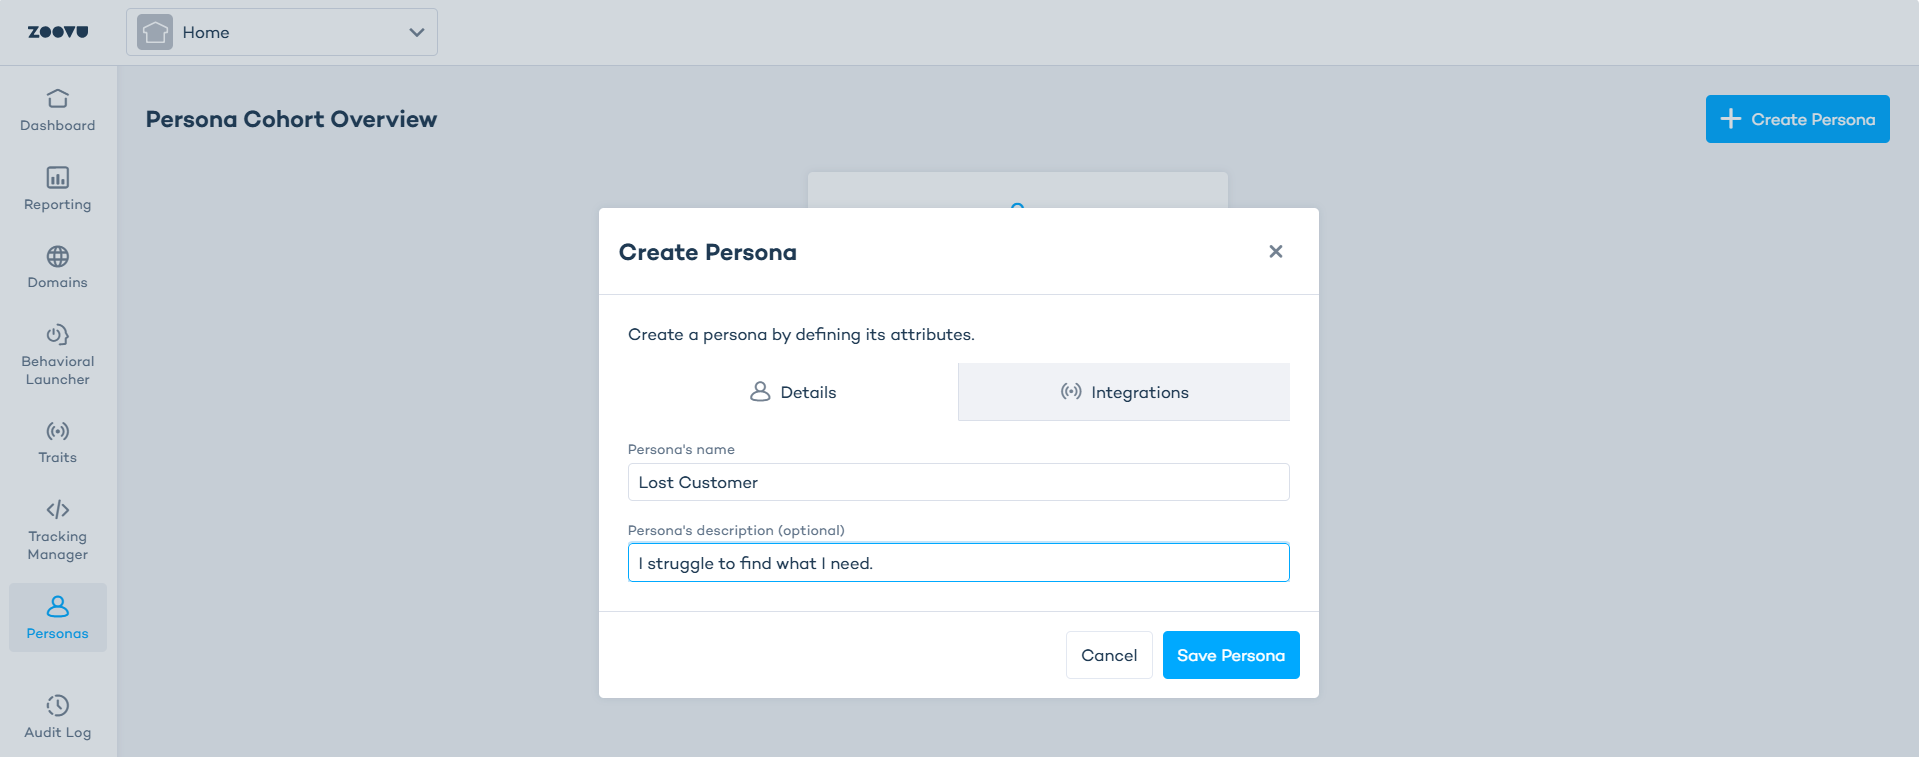
- Click + and add the relevant traits.
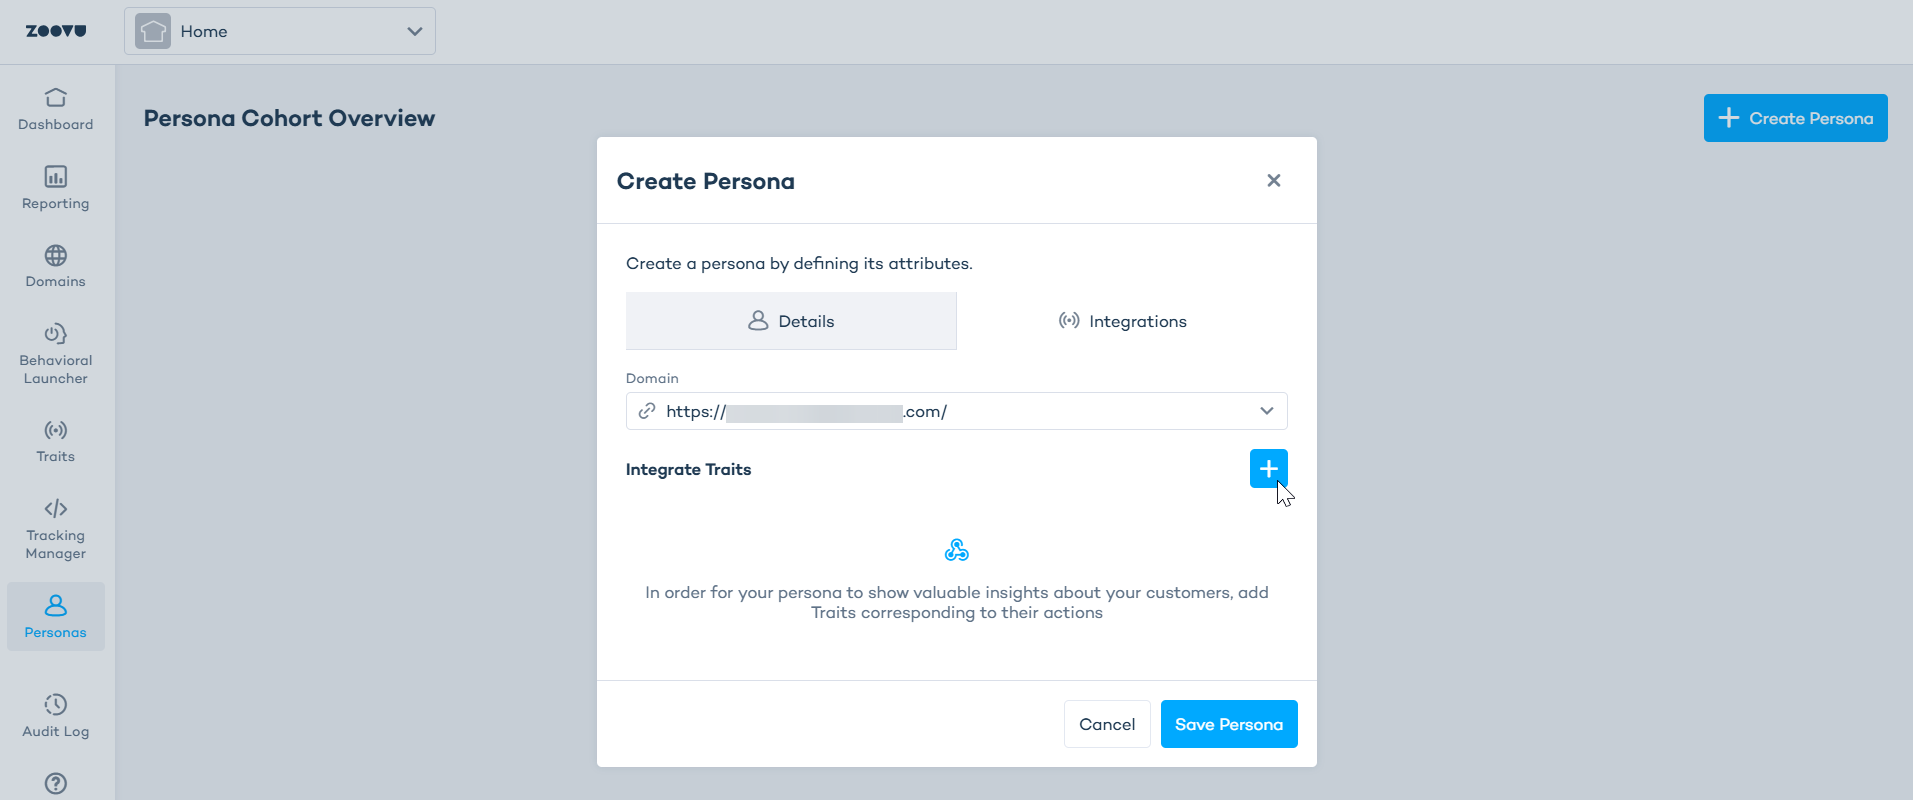
- Save. The persona now evaluates users in real time.
Step 3: Analyze
- Use reports to track persona size, trends, and performance.
- Compare cohorts to spot friction points and winning journeys.
- Check latency: evaluation updates can take a few minutes depending on data volume.
Examples
Reduce drop-offs (lost customers)
Goal: help indecisive browsers make progress.
- Trait: “>10 PDP views AND no add-to-cart (24h)”.
- Persona: “Lost customer”.
- Assistant: show a clarifying question early (use-case, budget), add “Need help choosing?” CTA.
- Measure: decrease in bounce, increase in filter usage and add-to-cart for this persona.
Boost promos (discount seekers)
Goal: increase engagement with offers.
- Trait: “≥3 price/discount filters in session”.
- Persona: “Discount seeker”.
- Assistant: highlight deal tiles, pre-show price slider, prioritize value props.
- Measure: promo CTR, conversion rate vs. baseline persona.
Speed up checkout (quick buyers)
Goal: optimize for fast decisions.
- Trait: “Landing → checkout in ≤5 steps (7d)”.
- Persona: “Quick buyer”.
- Assistant: minimize steps, skip non-essential questions, highlight fast delivery/payment.
- Measure: time-to-checkout, conversion rate, steps per session.
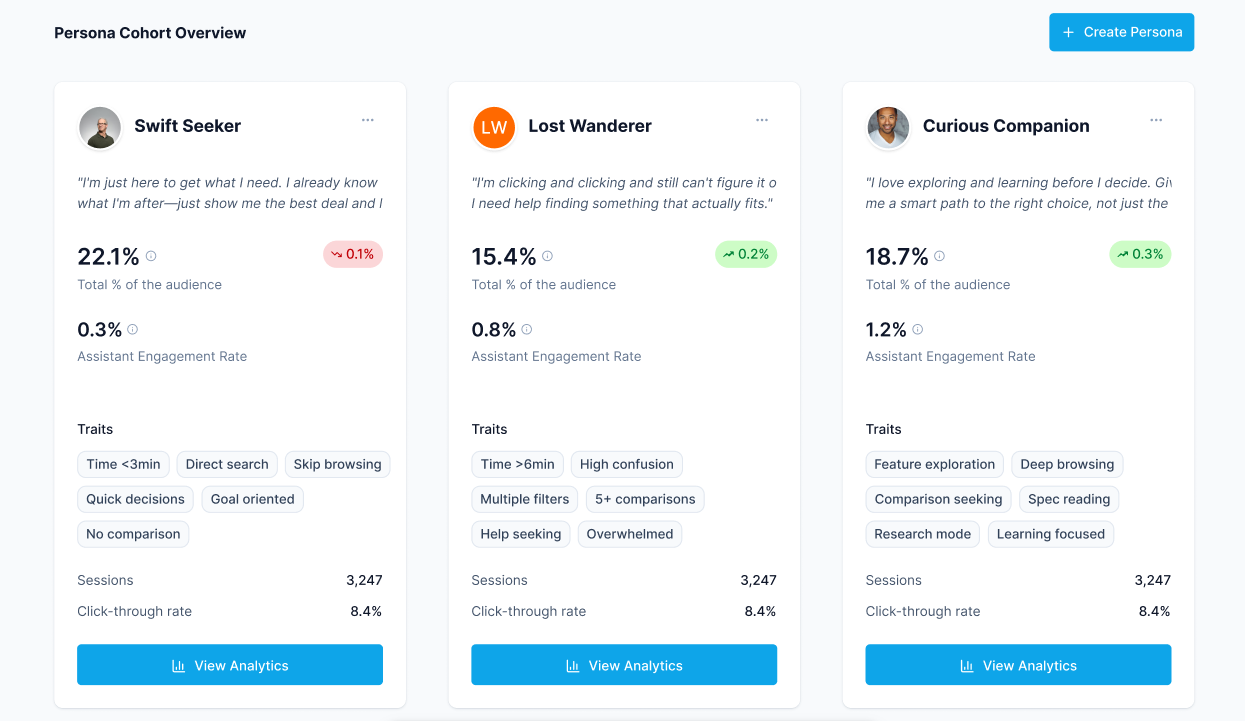
Persona statistics
On the Personas page you can check:
- how many sessions matched the persona
- what share of all sessions this group represents
- how the persona compares to other personas
Statistics update automatically as new journeys are collected.