Preselection in configurators
Preselection helps you control what customers see when they enter a configurator. Instead of starting from an empty state, you can guide users with a meaningful starting point.
How preselection works
When a configurator opens, it looks at three things in this order:
- Information passed in the URL
- Answers given in the flow before the configurator
- Your ranking and mapping rules
There is always a starting product. The difference is whether you control it explicitly or let the system decide.
If a product is explicitly passed in the URL, that product is used. If not, the configurator selects the best matching product based on the user’s answers and your setup.
Preselect a product
Step 1. Before you start: connect a catalog and set the SKU field (required)
- Open your configurator and go to the section you’re configuring.
- Link a product catalog to this section (choose from your linked Data Platform catalogs).
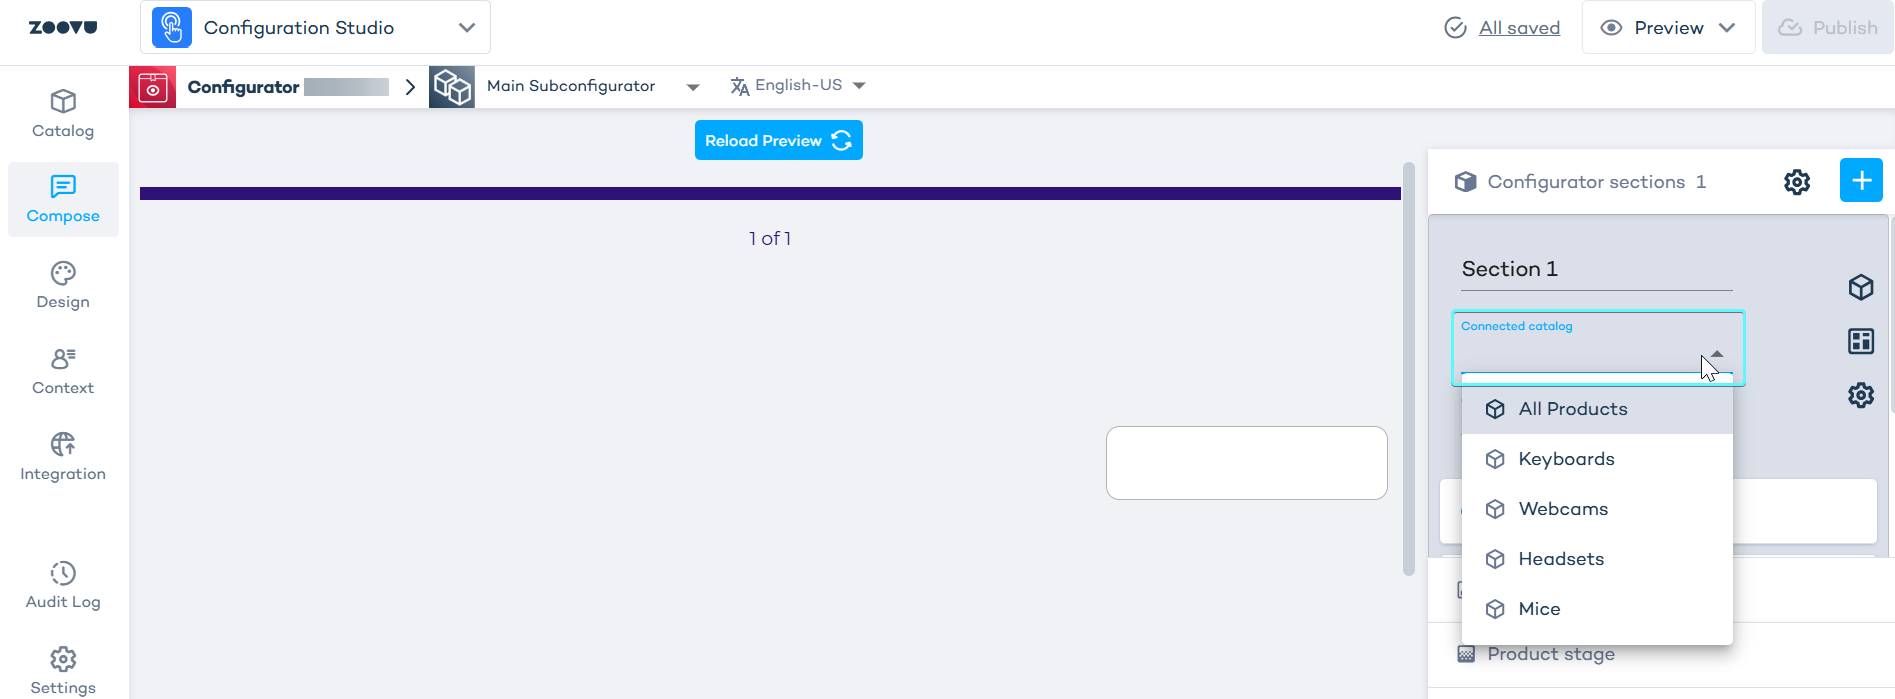
Step 2. Specify which attribute is the SKU
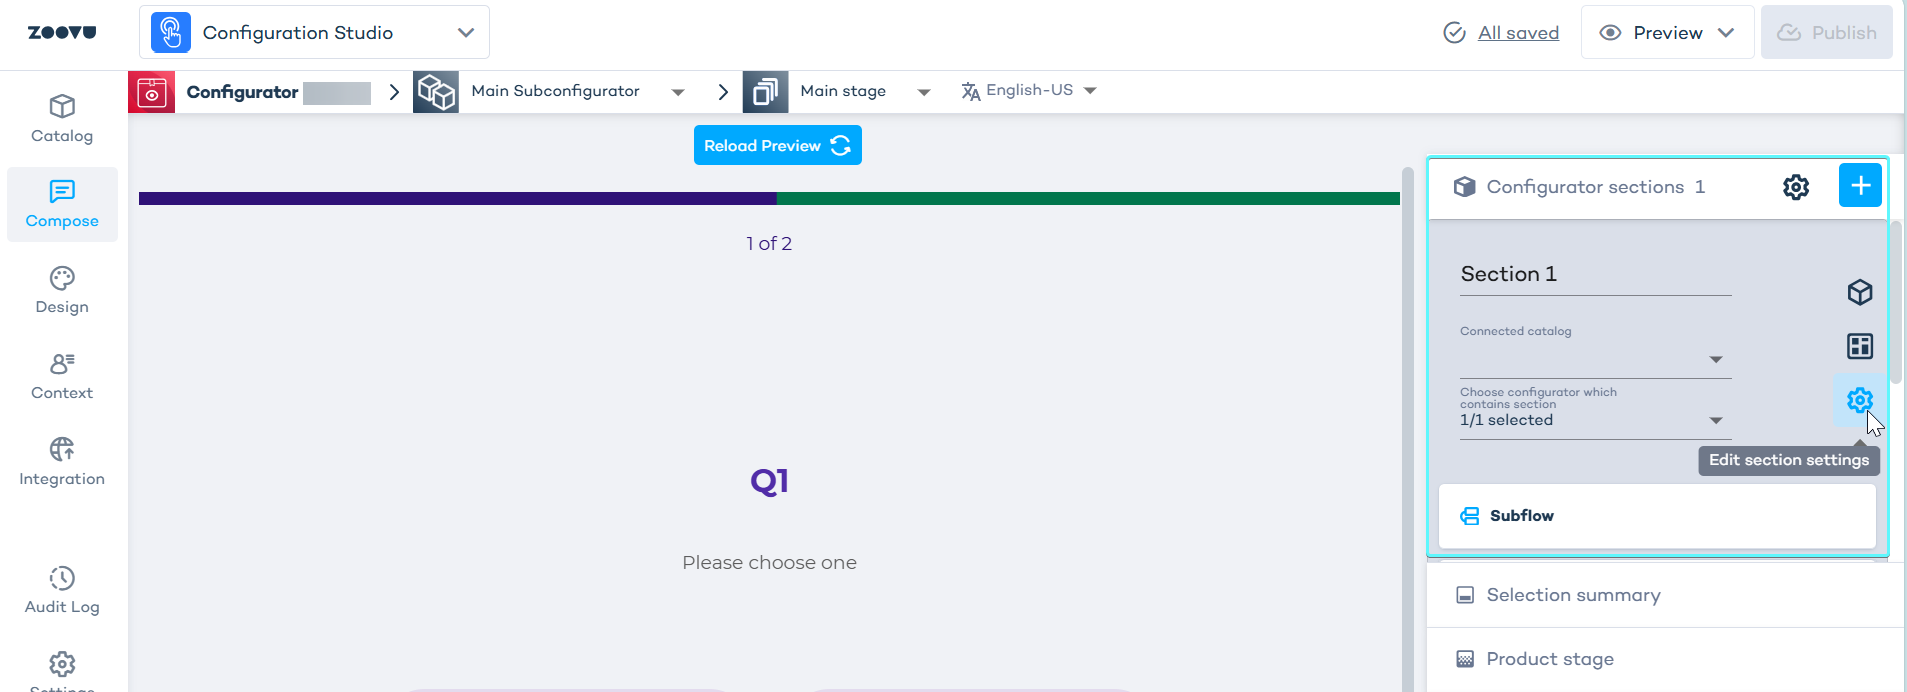
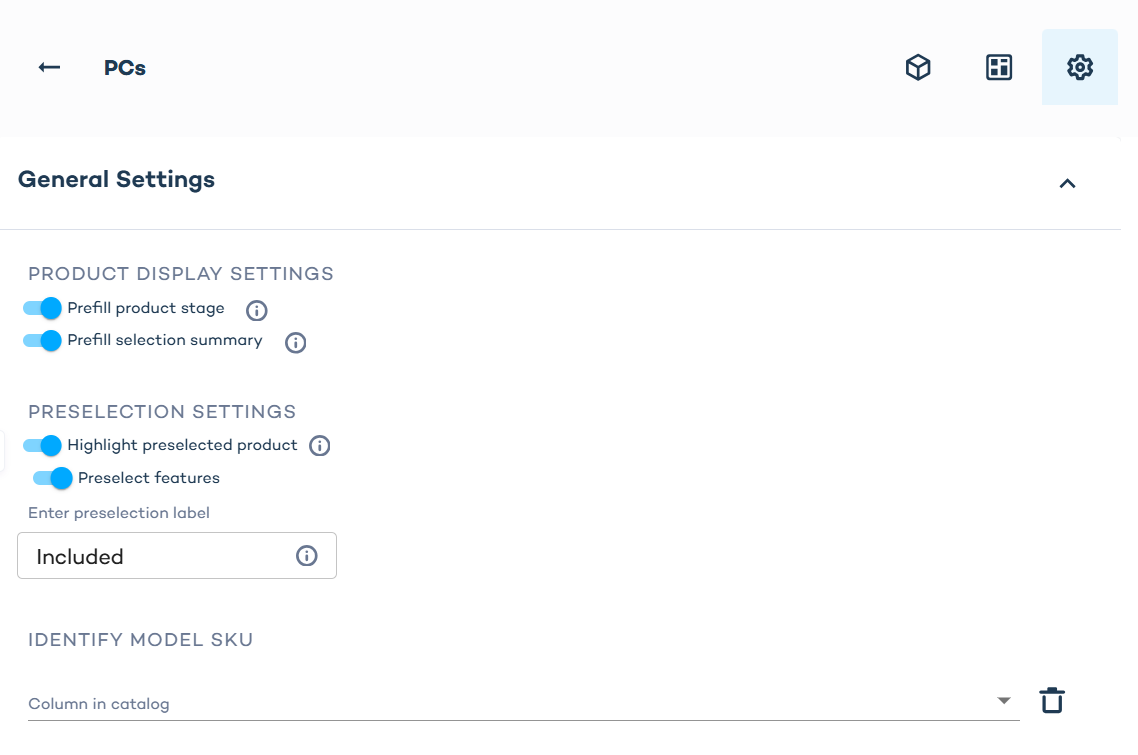
- Open Section settings (gear icon).
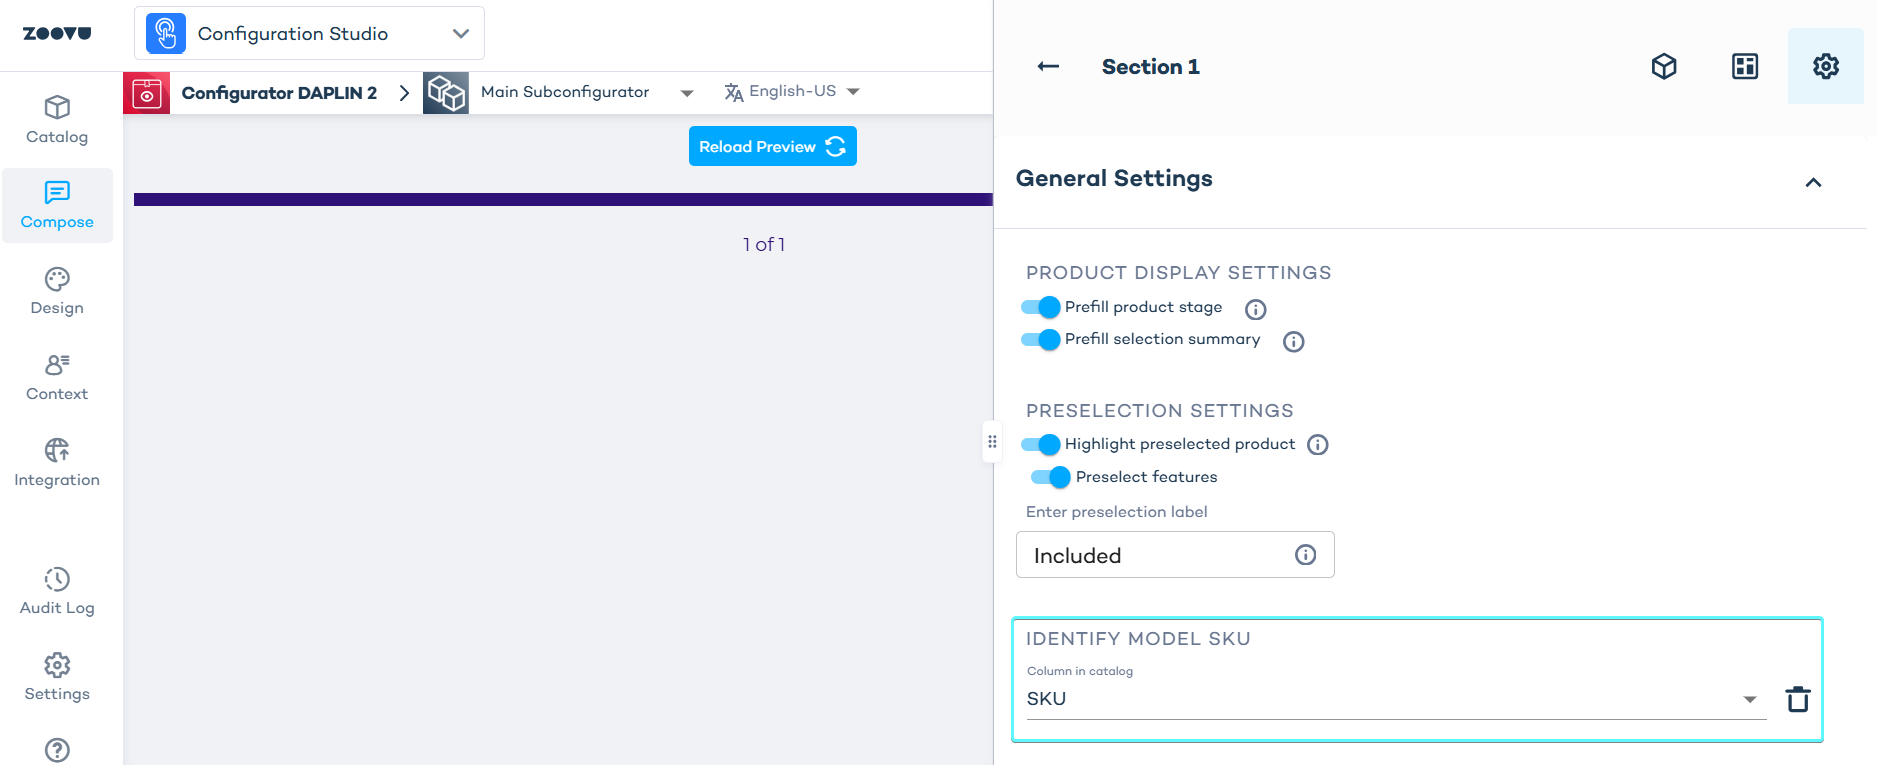
- Click on the dropdown selector under "Identify model SKU". Select the attribute from your data project that contains your product SKU (the unique identifier).
Step 3. Define the default product rule
In Define default product, create a rule that matches the product(s) you want to start with.
- Choose Attribute (often SKU or another unique identifier).
- Pick an operator (e.g. contains, equals).
- Enter the Value.
If more than one product matches, the configurator selects the “first best match” based on your recommendation/ranking logic.
URL preselection
The most reliable way to preselect a product is by passing it in the URL as a preselected product.
Use URL-based preselection when you want to:
- start the configurator with a specific product already selected
- support multiple entry points (for example, different “Configure this product” buttons)
Step 1: Prepare the configurator section
Before using URL preselection, make sure the configurator section is ready:
- Connect a product catalog to the section.
- Under "Identify model SKU", select the attribute that contains the product SKU in your catalog.
Step 2: Step 2: Choose the entry point
Decide where the configurator link will be placed, as this determines which product should be preselected. Typical entry points include:
- a product listing page (for example, a “Configure this model” action)
- a product comparison page
Each entry point can use its own URL, even if all links open the same configurator.
Step 3: Add the preselected product to the URL
Create a link to the configurator that includes:
- the section where the product should be selected the SKU of the product
- the quantity (usually 1)
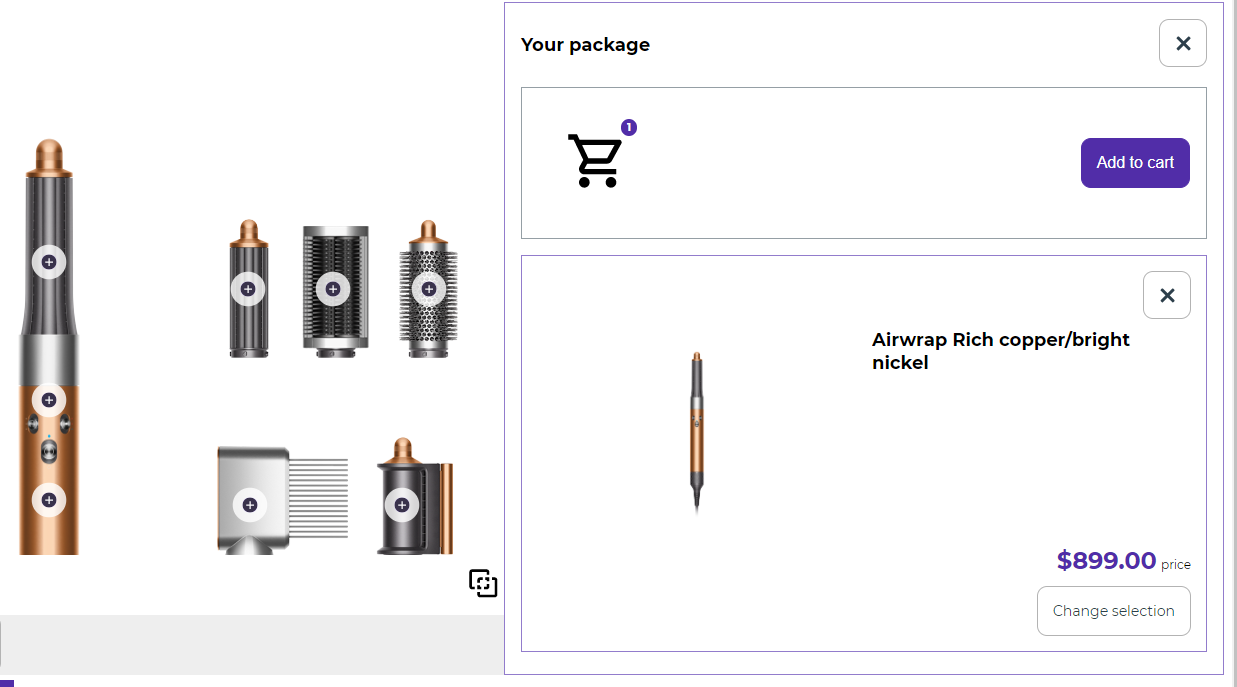
This link becomes your “preselected” entry point. When the user opens it:
- The configurator loads.
- The specified product is already selected.
- The user can continue configuring from that starting point.
Anyone opening the same link will see the same starting selection.
Step 4: Combine with preselection settings (optional)
URL preselection defines what is selected. Section settings define how it appears.
See preselection settings below for more details.
In the section settings, you can choose to:
- show the product on the stage
- add it to the selection summary
- highlight it in product lists
- preselect its features
- label it (for example, “Included”)
These settings apply to products coming from the URL as well.
Step 5: Enable URL updates in Experience Designer
To make URL preselection work correctly in the live experience, make sure to enable URL updates in the theme settings.
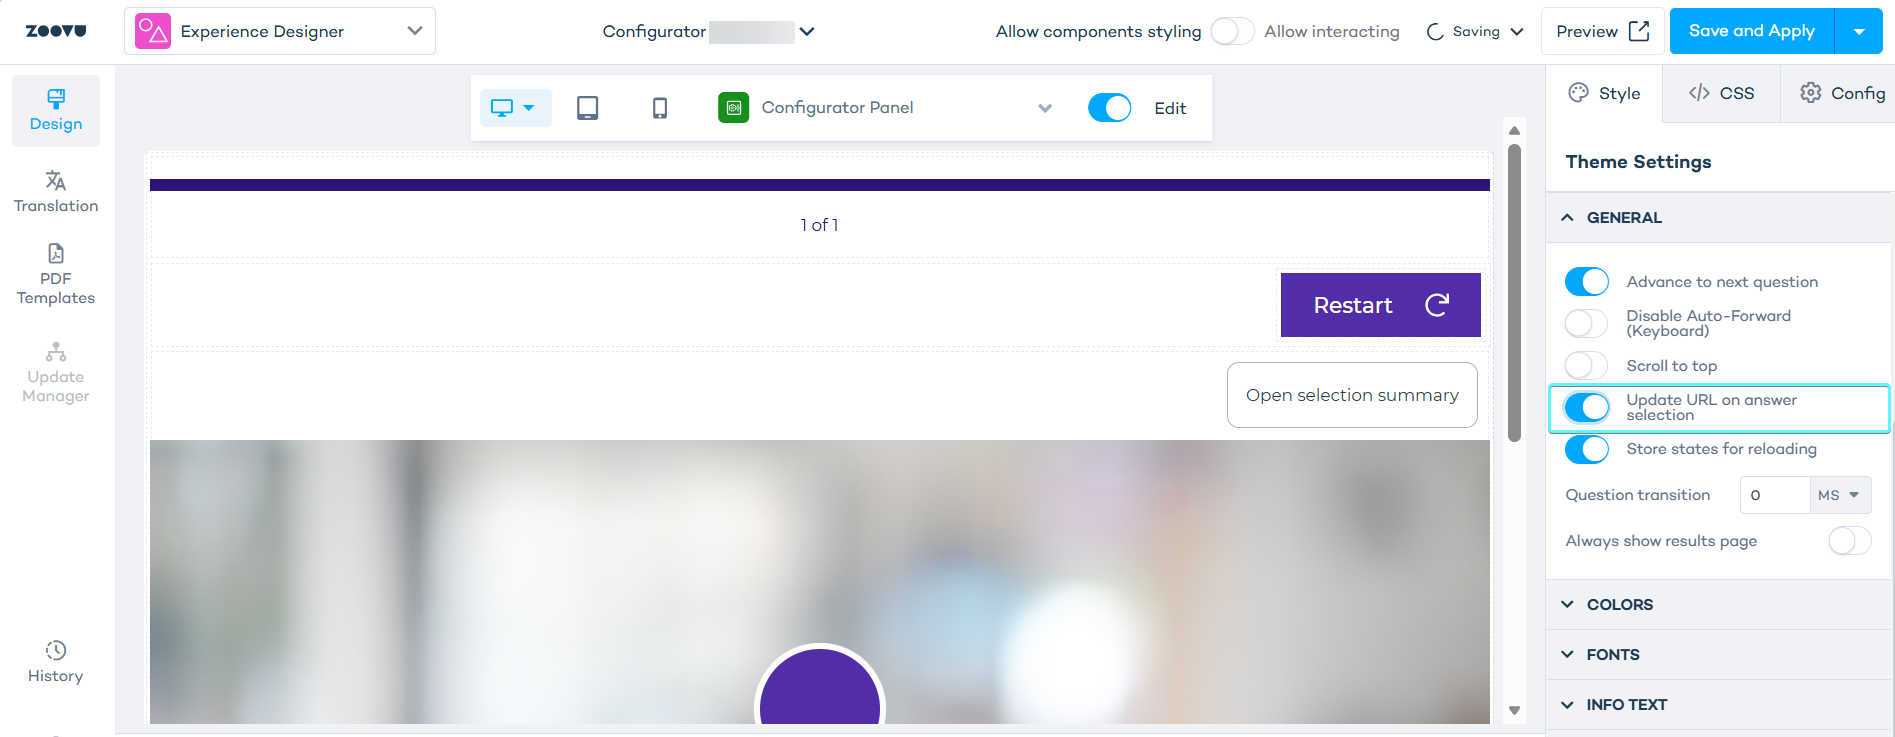
- Open your configurator in Experience Designer.
- Go to General theme settings.
- Turn on "Update URL on answer selection".
- Turn off "Store states for reloading".
Step 6: Test the result
Open the link in:
- preview
- an incognito window
- a new browser session
Check that:
- the correct product is selected
- it appears where you expect (stage, summary, list)
- changing the URL product changes the starting product
Preselection settings
Preselection controls how the product is treated in lists and filters.
- In your configurator's Compose tab, open the Configurator section settings by clicking the gear icon next to the section name and catalog.
- In the settings panel, scroll to the preselection section.
If the configurator has multiple stages, Preselection Settings can only be defined for the main substage. Other stages inherit these settings. If the same section is used across subconfigurators, the settings are copied.
Two switches define how the product appears at configurator start:
- Enable Prefill product stage if you want customers to see the default product on the stage when they enter the configurator.
- Enable Prefill selection summary if you want the default product to be automatically added to the selection summary (cart) when the configurator starts.
You can turn these on separately or together. For example, you might only want the product in the summary but not displayed on the stage.
- Highlight preselected product marks the product in the list, making it clear to customers which option is preselected.
- Preselect features automatically selects the feature values of the default product (e.g., color = wood, material = metal).
- Enter preselection label adds a label (such as “Included”) next to preselected features. You can also leave this field empty if you don’t want any text shown to the user when they see the preselected product.
The highlight option can be active without the display options. In that case, the product will not appear on stage or in the summary but will still be highlighted in the product list.
Define the default product in a legacy configurator
You can set a default product for a section. This is only possible in legacy configurators, which are not connected to the Data Platform.
In the example below, you can see a summary with a default product, filled by preceding flow answer selections:
URL preselection overrides UI defaults. If a product is passed in the URL, it will be used instead of any default product defined in the configurator.
Start by creating a mapping rule to define the product. For example, you can target a product by its SKU (identifier). The product you define becomes the default for that section:
- It is displayed to all customers who open the configurator with the default integration link.
- If the configurator is opened via a URL that specifies another product, that product overrides the default.
Default products are not always used in the selection summary. If you assign incompatible products to different sections, the selection summary may not work as expected. Avoid choosing non-compatible products if they should appear in the summary.
If more than one product matches your rule, the first product chosen follows Zoovu’s recommendation logic.
Preselection scenarios
Here are practical ways you can combine the settings:
1. Show product on stage only
- Enable Prefill product stage.
- Disable all other options.
The product is shown when the configurator opens but is not added to the summary or highlighted in lists.
2. Add to summary only
- Enable Prefill selection summary.
- Disable all other options.
The product is added to the selection summary automatically but is not displayed on the stage or highlighted elsewhere.
3: Highlight product in lists only
- Enable Highlight preselected product
- Optional: enable Preselect features if you want matching filters to be selected.
- Disable both Prefill options
The product does not appear on the stage or in the summary, but it stands out in the product list and its matching filters can be preselected.