Control what appears in search results
You can decide which pages and content are included in your search results by setting blacklisting, whitelisting, and no-index rules.
To get started:
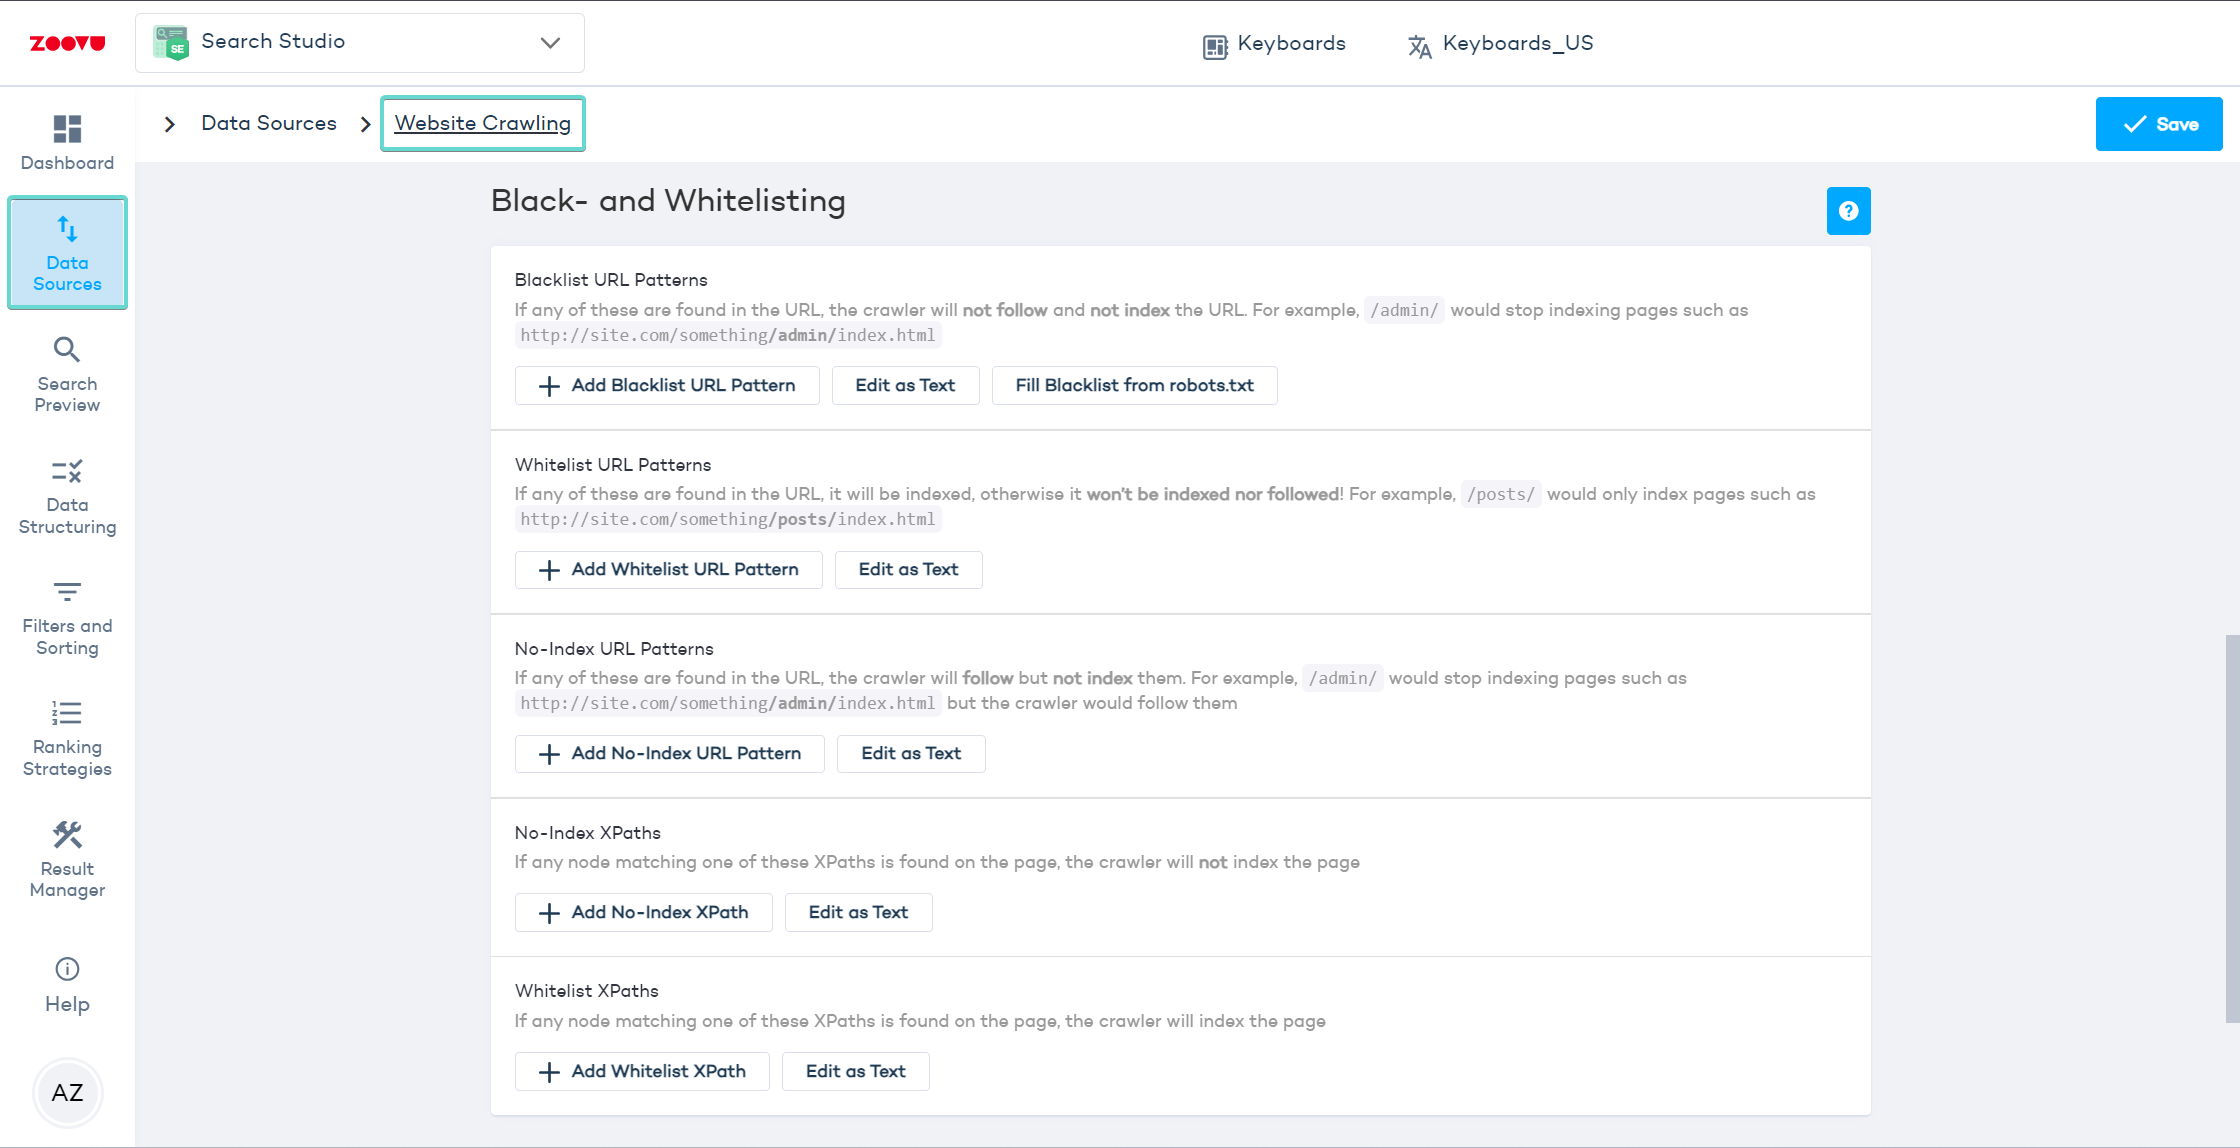
- Go to Search Studio > Data Sources > Website Crawling and navigate to the Black- and Whitelisting settings.
- Click "Add first rule".
URL and XPath patterns use regular expressions. Escape special characters like []\^$.|?*+(){} with a backslash \.
Blacklist URL patterns
Use blacklists to prevent the crawler from indexing certain pages or file types.
Examples:
- Exclude admin pages:
/admin/ - Ignore PDF files:
*.pdf
Whitelist URL patterns
Use whitelists to limit crawling to specific parts of your site.
Examples:
- Index only blog posts:
/blog/ - Index only product pages:
/products/
Your root URL must match your whitelist pattern (e.g. https://website.com/fr/). If it doesn’t, the root will be excluded and no content will be indexed.
No-index URL patterns
Exclude specific pages from appearing in search results, but still allow their links to be followed.
Example:
- Hide a landing page but follow its links:
/landing-page/
Use no-index for pages that should not show up in search but contain links to other valuable content (e.g. blog landing pages).
No-index XPaths
Hide pages based on structure instead of URL. This is useful when pages don’t share a common pattern.
Example:
- Exclude pages with a specific element:
//div[@class='hidden-content']
Whitelist XPaths
Use XPath whitelists to limit indexing to specific content areas, even if the URLs vary.
Example:
- Index only the main content:
//section[@id='main-content']
For a product category to show in search results, it needs to have a URL and a search result image. You can configure these in Data Platform > Ontology > Categories.