Set up product comparisons
Enable product comparisons to help your customers compare specifications and features, like screen size, battery life, or camera quality. You can add comparisons to search results, product listing pages, or any page on your site.
Enable comparisons
Comparisons are based on product attributes within your Data Project and are available in all languages.
- Go to Data Platform and select your project.
- Make sure your product data has defined attributes.
Contact Support if you need any help with your data.
Create comparison groups
- Go to Data Platform > Comparison and click "Add comparison group".
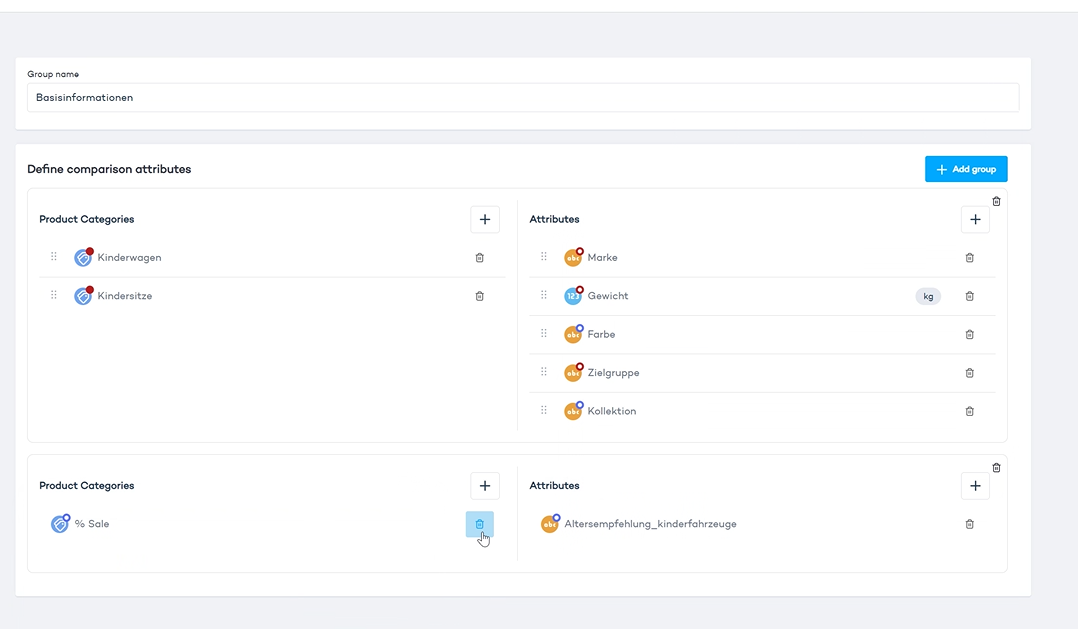
- On the left side, add product categories. You can select specific categories or leave this field blank to include all categories.
- On the right side, add the attributes you want to compare. These attributes will be applied to all the categories you've selected, as well as their subcategories. If you don't select any category, the attributes will apply to all products.
- Click "Save".
Example: You could create a group called "Basic specs." In the product categories, you might select a subset of products like keyboards. Specify attributes that distinguish these products, such as "connectivity" or "color."
Add comparisons to search results
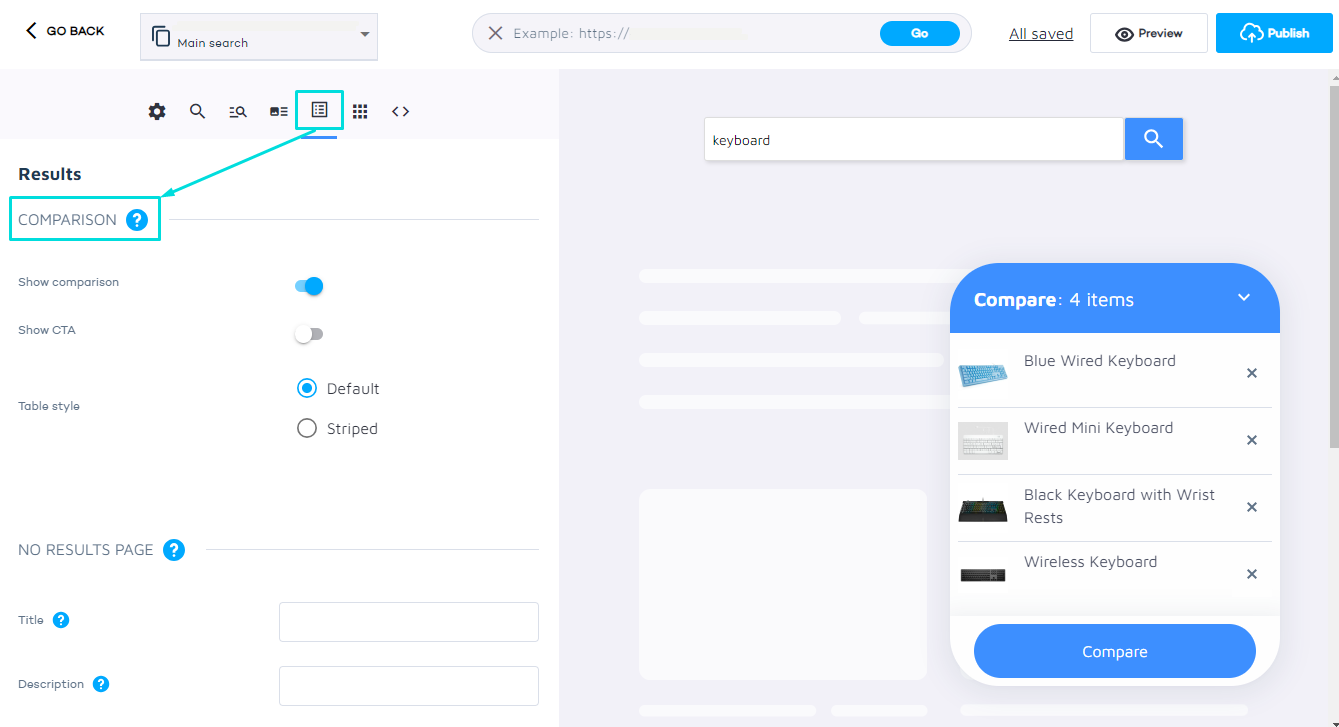
- Go to Search Studio > Design & Publish and select the "Results" tab.
- Enable the "Show comparison" toggle to allow product comparisons.
- Enable the "Show CTA" toggle to add a custom call-to-action (CTA) button, like "Add to cart".
Preview and test
- In the preview pane on the right side, enter a search query to display your products.
- Select the "Compare" box next to the products you wish to compare.
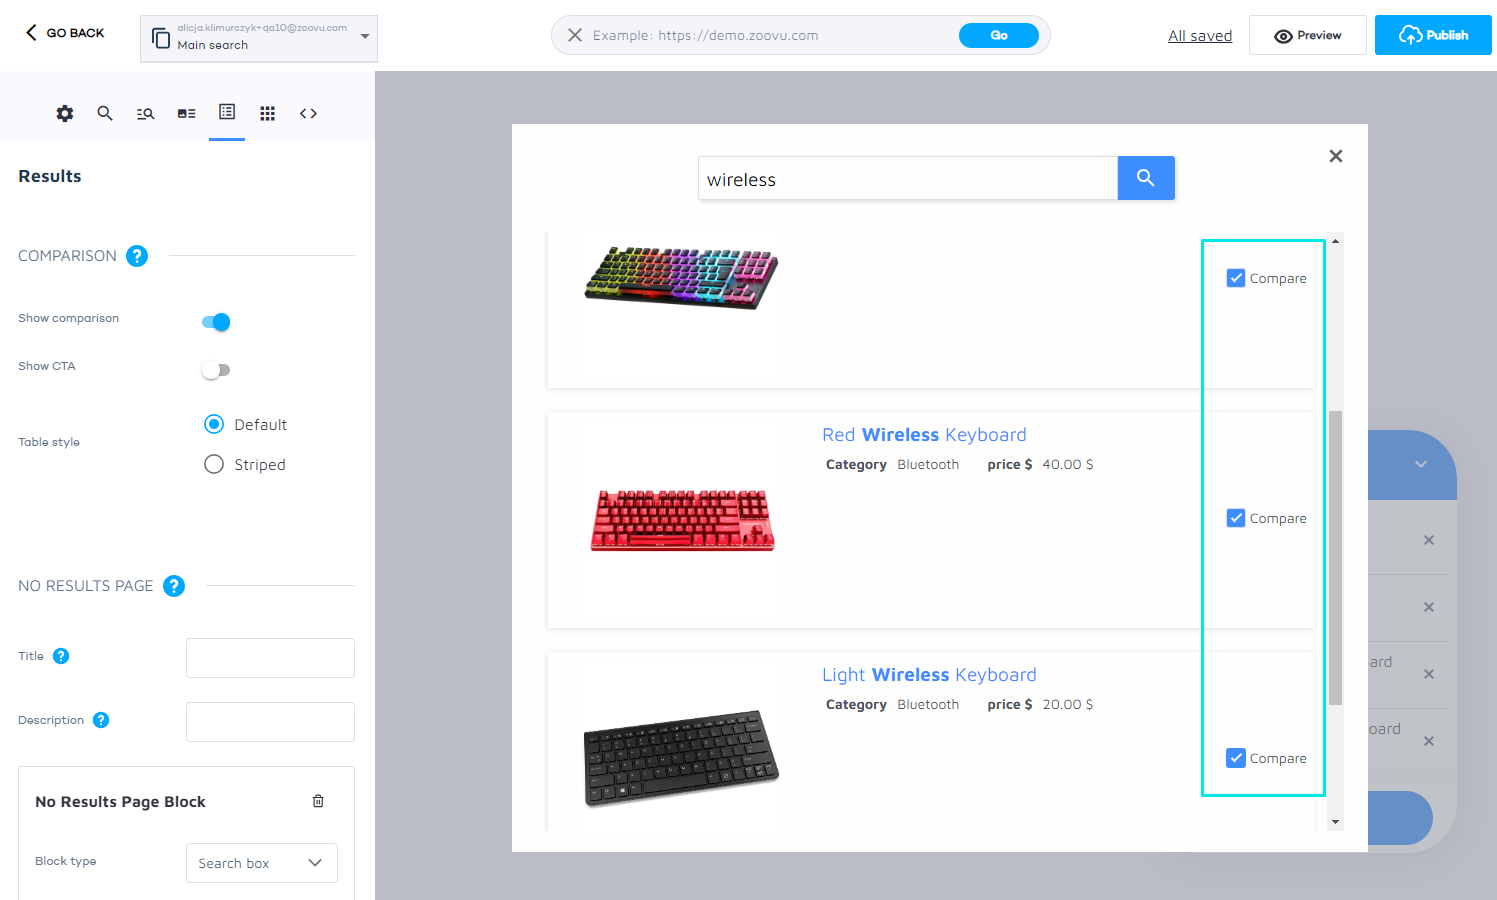
- The comparison box will appear. Click the "Compare" button to enter the new view. A table will display below the selected products, outlining their attributes for comparison.
- Click "Publish".

You can activate the "Only show differences" toggle to highlight the attributes that differentiate the products.
Add comparisons to any page
To add the comparison widget:
- Go to Data Platform > Comparison > Widget.
- Configure the comparison widget's style and copy the integration code.
- Paste the widget code into the HTML of your page.
- Input the SKUs of the products to compare, separated by commas, in the 'skus' attribute.
Customize callbacks
Modify the CTA button text, e.g. "Add to cart".
Add JavaScript under "Add to cart callback" to process adding a product to the cart (e.g. by submitting a form), using sku and productData variables:
const form = document.createElement('form');
form.setAttribute('method', 'POST');
form.setAttribute('action', '/cart/add');
const skuInput = document.createElement('input');
skuInput.setAttribute('type', 'hidden');
skuInput.setAttribute('name', 'sku');
skuInput.setAttribute('value', sku);
form.appendChild(skuInput);
document.body.appendChild(form);
form.submit();
Add JavaScript under "Remove product callback" to enable removing a product from the list of compared products (e.g. with local storage), using the sku variable:
const skus = JSON.parse(window.localStorage.getItem('comparison'));
skus.splice(skus.indexOf(sku), 1);
window.localStorage.setItem('comparison', JSON.stringify(skus));