PDF Creator
The PDF Creator lets you convert the output of your Digital Assistants and Visual Configurators into downloadable PDF documents.
- Shoppers can download product details or recommendations from your page to review offline.
- You can create personalized documents based on what the user has seen on your site.
- PDFs can be translated automatically into multiple languages for global customers.
Create PDF templates
In Experience Designer, you can manage PDF templates from a dedicated page. Choose from predefined templates or create custom ones using HTML, CSS, and JavaScript.
- To get started, go to the "Design" tab in Conversation Studio or Configuration Studio and enter Experience Designer.
- Click the PDFs icon in the left sidebar.
- Click the "Add template" button.
- Name your document and select one of the available templates or choose "Start with blank" to create a new one from scratch.
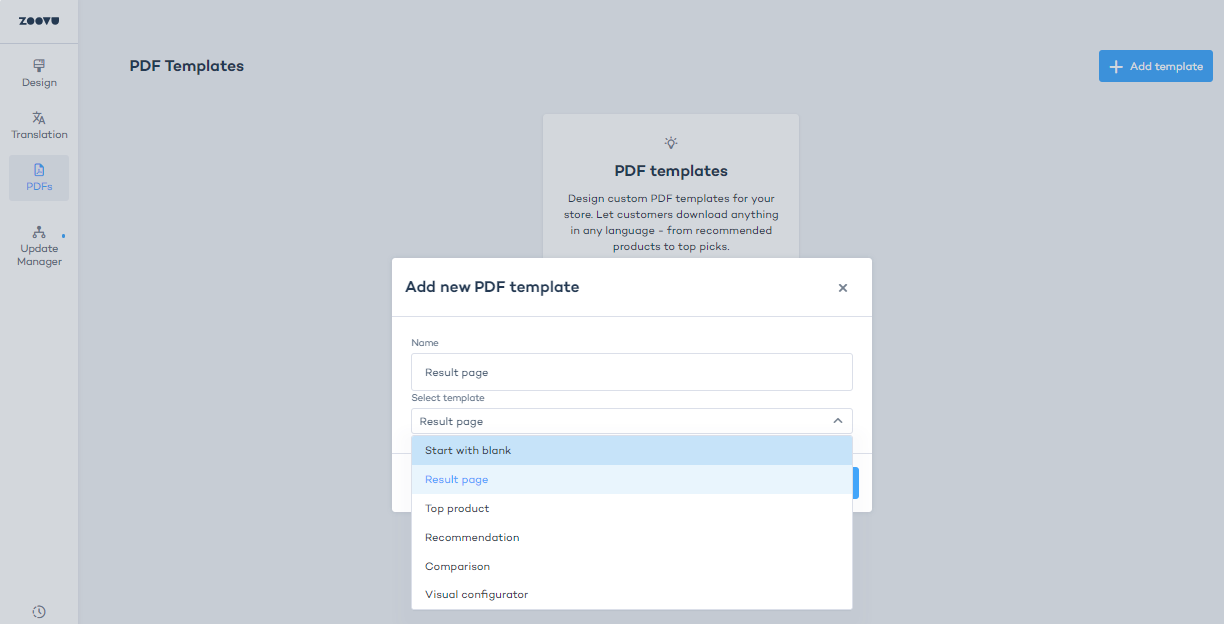
Types of PDF templates
- Result page: Allows customers to download the entire results page from the Digital Assistant.
- Top product Features product details for the top product from the results page.
- Recommendations: A list of recommended products.
- Comparison: A comparison of products from the results page.
- Visual configurator: Available only for configurators.
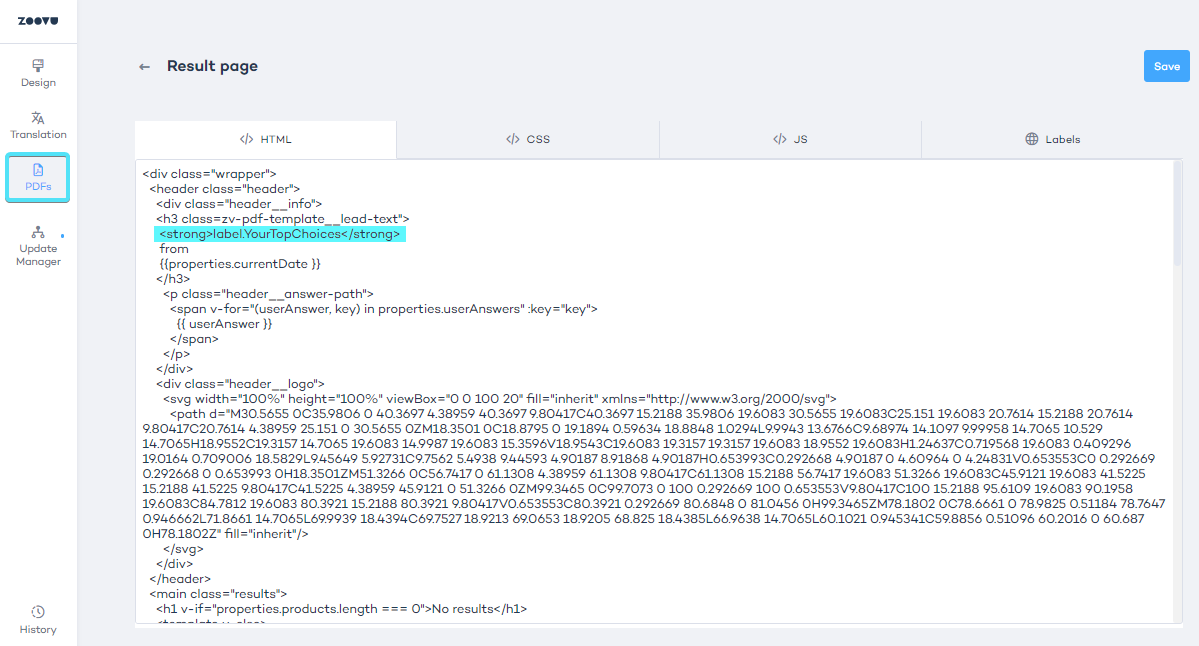
Use the template editor
Once you choose your starting point, you’ll enter the Template Editor. This editor has four tabs:
- JavaScript (JS) – here you define the data you want to use in the PDF.
- HTML – this is where you build the structure of the layout using Vue template syntax.
- CSS – this is where you style your PDF (colors, layout, fonts, etc.).
- Labels – this allows you to add translations and manage locale-specific content.
Each tab works together to define the final design of your PDF. You can preview your changes as you go.
Create multilingual PDFs
You can allow users to download documents in their preferred language. This is done by creating text elements, called tokens, which are automatically translated into the user’s language.
To make your PDF templates multilingual, you’ll need to insert localization tokens into the template code. These tokens act as placeholders for text that can be automatically translated.
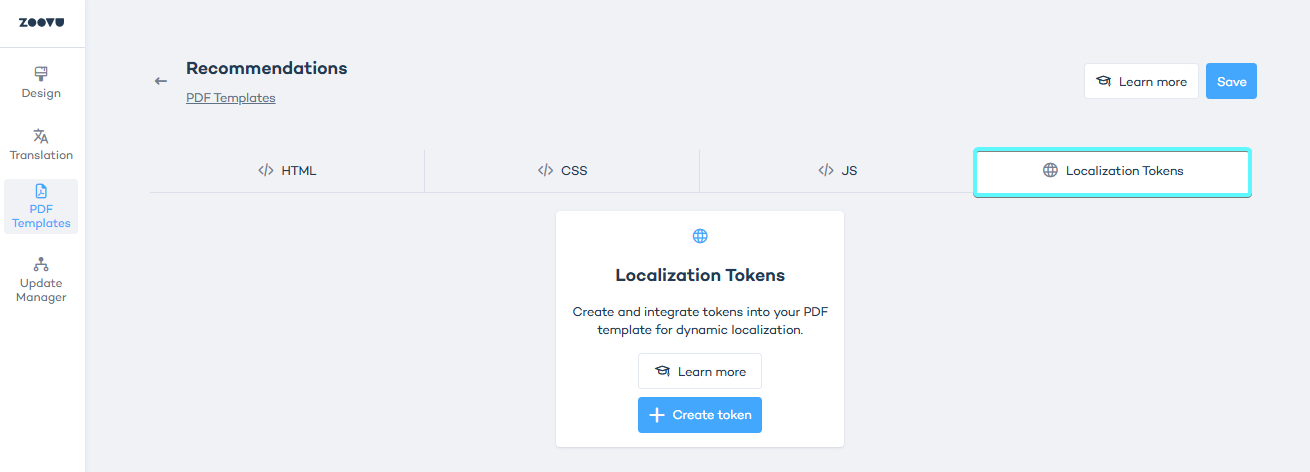
Localization tokens
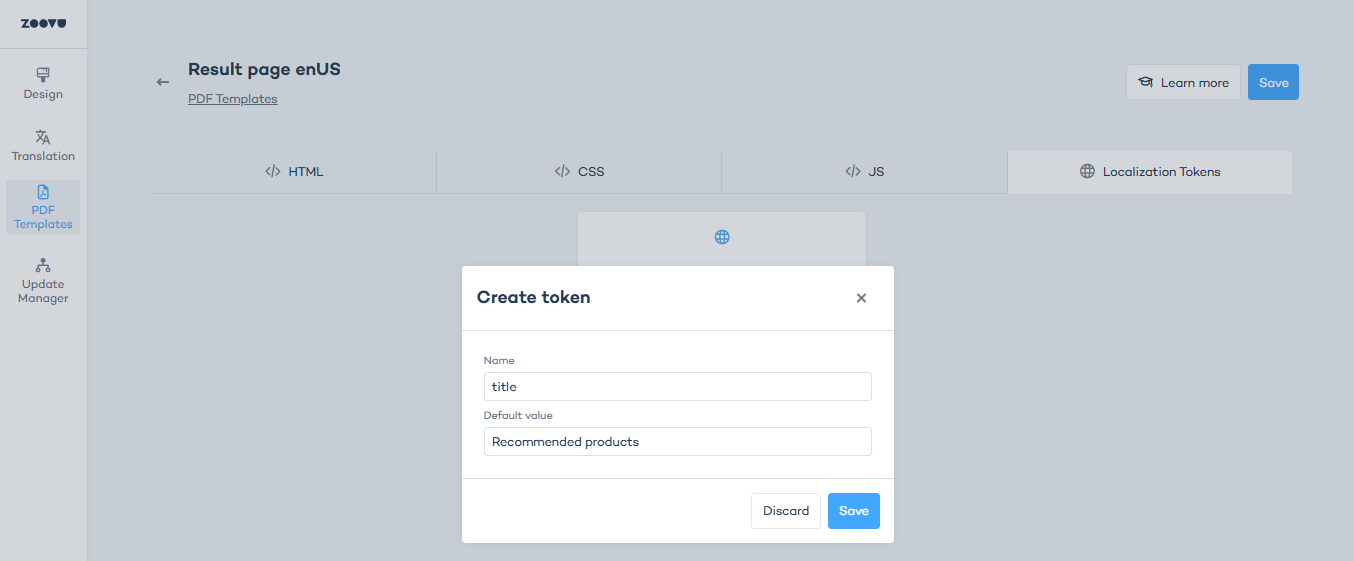
To add a token, go to Experience Designer > PDF > Localization Tokens and click on "Create token".
Name your token – This is the identifier that you’ll use in your template code (e.g., YourTopChoices). Enter the default text – This is the text that will appear in the document (e.g., "Here are your top choices").
Use tokens in your template code
Once you've created tokens, you need to insert them into the HTML code of your PDF template.
Naming your token correctly
Without spaces (recommended): Use the token name directly in the code:
label.YourTopChoices
With spaces: Enclose the token name in square brackets and remove the dot after label:
label["Your Top Choices"]
Insert tokens into the document
To use a localization token in your PDF template, include it in the HTML code where the text should appear. The system will replace the token with the correct translation when generating the PDF.
Now, when a user downloads the document, the system will automatically translate the token values based on their language settings.
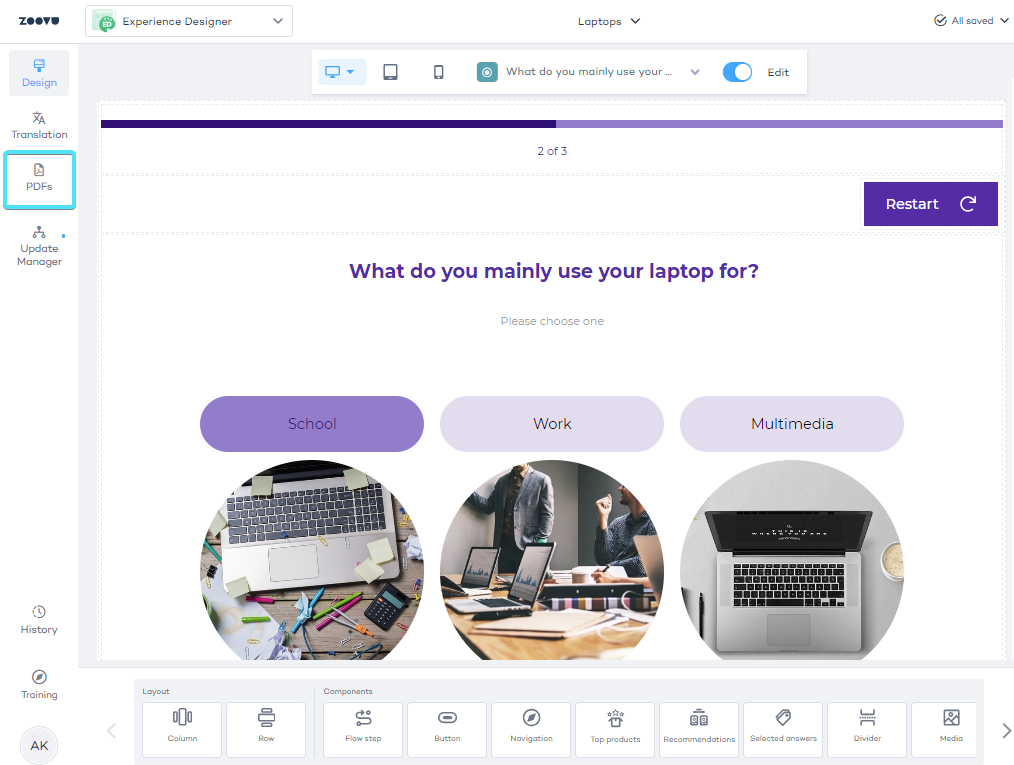
Add the "Download" button to your experience
After setting up your templates, you can apply them using the PDF button.
- Edit your theme by going to the Design tab in Experience Designer.
- Select the Results Page from the page selector on top.
- Grab the PFD Button compoment from the component bar under your canvas, then drag and drop it onto the canvas:

Once you select the PDF Button component on the canvas, you can style it using the options in the right-hand menu. Change the color, text on the button, font size, etc.
The PDF button can also be added as a subcomponent in various Call-To-Action (CTA) buttons:
- Top Product
- Recommendations
- Comparison
If you can't find the PDF button component, it might mean that your component list is outdated. Consider running a components update.
Advanced PDF configuration
Preview the data in the browser
To better understand what data is available for your PDF template, you can preview the live model in your browser's developer console.
Paste this into the console while your assistant is running:
const model = ZoovuAdvisors[Object.keys(ZoovuAdvisors)[0]].advisorUI.getModel()
This view gives you access to the full data structure powering the assistant. For example, if you're working with a Digital Assistant that shows recommendations, you can access the product clusters like this:
clusters → model.advice.currentPage.clusters
Use this to guide how you build your return object in JavaScript and how you reference values in your HTML tab. It’s a quick way to match what you see in the UI with the data behind it.
JavaScript
The JavaScript tab lets you define what data should be used in the PDF. You write a small piece of JavaScript code that returns an object. This object feeds the template with dynamic data like product names, prices or QR codes.
How it works:
Your JavaScript code runs inside a function and is passed specific parameters depending on the type of assistant.
For Digital Assistants, you get access to:
pdfPayloadDatacontextSdk
Example of a simple return:
const { advisorType } = pdfPayloadData;
return { advisorType };
For Visual Configurators, you get access to:
productscontextcontextSdk
Simple return:
return { products };
At least one product must be present in the selection summary.
Use pdfPayloadData
This object contains all the core data for your PDF. Depending on the advisor type, you may see:
| Property | Description |
|---|---|
advisorType | Type of advisor (e.g. PRODUCT_FINDER, BUNDLE_FINDER, VISUAL_CONFIGURATOR) |
currentUrl | The assistant URL |
flowSteps | An array of the visited steps and selected questions/answers |
clusters | Recommended products (for Digital Assistants) |
productsBundles | Product bundles (for Bundle Assistants) |
comparison | Product data from the comparison modal |
currentProducts | The products linked to the clicked PDF button |
pdfSummaryFileName | Set a custom file name for the generated PDF |
qrCode | String that will be rendered as a QR code |
Accessing context data
Use contextSdk to get data from context values set up in the assistant.
const brand = contextSdk.get("brand").value;
Here’s a more complete example that pulls key data into the PDF in a Digital Assisant:
const { advisorType, clusters, currentUrl, flowSteps, productsBundles } = pdfPayloadData;
const pdfSummaryFileName = "myAwesomeProduct";
const qrCode = { data: currentUrl };

let products;
if (advisorType === "PRODUCT_FINDER") {
  products = clusters[0].products.slice(0, 2);
} else {
  products = productsBundles.flat().slice(0, 2);
}

const questions = flowSteps.reduce((acc, { questions }) => {
  acc.push(...questions.map(({ questionText }) => questionText));
  return acc;
}, []);

return {
  advisorType,
  currentUrl,
  pdfSummaryFileName,
  products,
  qrCode,
  questions,
};
This code collects 2 products, generates a QR code, and returns all question texts as a list. You can then reference this data in the HTML tab.
HTML
The HTML tab is where you build the layout of your PDF. It defines how your content is structured, like where the product name appears, where the price goes, and so on.
This tab supports Vue template syntax, which lets you pull in dynamic data from your JavaScript tab.
Important:
- You must wrap everything in one root element (for example, a single
<div>). - To output dynamic values, use double curly braces like this:
{{ value }} - To bind an HTML attribute to dynamic data, use a colon prefix. For example:
:href="product.offerUrl" - To show or hide elements conditionally, use
v-iforv-else. - To loop through a list (like products), use
v-for.
Example:
<div class="wrapper">
  <h3><strong>Based on your visit</strong> from {{ currentDate }}</h3>
  <div v-if="products.length === 0">No results</div>
  <div v-else>
    <h2>We recommend:</h2>
    <ul>
      <li v-for="product in products">
        {{ product.name }} - {{ product.price.displayValue }}
      </li>
    </ul>
  </div>
</div>
CSS
The CSS tab is where you style your PDF. This includes fonts, colors, spacing, layout and more.
Things you can control:
- Padding and spacing between elements
- Font sizes and colors
- Layouts (grid, flex, column widths etc.)
- Borders and background colors
- Image sizes and alignment
Example:
.wrapper {
  --primary-color: #e31283;
  --border-radius: 16pt;
}

.product-card {
  border: 1px solid var(--primary-color);
  border-radius: var(--border-radius);
  padding: 8mm;
}
Use variables (like --primary-color) to keep your design consistent and easy to update. You can copy styling from your website to match your brand.
Support .avif images in your PDF template
To display .avif files in your PDF, update the image rendering logic with conditional loading.
In the PDFs section, replace the existing top-product__image block with the following:
<div class="top-product__image">
  <img :src="
    properties.products[0].picture.startsWith('http://') || properties.products[0].picture.startsWith('https://')
      ? properties.products[0].picture
      : 'https:' + properties.products[0].picture
  " alt="Top product image"/>
</div>
Also, update the recommendation__image block with this version:
<div class="recommendation__image">
  <img :src="
    product.picture.startsWith('http://') || product.picture.startsWith('https://')
      ? product.picture
      : 'https:' + product.picture
  " alt="Product image"/>
</div>