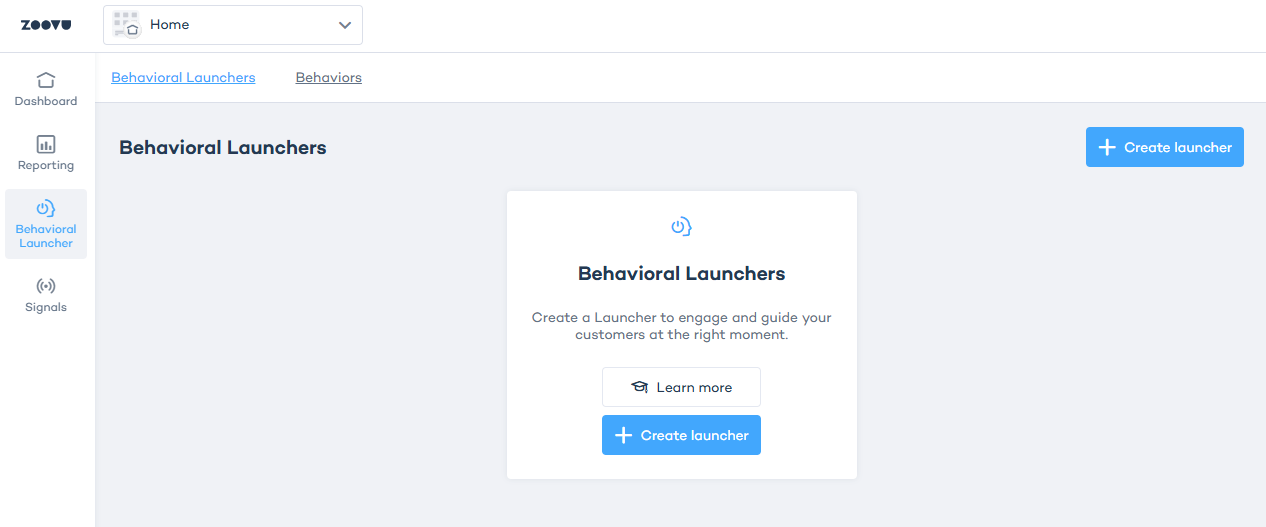
Behavioral launchers
The behavioral launcher automatically triggers a Zoovu discovery experience based on customer actions or conditions on your site. You can configure it to appear at key moments — such as when a user scrolls, lingers on a page, or shows signs of leaving. This allows you to offer timely support, answer questions, or guide users when they're most likely to need help.
Create a behavioral launcher
- Go to https://home.zoovu.com.
- Open the "Behavioral Launcher" tab.
Step 1: Configure a behavior
Behaviors track user interactions and provide the data the launcher uses to trigger actions at the right moment. Learn more.
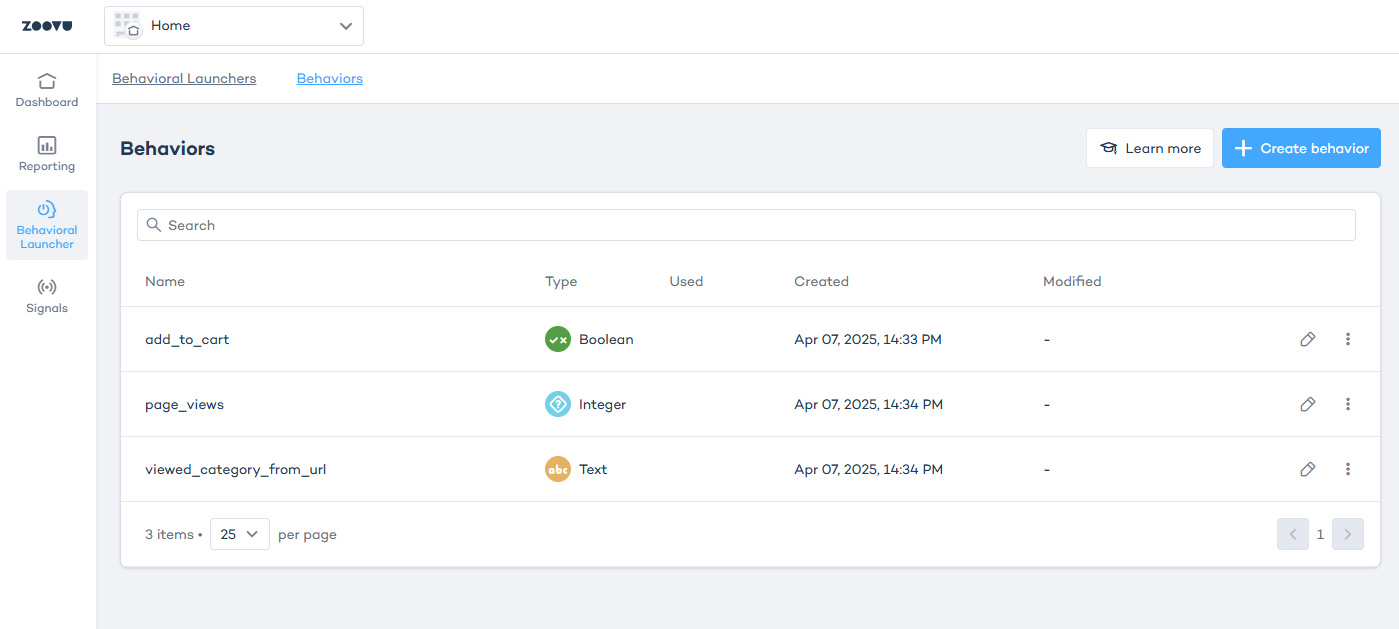
- Go to Behavioral Launcher > Behaviors and click Create behavior.
- Enter a name.
- Select a type:
- Boolean: Tracks true/false conditions (e.g., "Has the user added an item to the cart?").
- Integer: Tracks countable actions (e.g., number of clicks on the category button).
- Decimal: Stores numbers with decimal points.
- Text: Stores text values (e.g., last visited category).
- Duration: Stores time-based values (e.g., how long a user spends on a page).
The selected type determines which operators (equals, greater than etc.) can be used when setting up rules in the launcher.
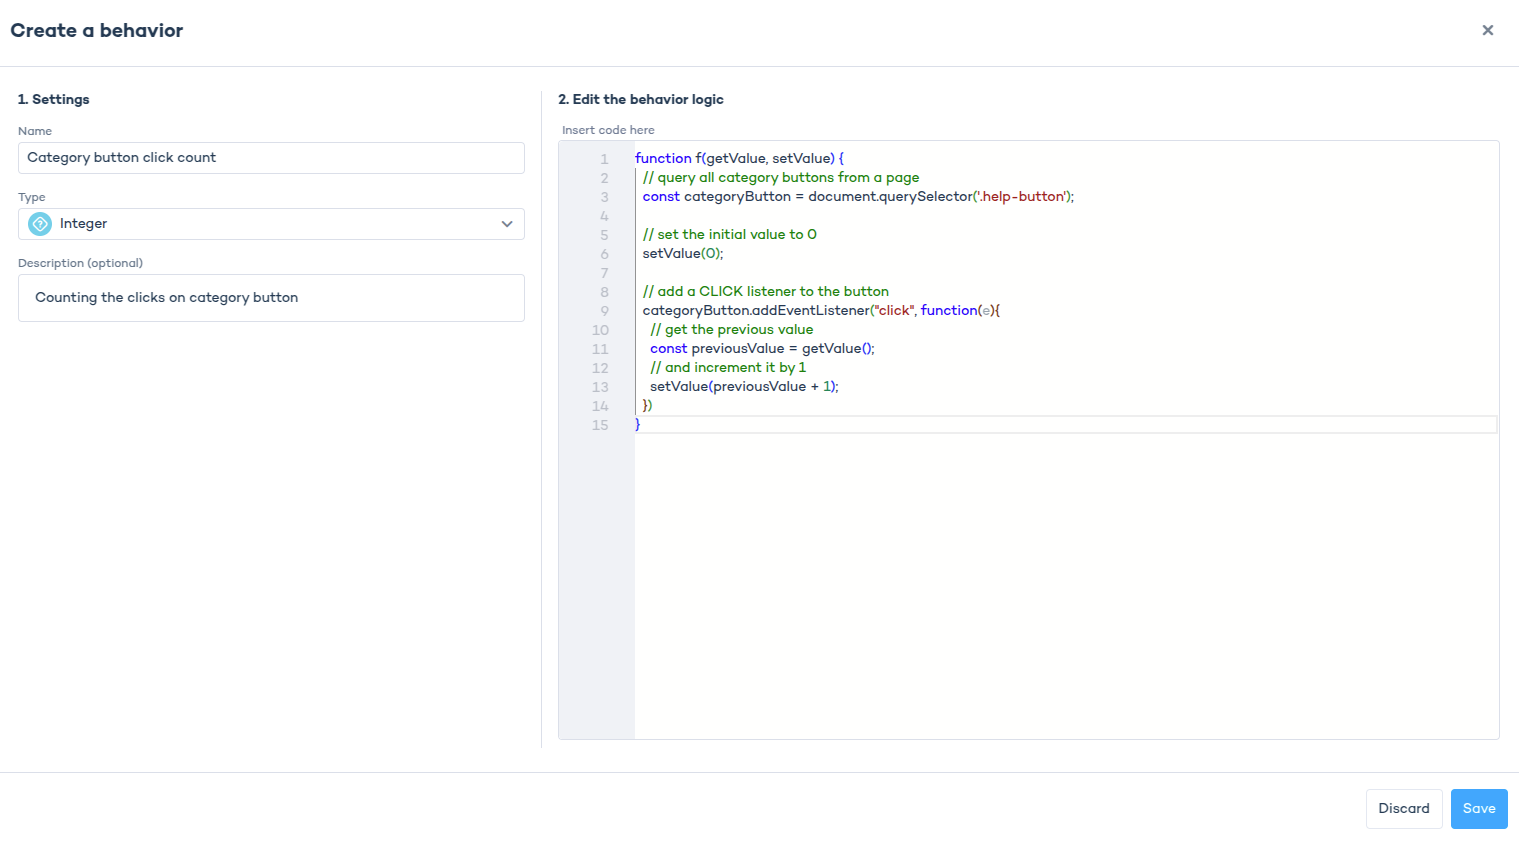
Step 2: Write the behavior logic
Each behavior must include a JavaScript function that captures user behavior.
A basic code snippet looks like this:
function f(getValue, setValue) {
  // Set the initial value to 0
  setValue(0);

  // Read the current value
  const currentValue = getValue();
}
setValue()updates the stored value.getValue()retrieves the current stored value.
Always use setValue() to store changes. Simply returning a value will not update the behavior.
Step 3: Create a behavioral launcher
- After configuring at least one behavior, navigate to Behavioral Launcher > Behavioral Launchers.
- Click "Create Launcher".
- Enter a name for the launcher.
- Click "Continue" to proceed to the configuration page.
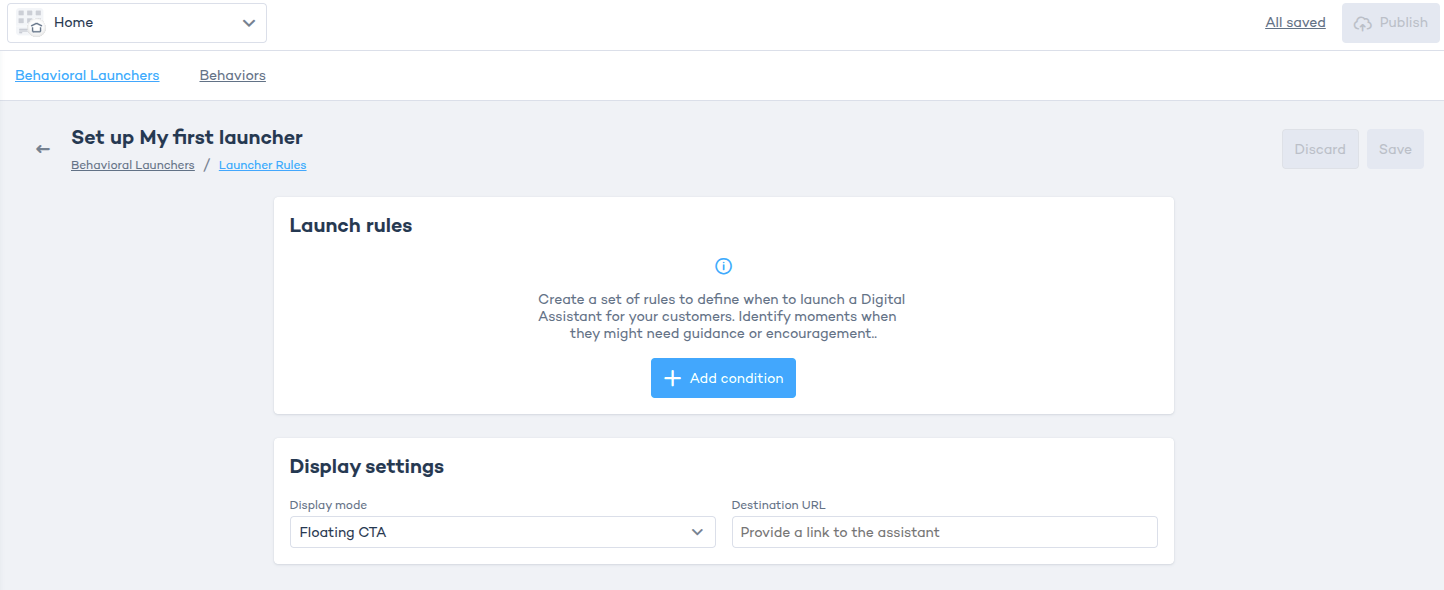
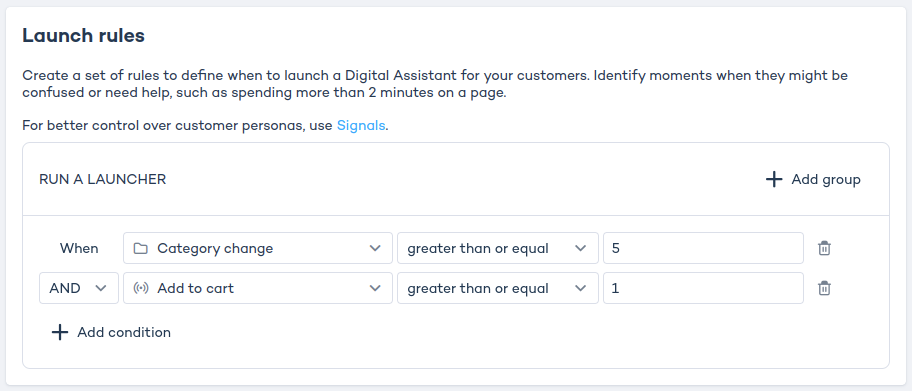
Step 4: Define launch rules
- In the Launch Rules section, click "Add Rule".
- Set up conditions for when the launcher should be triggered. Select a behavior (created in Step 1).
- Click "Add condition" to include more conditions using existing behavior. You can use logic operators like
ANDandORto define complex behaviors.
Step 5: Configure display settings and publish
In Display settings, choose how the launcher will appear.
- Under Display mode, select Floating CTA to show a call-to-action that prompts the user to start a digital experience.
- In Destination URL, enter the link to the page where your assistant or configurator is embedded.
- Click Save, then Publish to activate the launcher.
Floating CTA displays as a small call-to-action button in the bottom-right corner of the page. The button redirects users to your assistant, configurator, or any page you link to.
Adjust text and styling
You can change the short text shown on the CTA and update a set of styling properties. Only the properties listed in the editor are supported. You can edit values, but adding or removing properties has no effect.
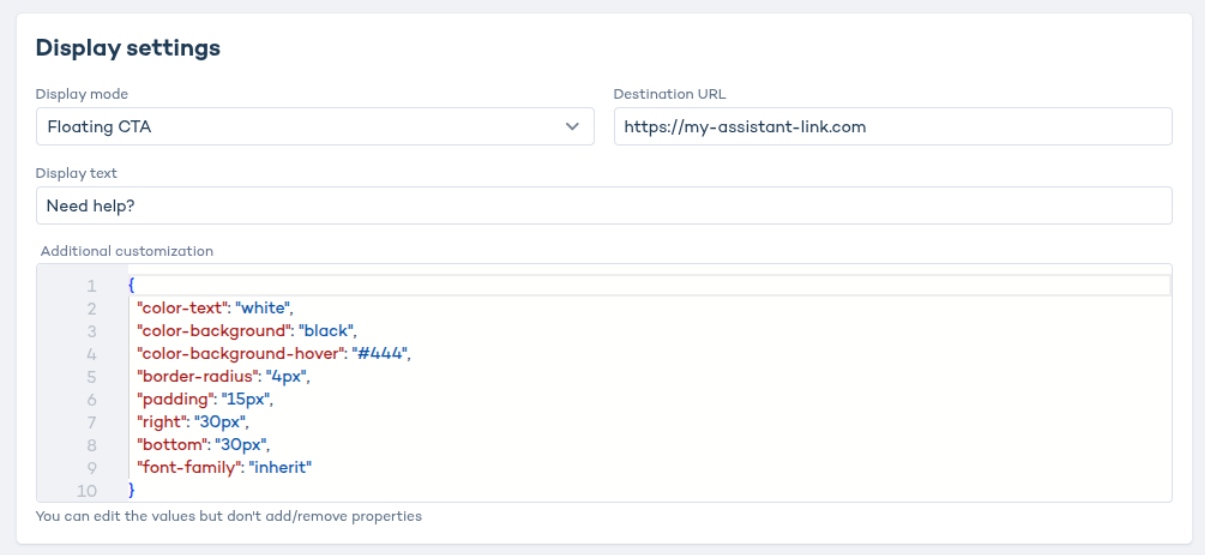
Changes take effect within 1 minute.
Deleting a behavioral launcher
If you want to delete a launcher:
- Go to the Behavioral Launchers tab.
- Click the three-dot menu next to the launcher.
- Select "Delete".
Behavioral launcher example
This launcher defines two signs of hesitation and uses two groups of rules, connected with OR.
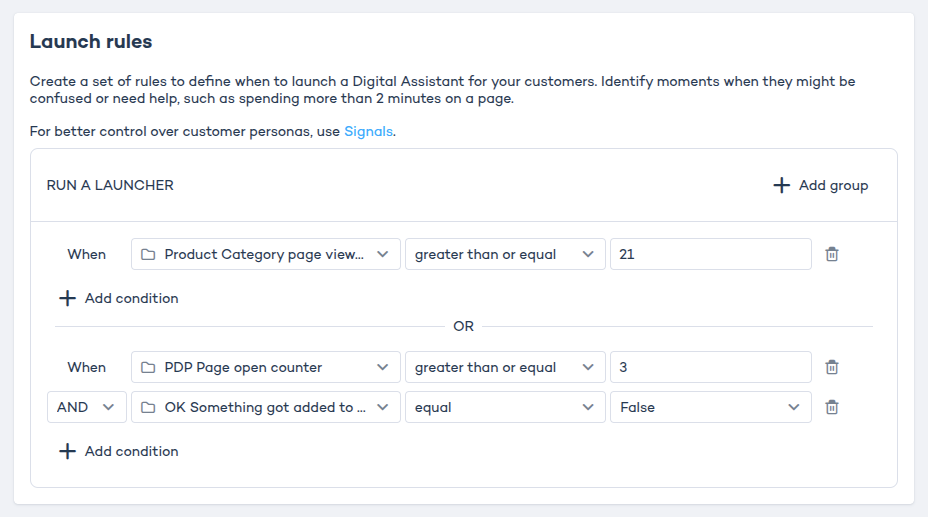
Group 1:
- Page view timer ��≥ 21 (seconds on category page)
Group 2:
- PDP view counter ≥ 3 AND Nothing added to cart = true
Scenarios:
- User stays 21 seconds on category page → launcher appears.
- User stays 10 seconds → no launcher.
- User opens PDP three times and doesn't add to cart → launcher appears.
- User opens PDP three times but adds to cart in between → no launcher.