Assistant with a configurator
Add a configurator to your Discovery Assistant when you want users to build a product step by step based on compatibility or business rules.
Step 1. Create your assistant
In Conversation Studio, choose "Discovery Assistant" to enable flexible setup.
Name your assistant and configure the default localization.

Step 2. Connect your catalogs
Go to Conversation Studio > Catalog tab and link the project and catalogs.
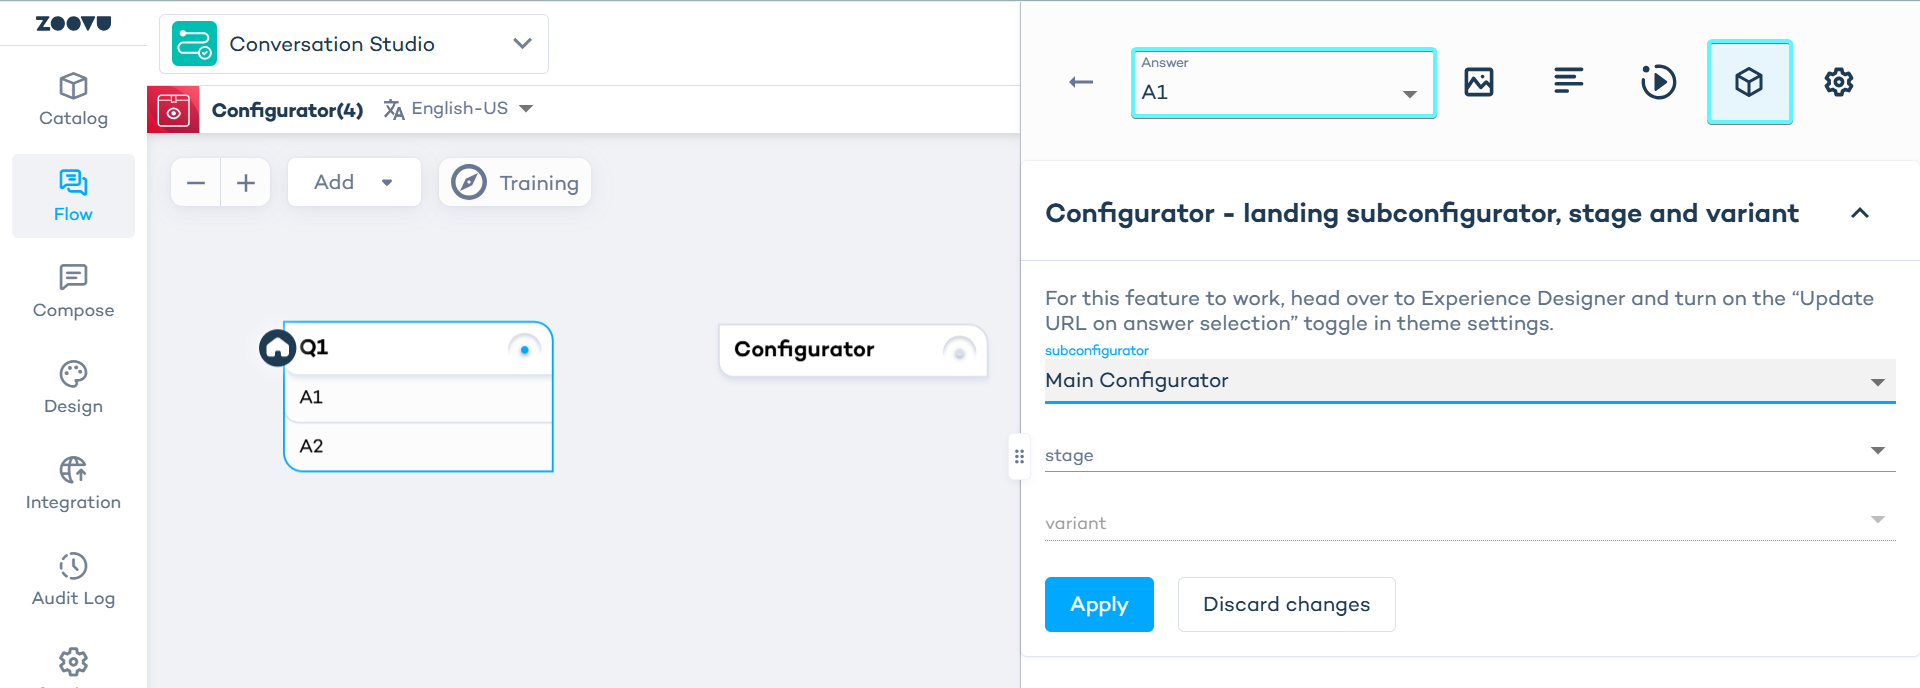
Step 3. Build the flow
In the Flow tab:
- Add your questions.
- Add a configurator panel from the dropdown menu.

- Connect the configurator panel to the question flow. For example, show it when users select specific answers to certain questions.
Step 4. Compose the configurator
Go to the Compose tab to compose your configurator.
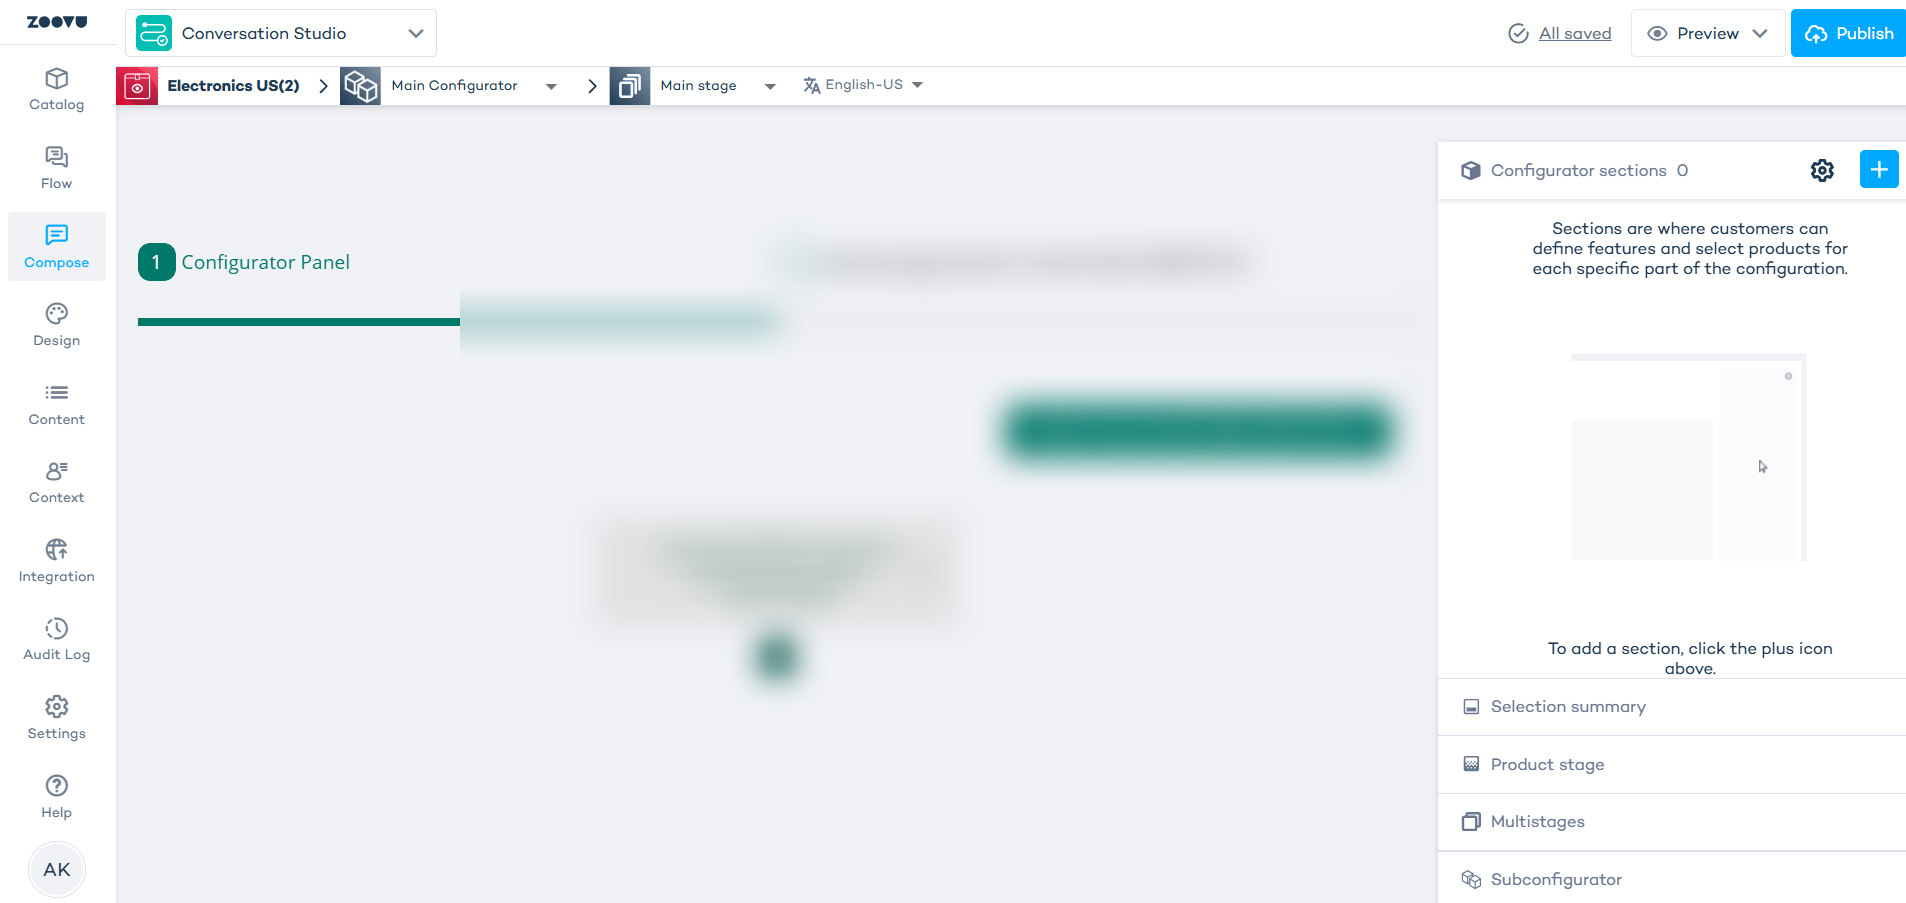
A configurator consists of several key elements, all managed in the Compose tab:
- Sections: Organize the product into logical parts (e.g. frame, wheels, seat for a bike).
- Stages: The visual area where the product is displayed and updated as users make selections.
- Triggers: Clickable hotspots or buttons on the stage that open up options for a specific section.
- Selection Summary: A real-time overview of the user's current choices, price, and compatibility.
Configurators function the same as before, but section configuration now includes only core toggles. While creating a configurator, you can set a subconfigurator's routing in the question flow (this replaces the "Preceding flow").
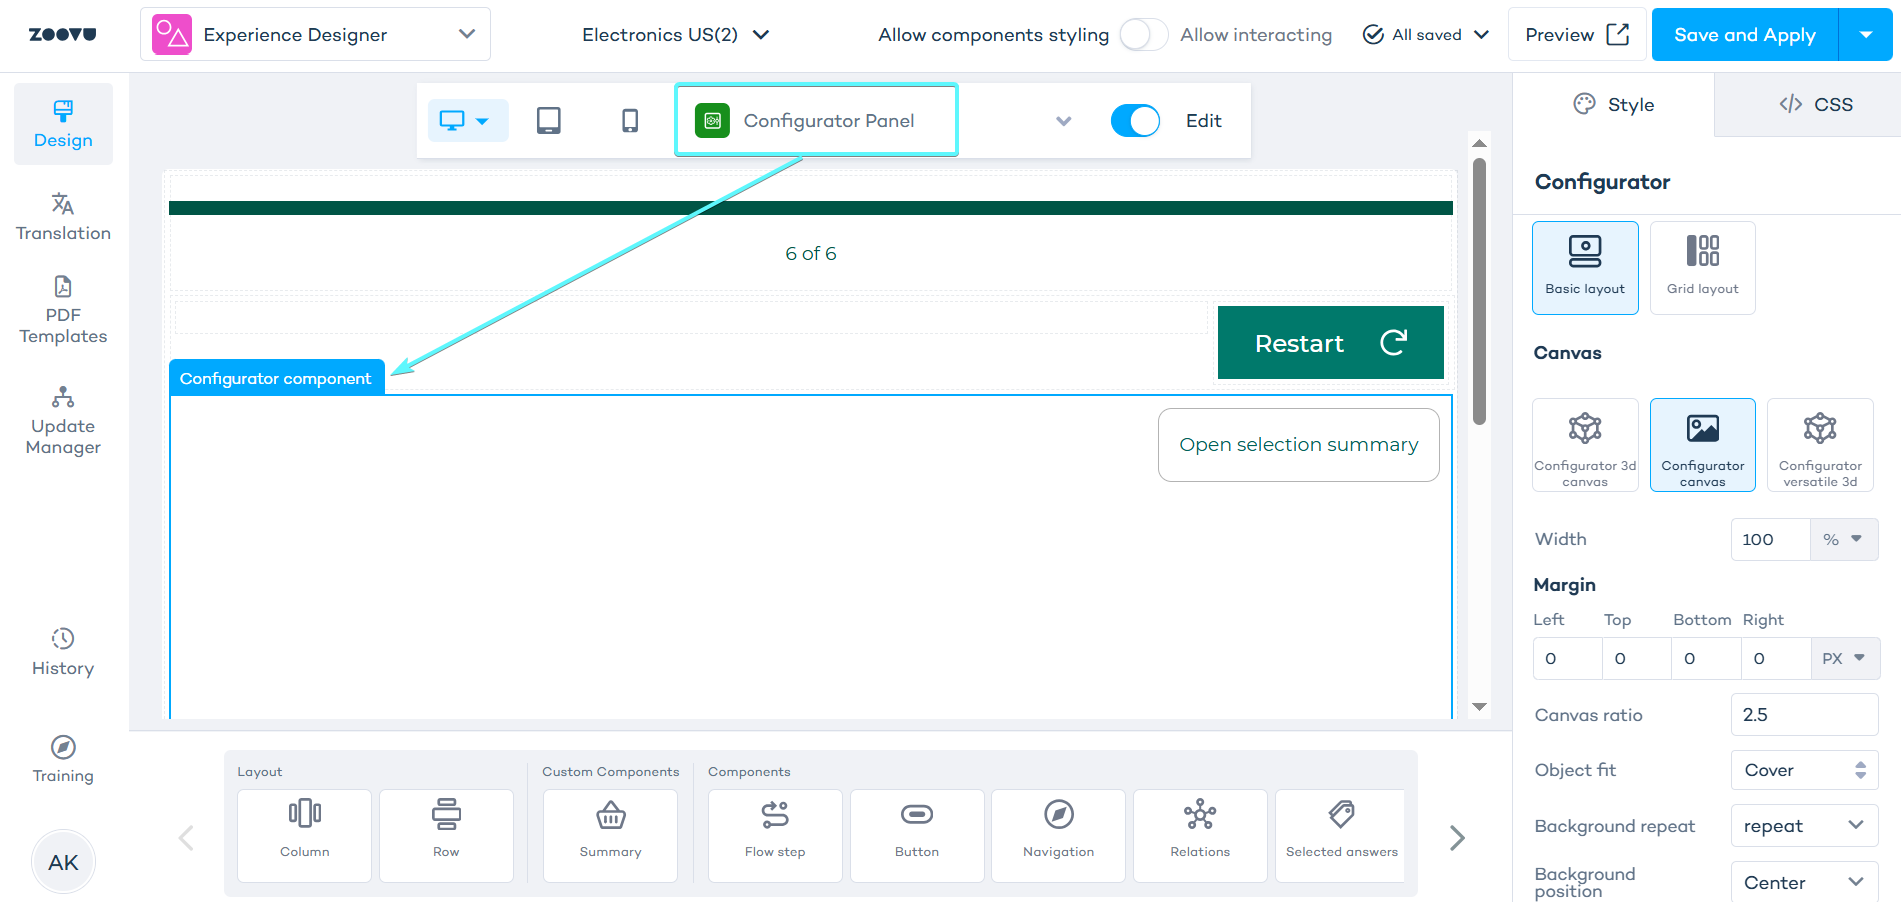
Style the assistant
- Open Experience Designer to apply layout and styling.
- Select the configurator from the page selector above the canvas.
- Click on the configurator component on the canvas to access its settings and begin styling.
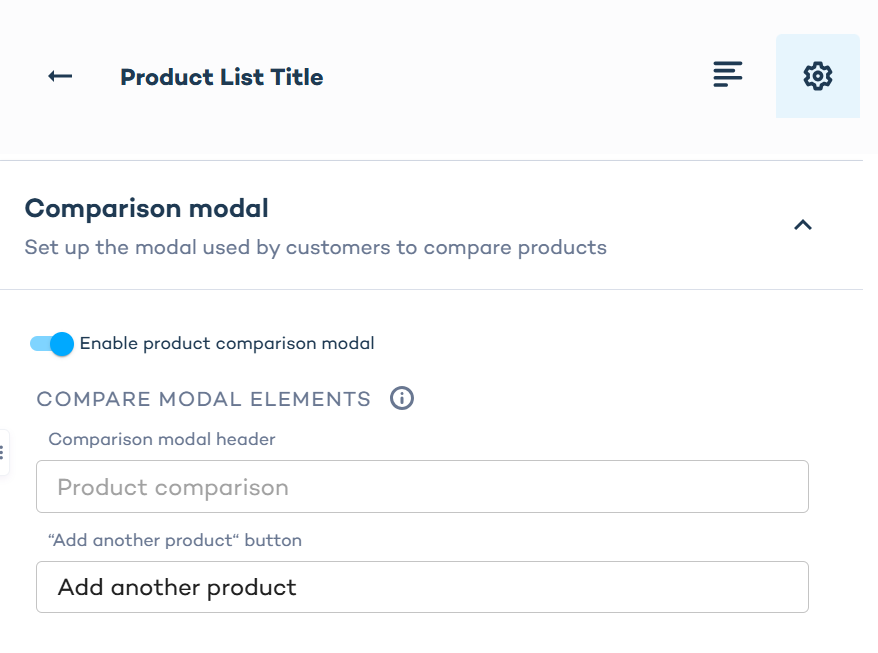
Compare products
The compare feature is now easier to enable. In Conversation Studio, you’ll find it as a simple toggle. When you switch it on, all comparison groups created in Data Platform become active (there’s no option to select specific groups in Conversation Studio).
- Go to Compose > Configurator Section settings > Product List settings.
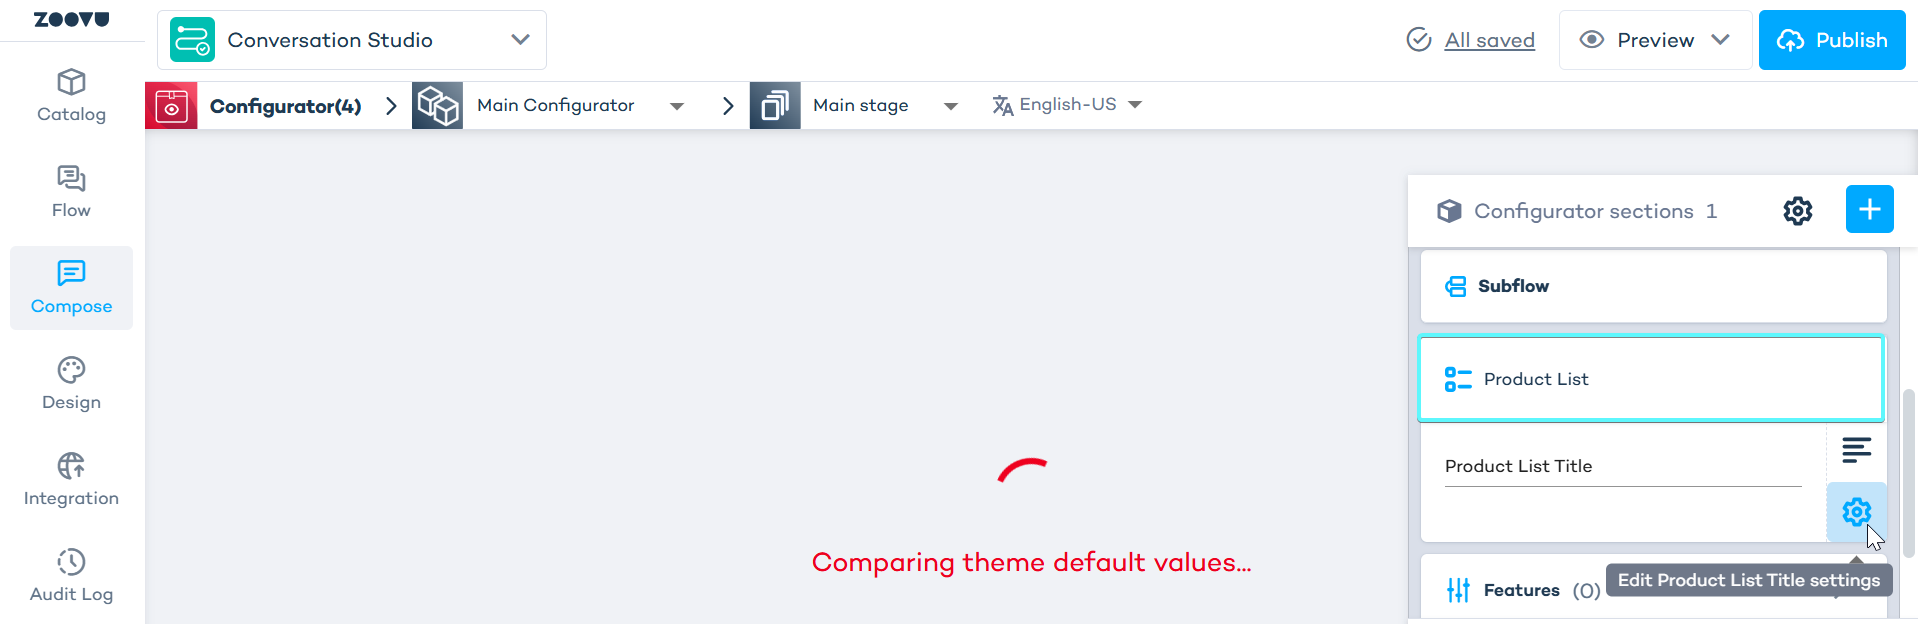
- In Product List settings, navigate to Comparison modal settings and switch on the toggle:
What gets compared is configured in Data Platform, while the look and feel is managed in Experience Designer.