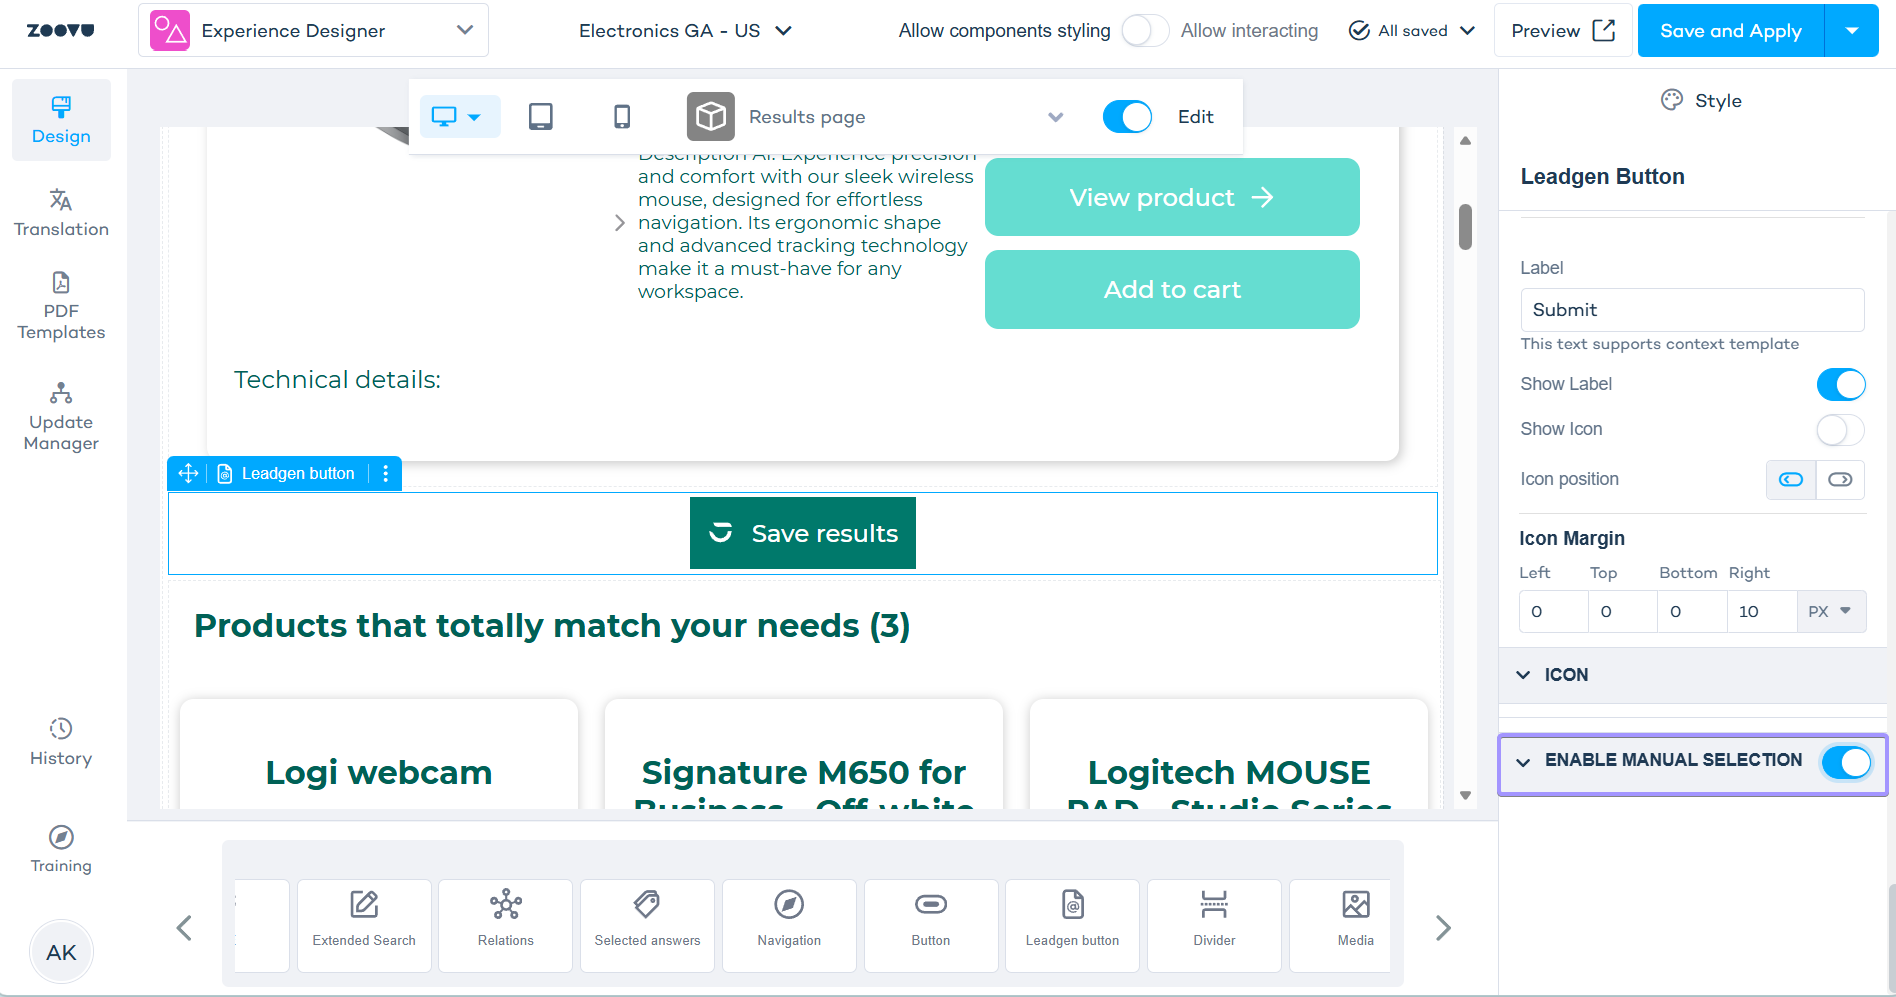
Lead generation form on the Results Page
Collect customer contact information and product preferences by adding a lead generation form to your Unified Assistant.
Two types of lead generation
Standalone lead generation appears on the Results page. It cannot be added to the Q&A flow canvas. Shoppers click a button to open the form and submit their details along with recommended products.
Regular lead generation is part of the Q&A flow. It appears as a step in the conversation before shoppers reach the Results page.
This guide focuses on standalone lead generation for Unified Assistants.
Add standalone lead generation
Step 1: Create a standalone leadgen question
- Go to Question bank.
- Select + Add to create a new question.
- Under Question type, select Standalone lead generation.
- Build your form by adding input fields (name, email, company, etc.).
- Enter the email address where you want to receive lead submissions.
- Save the question.
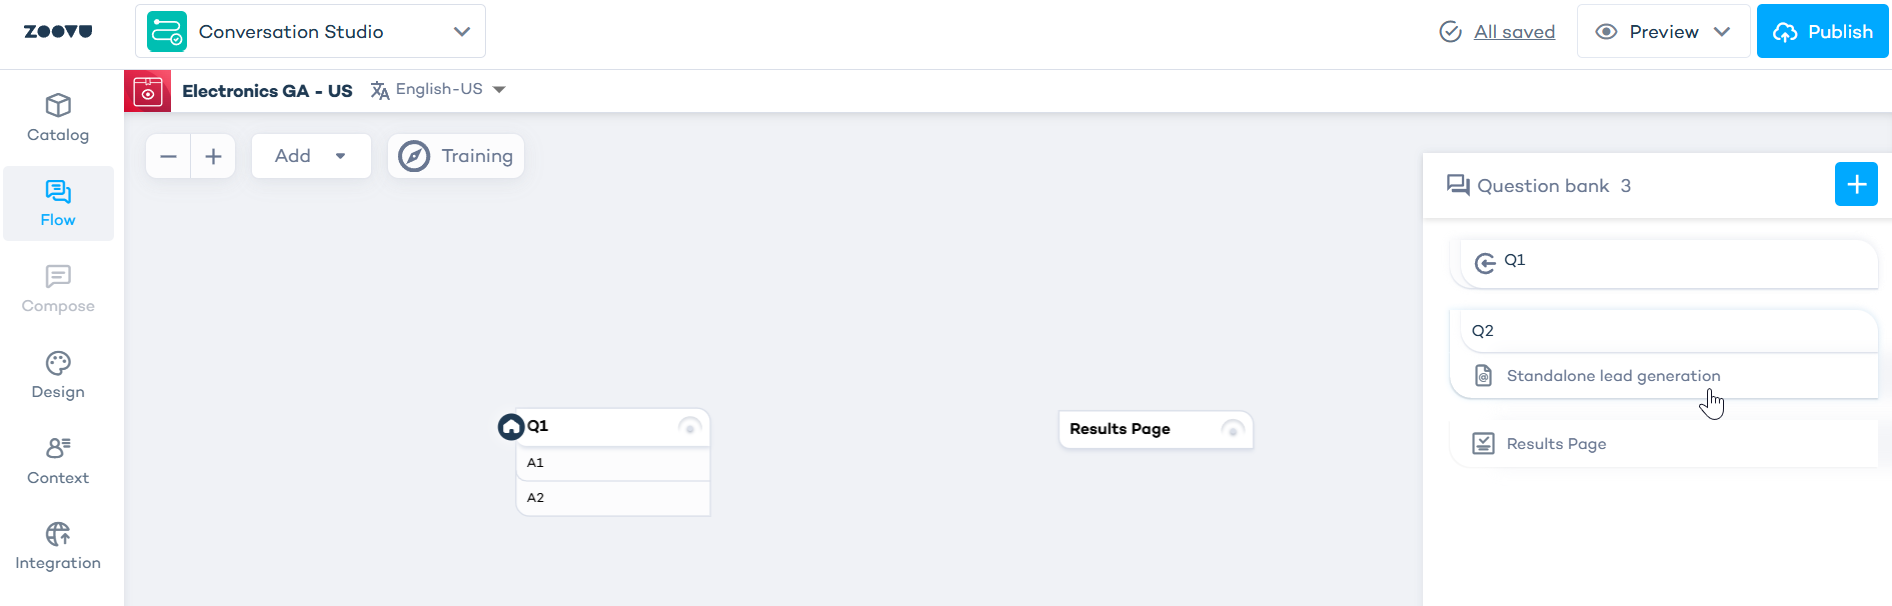
A standalone leadgen question does not need to be added to the Flow canvas. It lives separately in the Question bank.
If you change an existing question type to Standalone lead generation, it will be removed from the canvas. Routes linked to this question will also be removed.
Step 2: Attach the leadgen form to a Results page
- Add a Results Page to your Flow canvas (or select an existing one).
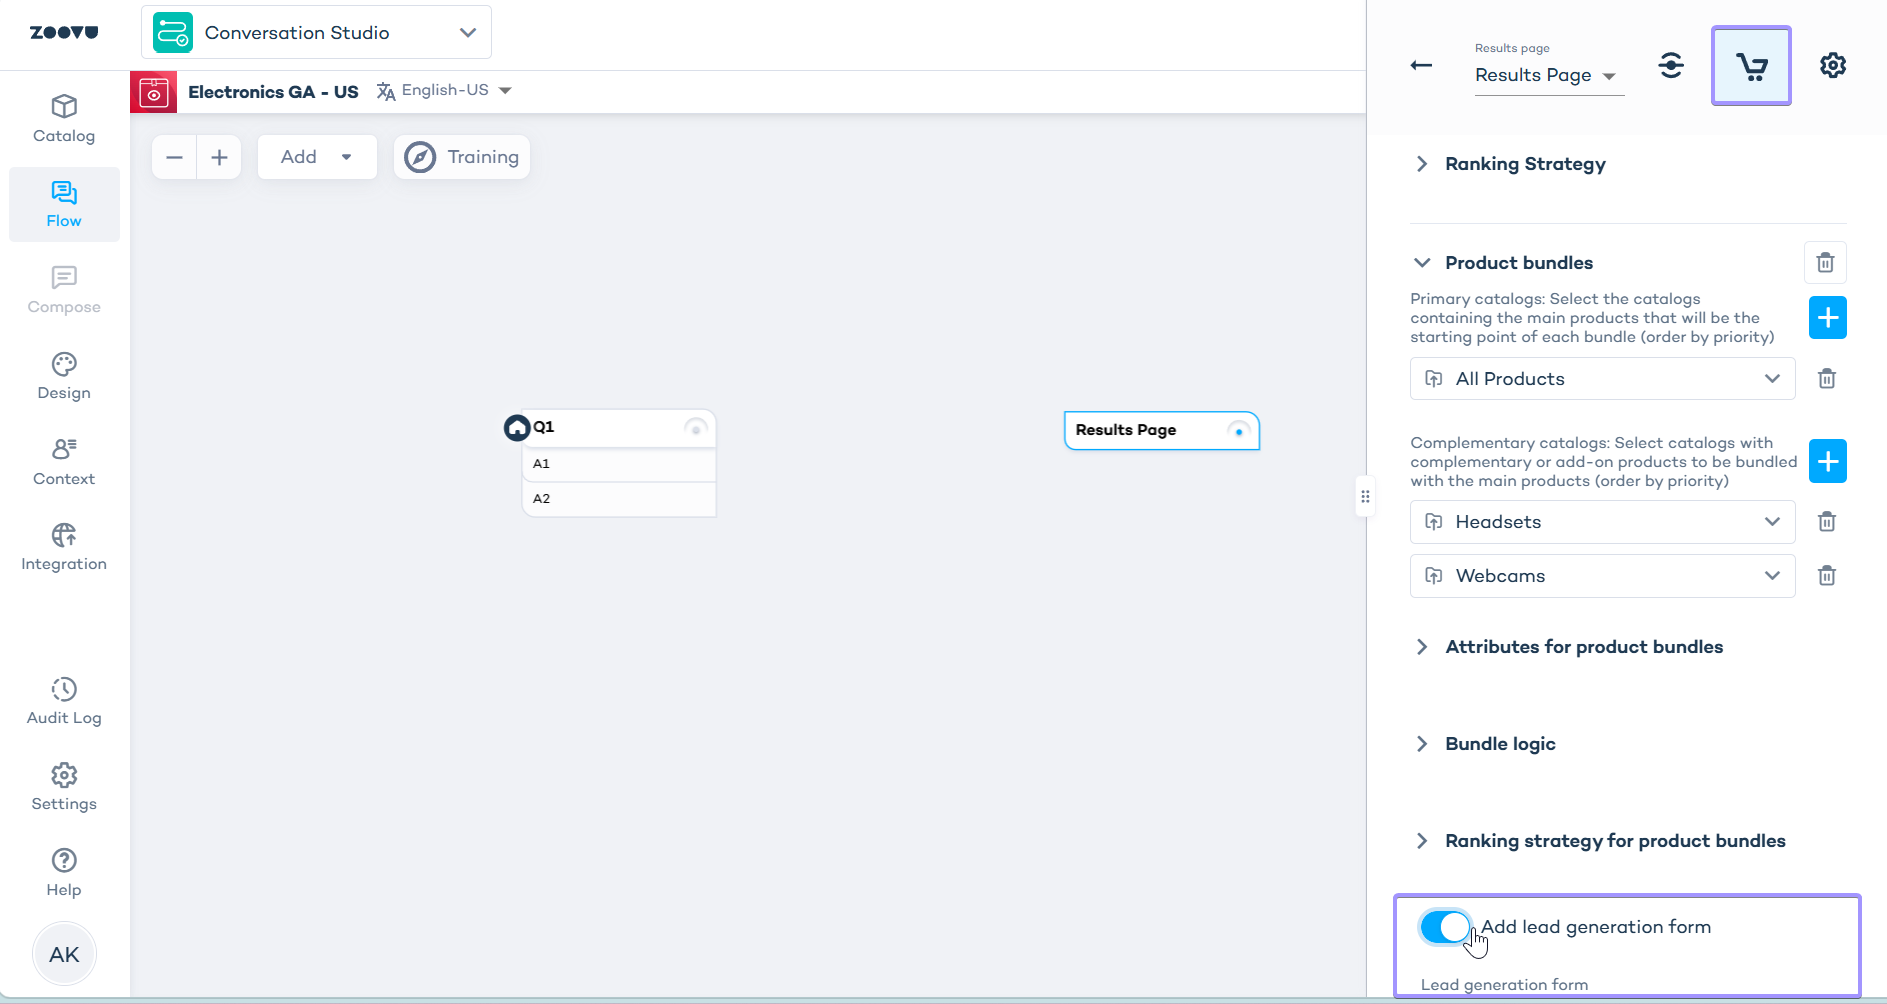
- Click the shopping cart icon on the Results Page to open its settings.
- Go to Ranking Strategy.
- Enable
Add lead generation form. - From the dropdown, select your standalone leadgen question.
The leadgen form is now attached to that Results page.
What gets sent when a shopper submits the form
You'll receive an email with:
- Submitted form data: The shopper's contact details (name, email and any other fields you added to the form) if provided by the shopper
- Zoovu path details: The questions and answers the shopper selected during the conversation
- Recommendations: The recommended products with name, SKU, price, and match quality
Step 3: Add styling in Experience Designer
- Open your assistant in Experience Designer.
- Select the Results page from the canvas dropdown.
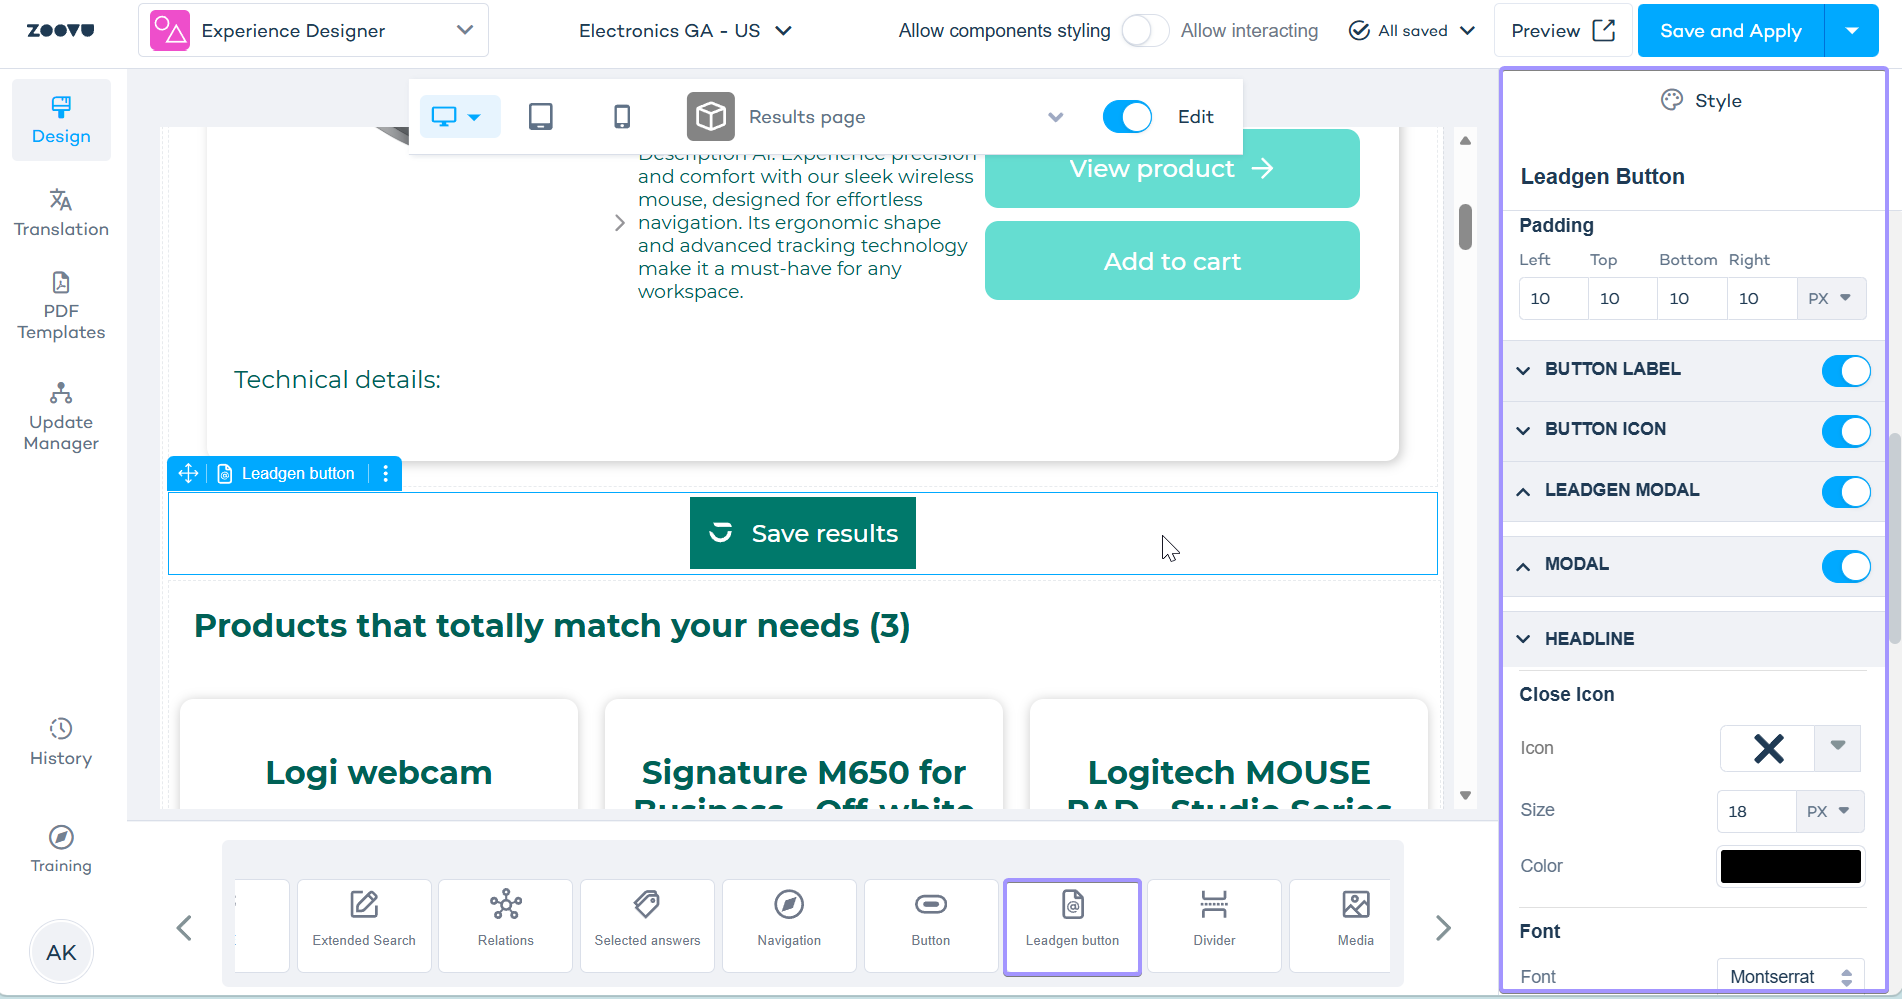
- From the component tray at the bottom, drag the Leadgen button component onto the Results page.
- Select the Leadgen button component.
- In the Style panel on the right, configure:
- Button label text
- Button icon
- Font and colors
- Leadgen modal settings
At runtime, shoppers will see the button on the Results page. Clicking it opens the leadgen form in a modal.
Manual product selection (optional)
By default, all displayed products are included in the leadgen submission. You can let shoppers choose which products to save.
To enable manual selection:
- In Experience Designer, select the Leadgen Button component.
- In the style panel, enable Manual Selection.
- Configure the checkbox label and styling.
Shoppers will see a "Save" checkbox on each product card. Only products they check will be sent with the leadgen submission. If they don't check any, all displayed products are sent.